
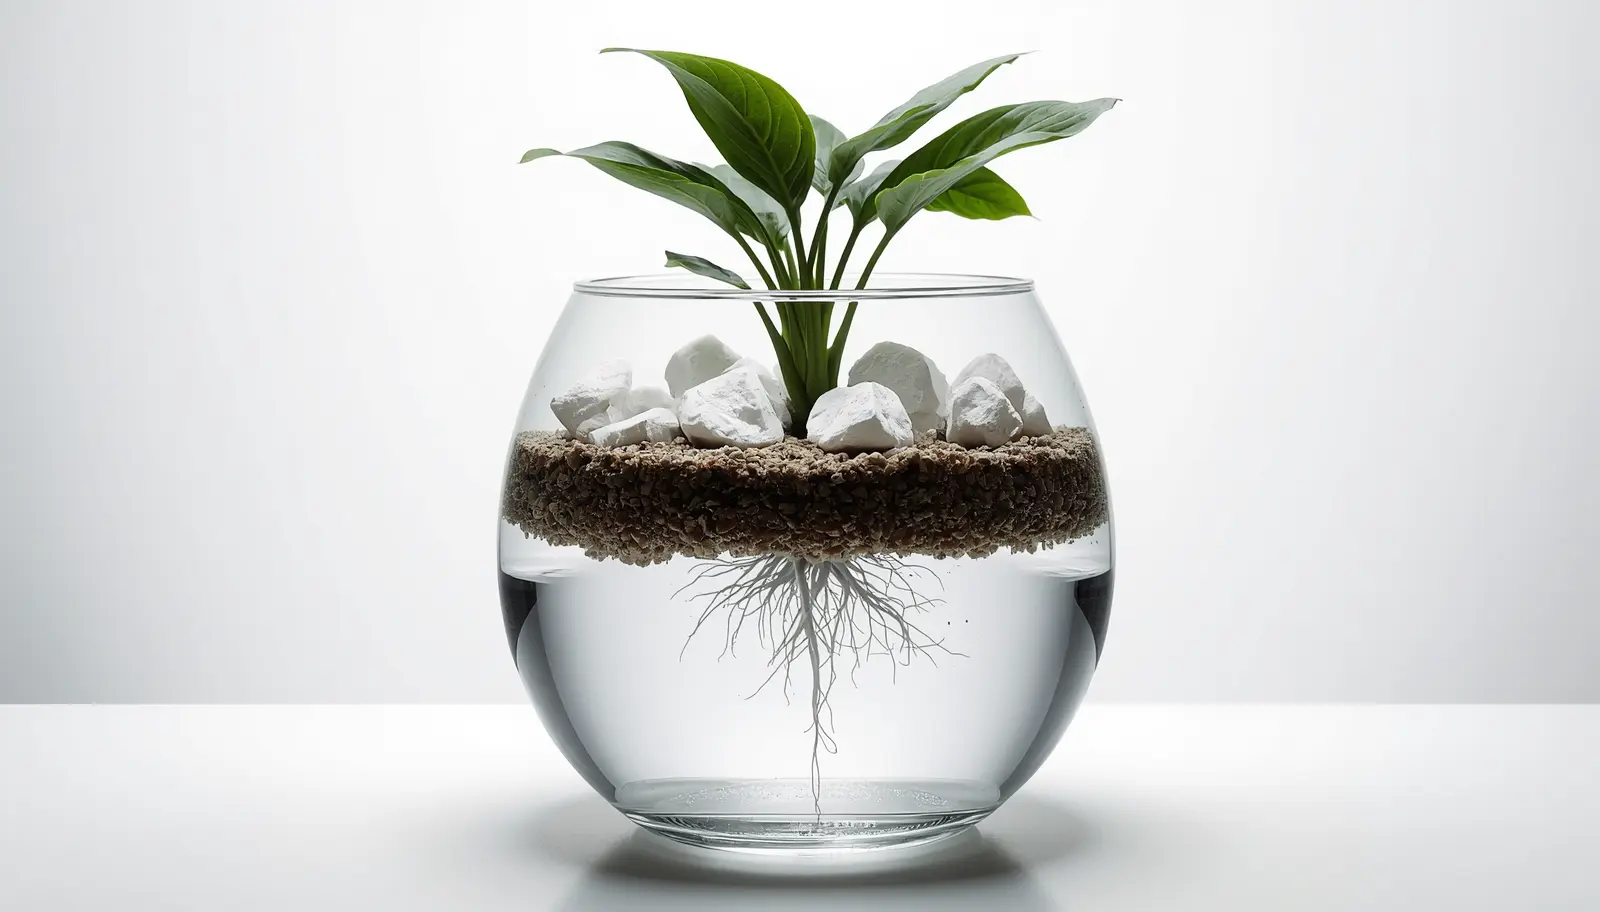
Lechuza Pon transition fails when growers use unamended fine Pon directly from the packaging, skip the dry adaptation phase, and fill the reservoir immediately. The result is substrate hypoxia. Oxygen deprivation develops within 3 to 7 days. A sulfurous odor appears. Within 7 to 14 days, roots turn black and mushy. You can prevent this by mixing 50 percent Lechuza Pon with 50 percent coarse perlite or pumice, completing a 2 to 4 week dry phase with top-watering only, and introducing the reservoir gradually at one-quarter depth after new white root tips appear.
According to NC State University, capillary rise in porous media follows the Washburn equation. Capillary height is inversely proportional to pore radius. Fine Lechuza Pon particles, averaging 3 to 4 mm, pack tightly in a 6 to 8 inch pot. Micropores draw water 20 to 40 cm vertically. In a 15 to 20 cm semi-hydro pot, this saturates the substrate from bottom to top. Air-filled porosity drops from 60 percent to below 10 percent.
Quick Answer: Transition to Lechuza Pon semi-hydro by mixing 50 percent Pon with 50 percent coarse perlite number 3 grade or pumice, potting the plant, and top-watering for 2 to 4 weeks without filling the reservoir. After new white root tips appear, introduce reservoir water gradually at one-quarter depth. Never fill above one-half depth. Flush monthly to prevent salt accumulation.
Table of Contents
- What Causes Lechuza Pon Root Rot?
- What Is the Best Substrate Mix for Lechuza Pon Semi-Hydro?
- How Do Soil Roots Differ from Water Roots?
- How Do I Transition Plants to Lechuza Pon?
- What Is the Fluval Stratum Bridge Method?
- How Do I Maintain a Semi-Hydro System?
- Is Lechuza Pon Safe for Pets?
- What Are the Most Common Lechuza Pon Transition Questions?
| Parameter | Ideal | Avoid |
|---|---|---|
| Substrate mix | 50% Pon + 50% coarse perlite (#3) or pumice | Pure fine Pon; LECA alone; any organic matter |
| Dry phase duration | 2-4 weeks (top-water only, no reservoir) | Skipping dry phase; filling reservoir immediately |
| Reservoir depth | Start at 1/4; max 1/2 depth | Filling above 1/2 depth; submerging roots |
| Watering during dry phase | When top 1-2 inches dry; every 4-7 days | Keeping substrate constantly wet; letting it bone dry |
| Flush frequency | Monthly with 2-3x pot volume of water | Never flushing; allowing salt crust to form |
| Fertilizer | Urea-free liquid at 1/4 to 1/2 strength | Organic fertilizers (fish emulsion, kelp) |
What Causes Lechuza Pon Root Rot?
Lechuza Pon root rot is caused by substrate hypoxia, not by overwatering in the traditional sense. When fine Pon particles pack tightly in a reservoir pot, capillary action draws water upward through micropores and saturates the entire substrate column. This eliminates air-filled porosity, depriving roots of oxygen and triggering anaerobic bacterial metabolism that produces hydrogen sulfide and invites Pythium infection.
Water molecules exhibit cohesion and adhesion. In narrow pores, adhesive forces overcome gravity. The narrower the pore, the higher the water climbs. Fine Pon particles of 1 to 8 mm create micropores of 0.01 to 0.1 mm when packed. These draw water 20 to 40 cm vertically. In a 15 to 20 cm pot, micropore capillarity saturates the entire substrate column.
The Oxygen Deprivation Cascade
Complete capillary saturation triggers hypoxia, cellular necrosis, and pathogen colonization. The failure sequence follows a precise timeline.
- Capillary saturation (Hours 0 to 6): Fine Pon packs tightly. Capillary action draws water throughout the column. Air-filled porosity drops below 10 percent.
- Root hypoxia (Hours 6 to 24): Oxygen depletes rapidly. Diffusion in saturated substrate is 10,000 times slower than in air. Cells switch to anaerobic fermentation.
- Cellular damage (Days 1 to 3): Anaerobic byproducts accumulate. Root tip necrosis occurs 5 to 15 mm from the apex.
- Anaerobic bacterial bloom (Days 2 to 5): Desulfovibrio species metabolize debris, producing hydrogen sulfide gas. The sulfur odor diagnoses anaerobic conditions.
- Oomycete invasion (Days 3 to 7): Pythium zoospores colonize weakened tissue. According to Penn State Extension, zoospores attack root tips first. Penn State plant pathologists confirm virulence under wet conditions. The UC Statewide IPM Program notes that 70 percent or higher soil moisture triggers infection.
- Vascular collapse (Days 7 to 14): The root system fails. The plant cannot uptake water. Wilting accelerates.
| Symptom | Timeline | Diagnosis | Immediate Action |
|---|---|---|---|
| Sulfur or rotten egg odor | Day 3 to 4 | Anaerobic bacterial bloom | Empty reservoir, inspect roots, repot in amended substrate |
| Oldest leaves yellow | Day 5 to 6 | Root hypoxia advancing | Reduce reservoir to 1/4 depth, verify amendment ratio |
| Black mushy roots | Day 7 to 10 | Pythium colonization | Remove plant, execute root rot treatment, hydrogen peroxide soak |
| Midday wilting | Day 5 to 7 | Vascular collapse beginning | Check reservoir depth, restart dry phase if needed |
What Is the Best Substrate Mix for Lechuza Pon Semi-Hydro?
The optimal substrate mix for Lechuza Pon semi-hydro is 50 percent Pon blended with 50 percent coarse perlite number 3 grade or large pumice 6 to 12 mm. This amendment disrupts uniform particle packing, creates macro-pores that remain air-filled during capillary saturation, and maintains 60 to 70 percent air-filled porosity even with a full reservoir.
The 50/50 Amendment Formula
The base formula for tropical aroids (Monstera, Philodendron, Anthurium, Alocasia) is:
- 50 percent Lechuza Pon (or equivalent zeolite, pumice, lava rock blend). This provides cation exchange capacity for nutrient retention, capillary water distribution, and mineral stability.
- 50 percent coarse perlite number 3 grade (1/4 to 1/2 inch particles) or large-grade pumice (6 to 12 mm). This creates macro-pores, disrupts uniform packing, and maintains air channels even when the base substrate saturates.
Physical performance of this mix: air-filled porosity of 60 to 70 percent even with a full reservoir. Capillary height is limited to the bottom 3 to 5 cm of substrate, leaving the upper root zone aerobic. Excess water from top-watering drains within 2 to 3 minutes. The mix is slightly heavier than pure Pon, which prevents tip-over for top-heavy plants like Monstera.
Species-specific adjustments:
- Thick-rooted species (Alocasia, Colocasia, mature Monstera): Increase the coarse component to 60 to 70 percent. Extra aeration prevents rot in large-diameter roots prone to hypoxic core formation.
- Fine-rooted species (Hoya, Syngonium, Scindapsus): The standard 50/50 ratio is adequate. Reduce the coarse component to 40 percent if you experience desiccation between reservoir fills.
- Nutrient-hungry species (variegated cultivars, Anthurium): Add 10 to 20 percent horticultural charcoal or additional zeolite to increase cation exchange capacity. See our best aroid soil mix guide for more on substrate CEC engineering.
Why Standard LECA Often Fails
LECA (lightweight expanded clay aggregate) suffers the opposite problem from fine Pon. Insufficient capillary action prevents water distribution to upper root zones. LECA particles are 8 to 16 mm diameter spheres with internal porosity of 75 to 85 percent but a relatively smooth external surface. Large particle size creates large inter-particle pores of 3 to 8 mm with minimal capillary forces. Water in the bottom reservoir does not wick upward effectively. Capillary height is typically under 5 cm. The result: bottom roots sit in water while upper roots desiccate.
LECA success requires three conditions: extremely frequent reservoir refilling every 2 to 3 days versus weekly for Pon, top-watering supplementation to wet upper substrate between fills, and selection of species that tolerate wet-dry cycling (Pothos, Philodendron, not Alocasia or Anthurium). For most growers, amended Pon provides a superior balance of capillary distribution and oxygen availability.
Pro Tip: Test your substrate mix before potting a plant. Fill a clear container with the amended mix, add water to the bottom, and observe the wetting front after 24 hours. If water saturates above the bottom third, increase the coarse perlite ratio by 10 percent. The wetting front should stop within 5 cm of the reservoir line.
How Do Soil Roots Differ from Water Roots?
Soil roots have dense root hairs, thin exodermis, and small intercellular air spaces for soil mechanical support. Water roots have thick suberized exodermis, aerenchyma tissue with 30 to 50 percent gas space volume, and reduced root hair density. Direct transfer without adaptation causes 60 to 80 percent root death from morphological incompatibility.
According to Louisiana State University research on rice root anatomy, aerenchyma gas space formation occurs closer to the root tip and over a shorter distance in roots grown in hypoxic water than in aerated roots. Roots grown in hypoxic conditions also develop a larger maximum amount of gas space. This tissue is a network of interconnected gas-conducting intercellular spaces that provide roots with oxygen under hypoxic conditions.
| Characteristic | Soil Roots | Water Roots (Hydro-Adapted) |
|---|---|---|
| Root hair density | High. Thousands of microscopic root hairs per mm² increase surface area 10 to 100 times for nutrient absorption from soil solution. | Low to absent. Water roots rely on direct cortex absorption. Root hairs are unnecessary in a constantly saturated environment. |
| Cortex structure | Dense cellular packing. Small intercellular air spaces (5 to 15 percent of cortex volume). Optimized for soil mechanical support. | Aerenchyma tissue. Large intercellular air spaces (30 to 50 percent of cortex volume) enable oxygen diffusion from shoot to submerged root tips. |
| Exodermis development | Thin and permeable. Allows rapid water and nutrient uptake from variable soil moisture. | Thick and suberized. Creates a water-impermeable barrier regulating uptake and preventing over-saturation and pathogen entry. |
| Root diameter | Fine and highly branched. Maximizes surface area in a 3D soil matrix. | Thicker and less branched. Provides structural support in a water environment. Reduced surface area is acceptable because water is constantly available. |
The incompatibility is severe. Soil roots placed directly in water-saturated semi-hydro substrate experience four simultaneous stressors. Root hairs die within 24 to 48 hours because they are adapted for air-rich soil and suffocate in water. Cortex cells rupture from osmotic shock. The absence of a protective exodermis allows pathogen invasion. Insufficient aerenchyma prevents oxygen transport to submerged portions. The combined result: 60 to 80 percent of soil root mass dies within 7 to 10 days, requiring complete regeneration before the plant stabilizes.
How Do I Transition Plants to Lechuza Pon?
Transition plants to Lechuza Pon through a three-phase protocol. Phase 1: completely remove all soil and organic matter from roots under running water. Phase 2: pot in amended substrate and top-water for 2 to 4 weeks without filling the reservoir. Phase 3: introduce reservoir water at one-quarter depth after new white root tips appear, then increase gradually to one-half depth maximum.
Phase 1: Complete Soil Extraction and Sterilization
The objective is to remove 100 percent of organic matter, preventing anaerobic decomposition in the reservoir environment.
- Extraction: Remove the plant from its pot. If root-bound, cut away the outer 1 to 2 cm of circling roots. These rarely survive transition and complicate cleaning.
- Initial rinse: Hold the root ball under lukewarm running water at 20 to 22 degrees Celsius. Use your fingers to gently massage and tease apart the root mass. Continue for 3 to 5 minutes until the majority of soil is removed.
- Detailed cleaning: Work systematically from the root crown to the tips. Remove every visible soil particle. Pay special attention to root crotches where branches diverge, the interior root ball core, and roots growing along pot walls.
- Microscopic verification: Rinse until water running off the roots is completely clear, not cloudy or tan-tinted. Even microscopic soil particles decompose anaerobically, producing toxins and feeding pathogens.
- Root inspection: Examine for pre-existing rot. Black or brown mushy tissue indicates active decay. If present, execute the Pythium root rot treatment protocol before proceeding. Diseased tissue spreads rapidly in semi-hydro.
- Optional sterilization soak: For high-value specimens, soak clean roots for 5 to 10 minutes in 3 percent hydrogen peroxide diluted 1:4 with water. See our hydrogen peroxide root rot guide for exact dilution ratios. This eliminates surface-borne pathogen spores.
- Air-dry period: Allow roots to air-dry for 30 to 60 minutes before potting. Surface water should evaporate. Roots should appear dry, but internal tissue remains hydrated.
Critical rule: if you see even small amounts of soil remaining, continue rinsing. Organic matter in a semi-hydro reservoir equals guaranteed anaerobic decomposition, which equals root rot within 7 to 14 days. Spend 20 minutes ensuring complete cleanliness now instead of spending 2 hours executing emergency root surgery later.
Phase 2: The Critical Dry Adaptation Phase
This is the most commonly skipped step, causing over 80 percent of semi-hydro failures. Do not fill the reservoir during this phase.
- Pot setup: Use a semi-hydro pot with a reservoir chamber, or a standard plastic pot with drainage holes. Fill with 50/50 amended substrate (Pon plus coarse perlite).
- Planting depth: Position the plant at the same depth as in its original soil pot. Do not bury the stem deeper. Firm the substrate gently around the roots, eliminating large air pockets but not compressing.
- Initial watering: Top-water thoroughly as if watering a normal potted plant. Water should drain freely from bottom holes within 1 to 2 minutes. Do not fill the reservoir.
- Watering schedule: Water from the top when the substrate is dry 1 to 2 inches down. Frequency is typically every 4 to 7 days depending on light, temperature, and plant size.
- Duration: Minimum 2 weeks for fast-adapting species (Pothos, Philodendron). Three to 4 weeks for slower species (Alocasia, Anthurium). Up to 6 weeks for sensitive or large specimens.
- Success indicator: New root growth is visible. White root tips emerge 5 to 10 mm from existing root ends, indicating active hydro-root morphology development.
What is happening during the dry phase: soil root hairs die and decompose. The remaining root cortex begins developing aerenchyma tissue, creating large air spaces that enable oxygen diffusion. The exodermis thickens and suberizes, creating a water-impermeable barrier. New root primordia form at nodes. These develop directly as hydro-adapted roots with appropriate morphology. The plant adjusts water uptake patterns, transitioning from fine root hair absorption to coarse root direct absorption.
Phase 3: Gradual Reservoir Introduction
- Week 1 post-dry-phase: Add water to the reservoir, filling to the “MIN” or “LOW” mark (typically 1/4 reservoir depth). This creates a bottom 1 to 2 cm saturation zone with capillary moisture extending 3 to 5 cm upward. Total wetted zone: 4 to 7 cm from the pot bottom.
- Observation period: Monitor for 3 to 5 days. Wilting indicates inadequate water uptake; increase the reservoir slightly. Yellowing indicates root stress; you may need to revert to the dry phase or check for rot. Sulfur odor indicates anaerobic conditions; immediately empty the reservoir and check your substrate amendment ratio.
- Week 2: If the plant tolerates well, increase the reservoir to 1/3 depth or the “NORMAL” indicator mark. This extends the saturation zone but should still leave the upper 50 to 60 percent of the root mass in the air zone.
- Week 3 to 4: Establish final reservoir depth based on plant response. Most aroids thrive with the reservoir at 1/3 to 1/2 depth. Never fill above 1/2 depth. Roots require an air zone. Only the substrate bottom should contact standing water.
- Long-term maintenance: Allow the reservoir to deplete completely before refilling (typically 7 to 14 days). This cycling ensures periodic root zone aeration, preventing chronic saturation. When the reservoir is empty, substrate moisture depletes to approximately 30 to 40 percent water content via evaporation, which is ideal for root respiration.
Fertilization: Begin urea-free liquid fertilizer at 1/4 strength when the reservoir is introduced. Increase to 1/2 strength by week 4. Apply directly to the reservoir or during top-watering. Target an electrical conductivity of 1.0 to 1.5 mS/cm in reservoir water.
What Is the Fluval Stratum Bridge Method?
The Fluval Stratum bridge method is a gradual transition protocol for sensitive species using volcanic ash substrate as an intermediate step. Plants spend 3 weeks in pure Fluval Stratum, 3 weeks in a 50/50 Stratum-Pon mix, then move to the final amended Pon substrate with gradual reservoir introduction over 6 to 8 weeks total.
Fluval Stratum consists of volcanic ash granules 1 to 4 mm diameter with a porous structure and cation exchange capacity of 15 to 25 meq/100g. Originally marketed for aquarium plant substrates, it serves as an excellent transitional medium. It has an inorganic composition with no anaerobic decomposition risk. Particle size is larger than soil but smaller than Pon, providing intermediate capillary behavior. High porosity maintains 40 to 50 percent air-filled porosity even when saturated.
Application protocol:
- Phase 1 (Weeks 1 to 3): Pot the freshly cleaned plant in pure Fluval Stratum. Top-water when the top inch is dry (every 3 to 5 days). Roots begin adapting to an inorganic medium in a forgiving environment.
- Phase 2 (Weeks 4 to 6): Repot into 50 percent Fluval Stratum plus 50 percent amended Pon mix. Continue top-watering with no reservoir. Roots experience increasing mineral exposure while maintaining moisture security.
- Phase 3 (Week 7+): Final repot into the standard 50/50 Pon-perlite mix. Introduce the reservoir gradually as per Phase 3 of the main protocol. Roots are now fully hydro-adapted with a high survival rate.
Best candidates for the bridge protocol: Alocasia species (particularly thick-rooted cultivars like A. frydek, A. zebrina), rare Anthurium (crystallinum, clarinervium), variegated Monstera (albo, Thai constellation), and any plant with a history of root sensitivity or recent root rot recovery. The additional time investment of 6 to 8 weeks total versus 2 to 4 weeks standard is justified by an 85 to 95 percent transition success rate versus 60 to 70 percent with the direct method.
How Do I Maintain a Semi-Hydro System?
Maintain a semi-hydro system by flushing the substrate monthly with 2 to 3 times the pot volume of lukewarm water to remove salt accumulation, refilling the reservoir when empty every 7 to 14 days, and using urea-free liquid fertilizer at one-half strength with an electrical conductivity of 0.8 to 1.2 mS/cm.
Monthly Substrate Flush
- Empty the reservoir completely.
- Move the plant to a sink or outdoor area.
- Run lukewarm water through the pot from the top for 2 to 3 minutes. Use a volume equal to 2 to 3 times the pot capacity to ensure complete pore water exchange.
- Observe runoff water. It should be clear, not cloudy or white-tinged. White runoff indicates salt precipitates requiring an extended flush.
- Allow complete drainage for 30 minutes.
- Refill the reservoir with fresh water plus fertilizer at standard concentration.
Weekly Monitoring
- Reservoir level: Refill when empty or when the water level indicator shows “MIN.” This is typically every 7 to 14 days depending on plant size and environmental conditions.
- Odor check: Sulfur or rotten smell means immediate intervention is required. Empty the reservoir, inspect roots, and verify your substrate amendment ratio.
- Root visibility: If using a clear cache pot or if roots are visible through drainage holes, check color monthly. They should be white or cream, not brown or black.
- Substrate surface: Check for white salt crust. This indicates a flush is overdue.
Annual Refresh
Every 12 to 18 months, complete a repot into fresh substrate. Perlite degrades to powder. Zeolite cation exchange capacity sites saturate with salts. Lava rock develops algae and biofilm. Inspect roots during refresh. Prune any brown or mushy tissue and remove outer circling roots. The cost is approximately $5 to $10 in substrate materials versus $50 to $500 or more for plant replacement.
Is Lechuza Pon Safe for Pets?
Lechuza Pon is safe for pets. The substrate contains only inert minerals: zeolite, washed pumice, and lava rock. These contain no organic compounds toxic to cats or dogs. The ASPCA does not list mineral substrates as toxic. Verify the toxicity of the specific plant growing in the Pon separately.
Because Lechuza Pon is purely mineral, it does not harbor mold, fungus gnats, or decomposing organic matter that might trigger pet allergies or digestive upset if accidentally ingested in small quantities. However, the substrate is not food. Ingestion of large volumes of any potting material can cause gastrointestinal obstruction. Keep pots out of reach of curious pets if you have a digger.
The plant growing in the Pon determines true pet safety. A Pothos in Pon is still toxic to cats. A Spider Plant in Pon is non-toxic. Before transitioning any plant, check our cat-safe plants guide and verify your specific species on the ASPCA toxic and non-toxic plants database.
Hands-On Testing
What Are the Most Common Lechuza Pon Transition Questions?
Can I skip the dry phase if I am in a hurry?
No. Skipping the dry phase is the primary cause of semi-hydro failures. Soil roots placed directly in a flooded reservoir environment experience 60 to 80 percent mortality within 7 to 10 days from morphological incompatibility. The dry phase is not optional hardening. It is the period where roots develop aerenchyma tissue, thicken the exodermis, and generate new hydro-adapted root primordia. Skipping this condemns soil roots to suffocation.
Timeline comparison: proper protocol with dry phase equals 4 to 8 weeks to stable vigorous growth. Skipped dry phase equals 2 weeks of apparent success, then sudden collapse requiring a complete restart, totaling 8 to 12 weeks. Patience during the dry phase is objectively faster than salvaging failure.
What if my plant already smells like sulfur in Pon?
Immediate action is required. Sulfur odor indicates active anaerobic bacterial metabolism. Protocol: (1) Remove the plant from Pon immediately. (2) Rinse roots, inspecting for black mushy tissue. If present, execute the Pythium root rot treatment protocol, removing all necrotic tissue plus a 1 cm margin. (3) Soak cleaned roots in 3 percent hydrogen peroxide (1:4 dilution) for 10 to 15 minutes to sterilize surface pathogens. (4) Repot in amended substrate (50 percent Pon plus 50 percent coarse perlite; the unamended Pon caused the problem). (5) Restart the dry phase protocol with no reservoir for 2 to 4 weeks, forcing new healthy root development. (6) Monitor obsessively for reinfection signs.
Prevention: never use pure fine Pon, never skip the dry phase, never fill the reservoir above 1/2 depth.
Do I need to fertilize differently in semi-hydro?
Yes. Nutrient dynamics differ from soil. Use the same urea-free liquid fertilizer at 1/2 normal strength (electrical conductivity 0.8 to 1.2 mS/cm) but apply more frequently: every reservoir refill versus every 2 to 3 weeks in soil. The reasoning: inorganic substrate provides zero nutrients, unlike soil organic matter that mineralizes slowly. Monthly flushing removes accumulated salts but also strips all nutrition, requiring consistent replacement.
Method: add fertilizer directly to reservoir water when refilling, or apply via occasional top-watering. Avoid organic fertilizers like fish emulsion and kelp. These decompose anaerobically in the reservoir environment, producing toxins and odor. Stick to synthetic mineral salts only.
Can I convert all my plants to semi-hydro at once?
Not recommended. Start with 1 to 3 plants to learn the system before mass conversion. Best starter species: Pothos (any variety), Philodendron hederaceum, Monstera deliciosa, Syngonium. These tolerate mistakes and adapt quickly (2 to 3 week dry phase). Intermediate difficulty: Anthurium, variegated Monstera, Scindapsus. These require careful attention but have a high success rate with proper protocol.
Advanced or avoid until experienced: Alocasia (extremely rot-prone; use the Fluval bridge method), Calathea and prayer plants (prefer soil organic matter), Ficus (woody roots adapt slowly). Strategy: convert 10 to 20 percent of your collection initially, observe for 3 to 6 months, troubleshoot issues, then expand. Mass conversion equals mass simultaneous failures if a protocol error is made.
Why does LECA work for some people but not others?
LECA success depends on three variables: plant species tolerance for wet-dry cycling, grower willingness to refill the reservoir every 2 to 3 days, and supplemental top-watering between fills. Pothos and Philodendron tolerate LECA because they withstand intermittent drying. Alocasia and Anthurium fail in LECA because their fine roots desiccate in the upper substrate while their thick roots rot in the standing water at the bottom. Amended Pon solves this by providing continuous capillary moisture distribution plus oxygenated air pockets throughout the column.
How do I know when the dry phase is complete?
The dry phase is complete when you see new white root tips emerging 5 to 10 mm from existing root ends. These new roots have hydro-adapted morphology: thicker diameter, reduced branching, and early aerenchyma development. Do not rush this. If you are unsure, extend the dry phase by 1 week. An extra week of patience prevents a month of recovery from root rot.
- Pure fine Pon saturates completely via capillary action, eliminating air-filled porosity and causing root hypoxia within days.
- Amend Pon with 50 percent coarse perlite (number 3 grade) or large pumice to create 60 to 70 percent air-filled porosity.
- The dry phase (2 to 4 weeks, top-water only, no reservoir) is mandatory for root morphology conversion.
- Introduce the reservoir gradually: 1/4 depth in week 1, 1/3 in week 2, max 1/2 depth thereafter.
- Flush monthly to prevent salt accumulation. Never use organic fertilizers in semi-hydro.
- For sensitive species, use the Fluval Stratum bridge method: 6 to 8 weeks total transition time.
The Lechuza Pon transition is not a product purchase. It is an engineering challenge balancing capillary water distribution against gravitational drainage to maintain continuous root zone oxygenation. When executed properly, semi-hydro provides superior growth rates, elimination of soil-borne pests like fungus gnats and spider mites, consistent moisture without manual monitoring, and virtually zero overwatering risk. When executed improperly, it becomes an anaerobic death trap causing faster plant death than the worst soil overwatering. For more growing guides, visit The Lab.