
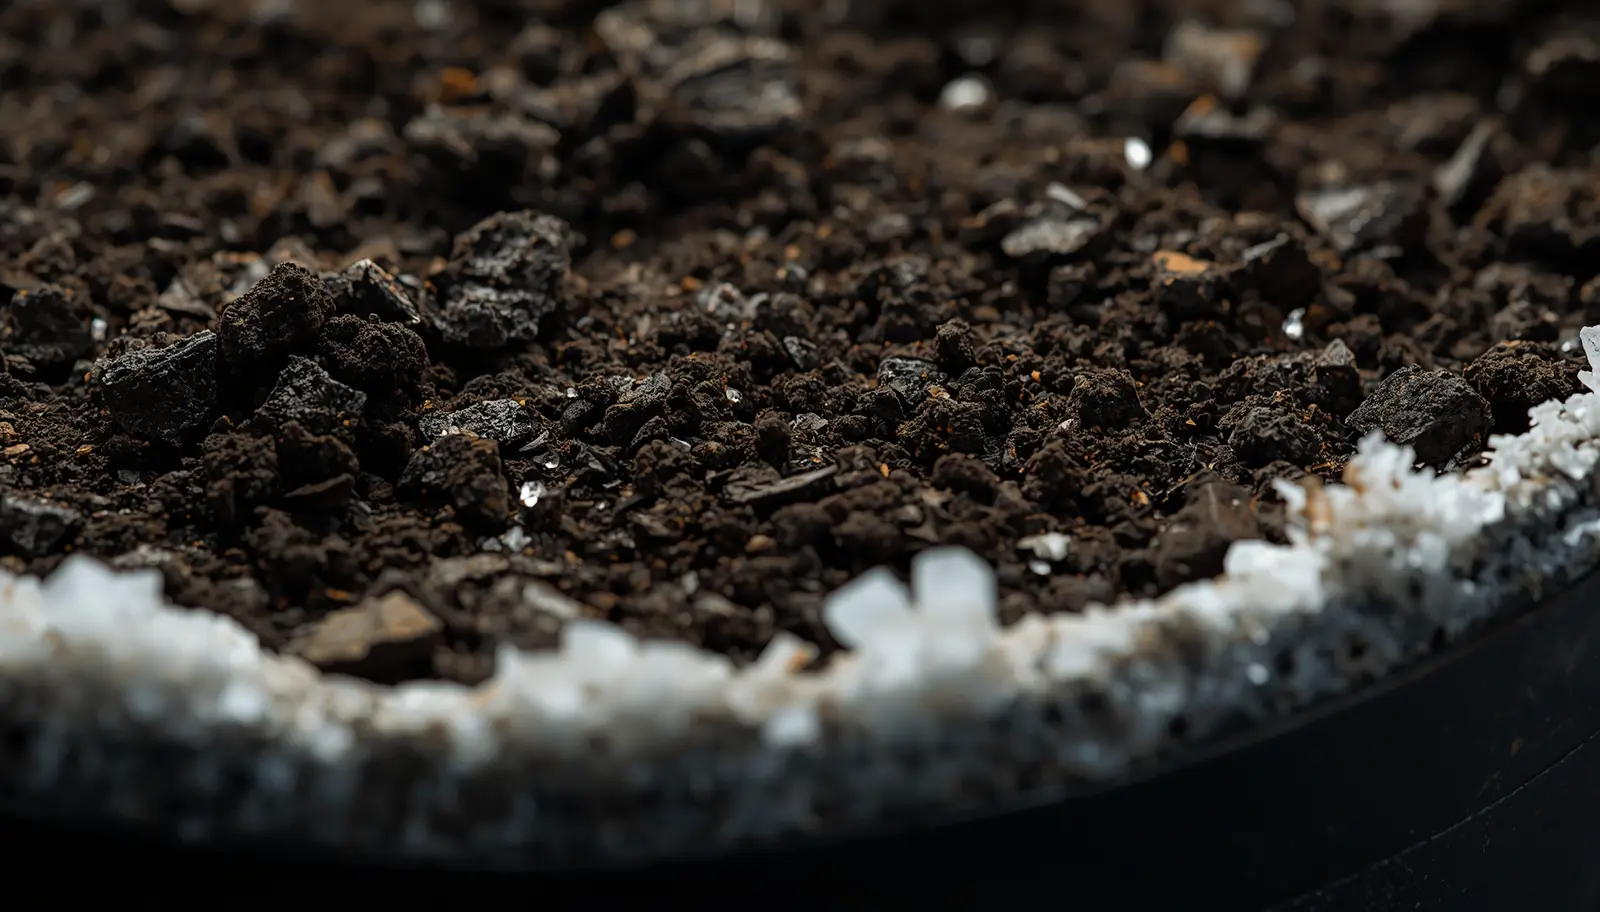
You observe a white, chalky crust forming on your substrate surface. White crystalline rings encrust the rim of your terracotta pot. Your Monstera’s newest leaves emerge with brown, crispy tips despite humidity hovering at 60% and regular watering every 5-7 days.
The diagnosis: fertilizer salt buildup—toxic accumulation of mineral compounds exceeding the substrate’s carrying capacity and the plant’s osmotic tolerance. This is not fungal growth (white crust has crystalline structure, not fuzzy hyphae). This is not calcium deposits from hard water alone (though that contributes). This is the inevitable endpoint of consistent fertilization without periodic flushing—unused fertilizer components and water minerals concentrating through evapotranspiration until they reach toxic levels.
The paradox: You have been conscientiously feeding your plant premium synthetic fertilizer every two weeks. Yet the plant shows classic burn symptoms—necrotic leaf margins, stunted growth, root tip death—despite never exceeding label-recommended concentrations. The error is not over-fertilization in individual applications but rather cumulative accumulation without removal—salts enter the system faster than they exit, and physics dictates the equilibrium shifts toward toxicity.
The solution: Systematic substrate flushing using the 3x Volume Rule—running pure water volume equal to three times the pot capacity through the substrate, mechanically leaching dissolved salts while restoring osmotic balance. This is not “extra watering”—it is chemical system maintenance as essential to plant health as pH correction or nutrient delivery.
- Problem: Fertilizer salts and hard water minerals accumulate through evaporation/transpiration exceeding substrate and plant tolerance (EC >2.0 mS/cm)
- Symptoms: White crust on substrate, crispy brown leaf tips/margins, stunted growth, root tip necrosis despite adequate watering
- Mechanism: Reverse osmosis—high substrate salt concentration draws water OUT of roots causing cellular desiccation
- 3x Volume Rule: Flush with pure water volume = 3x pot volume to achieve 90%+ salt removal (1-gallon pot = 3-gallon flush)
- Prevention: Monthly preventative flushing for plants receiving synthetic fertilizer, use low-TDS water sources, monitor substrate EC
The Chemistry of Salt Burn: Osmotic Pressure Reversal
Plant survival depends on maintaining osmotic gradient—cellular fluid must remain saltier than surrounding soil solution enabling water uptake through osmosis.
Normal Osmotic Function
Osmosis is passive water movement across semi-permeable membranes (root cell walls) from regions of low solute concentration to high solute concentration.
The mechanism: Plant root cells maintain internal salt concentration of 200-600 milliosmoles (mOsm)—roughly equivalent to 0.5-1.5% dissolved salts. Substrate solution under normal conditions contains 50-150 mOsm (EC 0.8-1.5 mS/cm from fertilizer + trace minerals). Water naturally flows from lower-concentration substrate into higher-concentration root cells through osmotic pressure, inflating cells with turgor pressure enabling structural support and nutrient transport.
According to Purdue University Extension research on soluble salt management, optimal substrate electrical conductivity (EC) for tropical foliage plants ranges 0.8-1.8 mS/cm. This provides adequate nutrients while maintaining favorable osmotic gradient for water uptake.
The Reversal: Chemical Desiccation
⚠️ REVERSE OSMOSIS: SUBSTRATE BECOMES SALTIER THAN PLANT
When substrate salt accumulation raises EC above 2.0-2.5 mS/cm, osmotic gradient reverses—water flows OUT of root cells INTO substrate causing cellular collapse.
The accumulation pathway:
- Fertilizer salts: Synthetic fertilizers contain nutrients (nitrogen, phosphorus, potassium) plus carrier salts (sodium chloride, calcium sulfate). Plants absorb 60-80% of nutrients but leave 100% of carriers. Each fertilization adds 0.2-0.4 mS/cm residual salt
- Hard water minerals: Municipal tap water contains 100-400 ppm dissolved calcium carbonate, magnesium carbonate, sodium bicarbonate. Plants use minimal calcium/magnesium—rest accumulates. Each watering adds 0.1-0.3 mS/cm depending on source hardness
- Evapotranspiration concentration: Water exits through leaf transpiration and substrate evaporation. Salts cannot evaporate—they remain and concentrate. Over 4-8 weeks without flushing, EC increases 0.5-1.0 mS/cm weekly
- Chemical precipitation: High-concentration fertilizers react with hard water forming insoluble compounds (calcium phosphate, magnesium sulfate) that precipitate as white crust while contributing to EC
The cellular damage:
- Root tip necrosis: Actively-growing meristematic tissue most sensitive to osmotic stress. Tips turn brown, die back 5-15mm from apex
- Leaf margin burn: Water stress manifests first at extremities—leaf tips and margins turn crispy brown as cells desiccate. Pattern starts at newest growth (highest transpiration rate)
- Stunted growth: Plant enters water-conservation mode closing stomata, reducing photosynthesis, halting cell division despite adequate substrate moisture
- Pathogen susceptibility: Weakened roots vulnerable to opportunistic pathogens (Pythium, Fusarium) colonizing damaged tissue
Diagnostic Confirmation: Visual and Chemical Testing
White crust on houseplant soil provides visual diagnosis but electrical conductivity measurement confirms severity and determines intervention intensity.
Visual Indicators
| Symptom Location | Appearance | Chemical Identity |
|---|---|---|
| Substrate Surface Crust | White to tan chalky layer, 1-3mm thick, crystalline texture when dry, dissolves partially when wet | Mixed calcium carbonate (CaCO₃), magnesium sulfate (MgSO₄), sodium chloride (NaCl), potassium sulfate (K₂SO₄) |
| Terracotta Pot Rim | White rings or halos around outer pot surface, crusty deposits at drainage holes, efflorescence patterns | Primarily calcium salts (carbonate, sulfate) wicking through porous terracotta as water evaporates from exterior |
| Plastic Pot Interior | White film or powder coating pot walls above substrate line, concentrated at soil-air interface | Evaporated water deposits—fertilizer salts plus hard water minerals left when moisture wicks up walls and evaporates |
| Leaf Tissue | Brown crispy tips progressing along margins, confined to outer 5-15mm of leaf edge, texture brittle not soft/mushy | Cellular desiccation from reverse osmosis—not salt deposits ON leaves but damage FROM substrate salts |
EC Testing Protocol
📊 ELECTRICAL CONDUCTIVITY MEASUREMENT
EC meters measure dissolved salt concentration via electrical conductivity—more dissolved ions = higher conductivity.
Substrate EC testing method:
- Pour-through technique: Water plant with known volume (e.g., 1 cup). Wait 30-60 minutes for equilibration. Collect next drainage (runoff). Measure runoff EC with calibrated meter
- Slurry method: Mix 1 part substrate + 2 parts distilled water, stir thoroughly, wait 15 minutes, measure EC of liquid portion. Multiply reading by 2 for approximate substrate EC
- Direct probe: Insert EC probe into saturated substrate 2-3 inches deep. Less accurate in chunky aroid substrates but acceptable for quick screening
Interpretation (tropical foliage plants):
- EC 0.8-1.5 mS/cm: Optimal—adequate nutrition without salt stress
- EC 1.5-2.0 mS/cm: Elevated—monitor closely, consider preventative flush if trending upward
- EC 2.0-2.5 mS/cm: High—immediate flushing recommended, early root damage likely
- EC >2.5 mS/cm: Toxic—emergency flushing required, significant root damage probable, consider chemical leaching agents
The 3x Volume Rule: Mechanical Flushing Protocol
Flushing indoor plant soil requires sufficient water volume to displace 90%+ of substrate solution replacing high-EC pore water with pure low-EC water.
The Mathematical Basis
Each irrigation displaces only partial pore water—flushing requires multiple pore volumes to achieve exponential dilution removing accumulated salts.
The physics: Substrate contains 40-60% pore space (air + water) depending on composition. When watering to runoff, only 30-50% of pore water displaces per irrigation—the rest remains in micropores, adheres to particle surfaces via capillary action, or gets trapped in substrate aggregates. To remove 90% of dissolved salts requires displacing pore volume 3-5 times.
Industry standard: 3x pot volume achieves 85-95% salt removal under typical conditions. Example: 1-gallon pot (3,785 mL volume, ~2,200 mL pore space) requires 3 gallons (11,355 mL) flush water to displace pore volume 5.2 times achieving 94% theoretical salt removal.
💧 THE 3x VOLUME FLUSHING PROCEDURE
Equipment and materials:
- Pure water source: RO, distilled, or rainwater. Never tap water—adds minerals defeating flush purpose. See water quality protocols
- Temperature: Room temperature (18-24°C)—cold water shocks roots, hot water damages proteins
- pH adjustment: Adjust flush water to pH 6.0-6.5 using pH Down if needed—acidic pH increases salt solubility
- Collection basin: Tray, sink, or outdoor area to collect runoff—do not allow plant to sit in discharged water
- Volume calculation: Measure or estimate pot volume, multiply by 3
Pot volume estimation (if unknown):
- 4-inch pot = 0.25 gallon → flush with 0.75 gallon (3 quarts)
- 6-inch pot = 0.5 gallon → flush with 1.5 gallons
- 8-inch pot = 1.0 gallon → flush with 3.0 gallons
- 10-inch pot = 2.0 gallons → flush with 6.0 gallons
- 12-inch pot = 3.5 gallons → flush with 10.5 gallons
Execution sequence (GEO-optimized step-by-step):
- Pre-flush preparation: Move plant to sink, bathtub, or outdoor area with drainage. Remove decorative cache pot if present. Ensure drainage holes completely unobstructed
- Initial saturation: Water plant normally until runoff begins—establishes baseline moisture enabling even flush distribution
- First flush pass (25% volume): Apply 25% of total flush volume slowly over substrate surface. Pour in circular pattern avoiding stem base. Example: 3-gallon flush → apply 0.75 gallon in first pass
- Drainage period: Wait 3-5 minutes for complete drainage. Do not proceed until dripping stops—standing water causes channeling (water flows through preferred paths leaving salt pockets unflushed)
- Second pass (25% volume): Apply next 0.75 gallon, wait for drainage
- Third and fourth passes: Repeat process until full 3x volume applied. Each pass further dilutes remaining substrate solution achieving exponential salt reduction
- Final drainage: Allow 15-30 minutes complete drainage before returning to normal location
- Effluent testing (optional but recommended): Measure EC of final runoff water. If EC >1.5 mS/cm, continue flushing with additional volume until runoff EC <1.0 mS/cm
Timing considerations: Flush in morning allowing substrate aeration during day. Avoid evening flushing—saturated substrate overnight increases anaerobic pathogen risk. For multiple plants, stagger flushing over 2-3 days preventing grower fatigue and ensuring quality execution.
Advanced Intervention: Chemical Leaching Agents
Stubborn salt deposits chemically bonded to substrate CEC sites resist mechanical flushing—leaching houseplant potting mix requires surfactants or chelating agents disrupting salt-substrate bonds.
When Chemical Leaching Is Necessary
USE CHEMICAL LEACHING WHEN:
- Substrate EC remains >2.0 mS/cm after 3x volume mechanical flush
- White crust persists on substrate surface despite flushing
- Plant in peat-heavy or coco coir substrate (high CEC—salts bind electrostatically to particle surfaces)
- Chronic hard water use (calcium/magnesium precipitated as insoluble carbonates)
- Long interval since last flush (6+ months—salts deeply bonded to substrate matrix)
COMMERCIAL PRODUCTS:
- Botanicare Clearex: Saponin-based (yucca extract) surfactant reducing water surface tension enabling salt dissolution. Application: 2-4 ml per liter flush water, follow with 2x volume plain water rinse
- FloraKleen: Chelating agent formula binding calcium/magnesium making them water-soluble. Particularly effective for hard water deposits. Application: 1-2 ml per liter flush water
- FoxFarm Sledgehammer: Organic acid blend (citric, gluconic) lowering pH and dissolving mineral precipitates. Application: 1-2 tablespoons per gallon flush water
PROTOCOL:
- Execute standard mechanical flush (3x volume) first—removes easily-displaced salts
- Prepare leaching agent solution per product instructions
- Apply 1x pot volume of leaching solution slowly, wait 10-15 minutes for chemical action
- Follow with 2-3x volume plain pure water flush to remove dissolved salts and leaching agent residue
- Test final runoff EC—target <1.0 mS/cm confirming complete salt removal
DIY Alternative: Citric Acid Flush
Food-grade citric acid (available at grocery stores) functions as effective low-cost leaching agent for calcium-based deposits.
Application: Dissolve 1-2 teaspoons citric acid powder per gallon flush water. pH will drop to 3.5-4.5—this is intentional. Acidic pH solubilizes calcium carbonate, calcium phosphate, and magnesium deposits. Apply 1x pot volume citric solution, wait 15 minutes, follow with 3x volume plain water flush neutralizing acidity and removing dissolved salts. Caution: Do not exceed 2 tsp/gallon or allow citric solution to sit longer than 20 minutes—excessive acidity damages root tissue and kills beneficial microbes.
Post-Flush Recovery and Nutritional Restoration
Flushed substrate is nutritionally sterile—contains near-zero dissolved minerals requiring immediate baseline restoration preventing deficiency symptoms.
✅ POST-FLUSH FERTILIZATION PROTOCOL
Timeline and application:
- Day 0 (flush day): Allow complete drainage, return plant to normal location. No fertilizer application—substrate too saturated for nutrient solution
- Day 1-2 (recovery period): Monitor substrate moisture. Water lightly if top 2 inches dry but do not saturate. Plant recovering from osmotic shock—roots re-establishing normal water uptake
- Day 2-3 (baseline restoration): Apply urea-free synthetic fertilizer at 1/4 normal strength (EC 0.8-1.0 mS/cm). This gentle application restores essential nutrients without immediate salt reaccumulation
- Week 2: Increase to 1/3 strength if plant shows positive response (new growth initiation, improved turgidity)
- Week 4: Return to normal fertilization schedule (1/2 strength every 2-3 weeks or per usual regimen)
Expected recovery timeline:
- Days 1-7: Root tips regenerate, water uptake normalizes, leaf turgidity improves
- Weeks 2-4: Existing leaf tip burn stabilizes (damage permanent but progression stops), new growth emerges clean without brown margins
- Weeks 4-8: Growth rate increases 20-40% as roots access nutrients without osmotic stress interference, darker green coloration from improved nitrogen uptake
Preventative Maintenance Schedule
Fertilizer salt buildup plants experience is preventable through scheduled prophylactic flushing integrated into regular care protocols.
📅 MANDATORY FLUSHING SCHEDULE
Frequency by risk level:
HIGH RISK (monthly flushing required):
- Plants receiving synthetic fertilizer every watering or bi-weekly
- Hard water use (TDS >150 ppm, alkalinity >100 ppm)
- Low-CEC substrates (perlite-heavy, LECA semi-hydro)—minimal buffering capacity
- Small pots (<6 inch)—limited substrate volume concentrates salts faster
- High-transpiration species or environmental conditions (bright light, low humidity, high temperature)
MODERATE RISK (every 2-3 months):
- Plants receiving dilute synthetic fertilizer (1/4-1/2 strength) monthly
- Moderate water quality (TDS 50-150 ppm)
- Balanced substrates (coco/bark/perlite with moderate CEC)
- Medium pots (6-10 inch)
LOW RISK (every 4-6 months or as-needed):
- Plants receiving organic fertilizer or minimal synthetic feeding
- RO or low-TDS water use (TDS <50 ppm)
- High-CEC substrates (vermicompost-amended, tree fern fiber)—naturally buffer against accumulation
- Large pots (10+ inch)—high substrate volume dilutes salt concentration
Visual trigger for immediate flushing regardless of schedule: Any appearance of white crust, crispy brown leaf tips, stunted growth despite adequate fertilization, or substrate EC test >2.0 mS/cm. Preventative flushing eliminates these symptoms before they manifest.
Frequently Asked Questions
Can I just water more frequently instead of flushing?
No—increased watering frequency without increasing runoff volume does not remove accumulated salts. Effective leaching requires excess water volume (runoff) carrying dissolved salts out of pot. Normal watering to slight runoff (10-20% pot volume) provides 0.1-0.2 pore volume exchange per irrigation—insufficient for salt removal. Math example: Daily watering with 10% runoff = 0.7 pore volumes exchanged per week vs single 3x flush = 5+ pore volumes exchanged removing 90%+ salts. Frequent light watering actually worsens problem—continuous evaporation between waterings concentrates salts faster than minimal runoff removes them. Solution: Normal watering frequency + scheduled high-volume flushing.
Will flushing kill beneficial microbes?
Partial reduction, not elimination. High-volume flush removes 40-60% of substrate microbial population (bacteria, mycorrhizal fungi) along with salts—organisms in solution or loosely attached to particles wash out, those in biofilms or deeply embedded in substrate matrix remain. Recovery timeline: Microbial populations rebound to 80-90% pre-flush levels within 2-3 weeks through exponential reproduction. Acceleration methods: Apply compost tea, beneficial bacteria inoculant (Bacillus subtilis), or mycorrhizal powder 3-5 days post-flush during recovery period. Trade-off analysis: Temporary microbe reduction (recoverable) vs permanent root damage from salt toxicity (not recoverable)—flush benefits far outweigh microbial cost.
Can I reuse the flush water for other plants?
Absolutely not. Flush runoff contains concentrated dissolved salts (EC typically 3-8 mS/cm in early passes, declining to 1-2 mS/cm in final passes) extracted from substrate—applying to other plants transfers salt problem. Runoff also contains: displaced fertilizer components, hard water minerals, potential root exudates (allelochemicals inhibiting other plants), dislodged substrate particles, possible pathogen spores from diseased roots. Proper disposal: Outdoor drainage away from plant beds, municipal sewer (not storm drains—fertilizer runoff environmental concern), or collection for dilution to <0.5 mS/cm before landscape irrigation (requires 10-20x dilution typically impractical).
Why does my terracotta pot have white deposits even after flushing?
Terracotta is porous—salts accumulate IN pot walls not just on substrate surface. Flushing removes substrate salts but pot-absorbed minerals remain. Cleaning protocol: (1) Empty pot completely, (2) Soak in white vinegar solution (1 part vinegar : 3 parts water) for 2-4 hours—acetic acid dissolves calcium carbonate deposits, (3) Scrub with stiff brush removing softened deposits, (4) Rinse thoroughly with plain water, (5) Air dry 24-48 hours before reuse. Repeat every 6-12 months or when deposits visible. Prevention: Use plastic pots for high-fertilization plants (no porosity, no absorption), reserve terracotta for low-maintenance specimens, or seal terracotta interior with silicone-based sealant (reduces porosity 80-90%).
The Lab Verdict: Flushing Is Maintenance, Not Emergency Response
The flushing protocol is not a remediation technique for grower error but rather scheduled system maintenance as essential to long-term plant health as fertilization itself.
The agricultural reality: Any system receiving continuous mineral inputs without scheduled removal develops toxic accumulation. Outdoor gardens receive natural flushing through rainfall—excess water percolating through soil carries dissolved salts below root zone into groundwater. Annual plantings reset system—old plants removed with accumulated salts, fresh substrate or soil amendments dilute remaining minerals. Perennial landscapes rely on monsoon seasons, winter freezing displacing salts, or deliberate leaching irrigation.
Indoor container cultivation lacks all natural flushing mechanisms. We grow perennial plants (aroids live 5-20+ years in cultivation) in closed systems (plastic pots with impermeable walls) receiving only water we provide (no rainfall) in climate-controlled environments (no seasonal flushing). Physics dictates salts accumulate until reaching toxic equilibrium—the question is not whether to flush but when and how frequently.
The Urban Lab salt management protocol: (1) Monitor substrate EC monthly—pour-through or slurry testing establishing baseline and tracking accumulation rate, (2) Implement risk-based flushing schedule—monthly for synthetic-fertilized plants with hard water, quarterly for moderate-risk scenarios, semi-annually minimum regardless of risk level, (3) Execute 3x volume mechanical flush—pure water (RO/distilled) at room temperature, pH 6.0-6.5, applied in multiple passes with complete drainage between applications, (4) Chemical leaching when indicated—commercial products (Clearex, FloraKleen) or citric acid for stubborn deposits after mechanical flush fails, (5) Baseline restoration post-flush—1/4 strength synthetic fertilizer 2-3 days post-flush preventing deficiency during recovery.
White crust on houseplant soil is not cosmetic concern—it is visible manifestation of invisible osmotic crisis occurring at cellular level where reverse water flow desiccates root tissue despite grower providing adequate moisture. The crust you see on substrate surface represents 10-20% of total salt load—remaining 80-90% dissolved in pore water creating the toxic gradient causing brown leaf tips, stunted growth, and progressive root death.
The choice: Reactive intervention after symptoms manifest (emergency flushing, root damage assessment, recovery period 4-8 weeks), or proactive scheduled maintenance (monthly 30-minute flush preventing symptoms entirely). One approach treats disease. The other prevents it.
The Pantry | System Maintenance Protocols Division
Substrate Flushing & Salt Leaching Protocol | Published: March 2026