
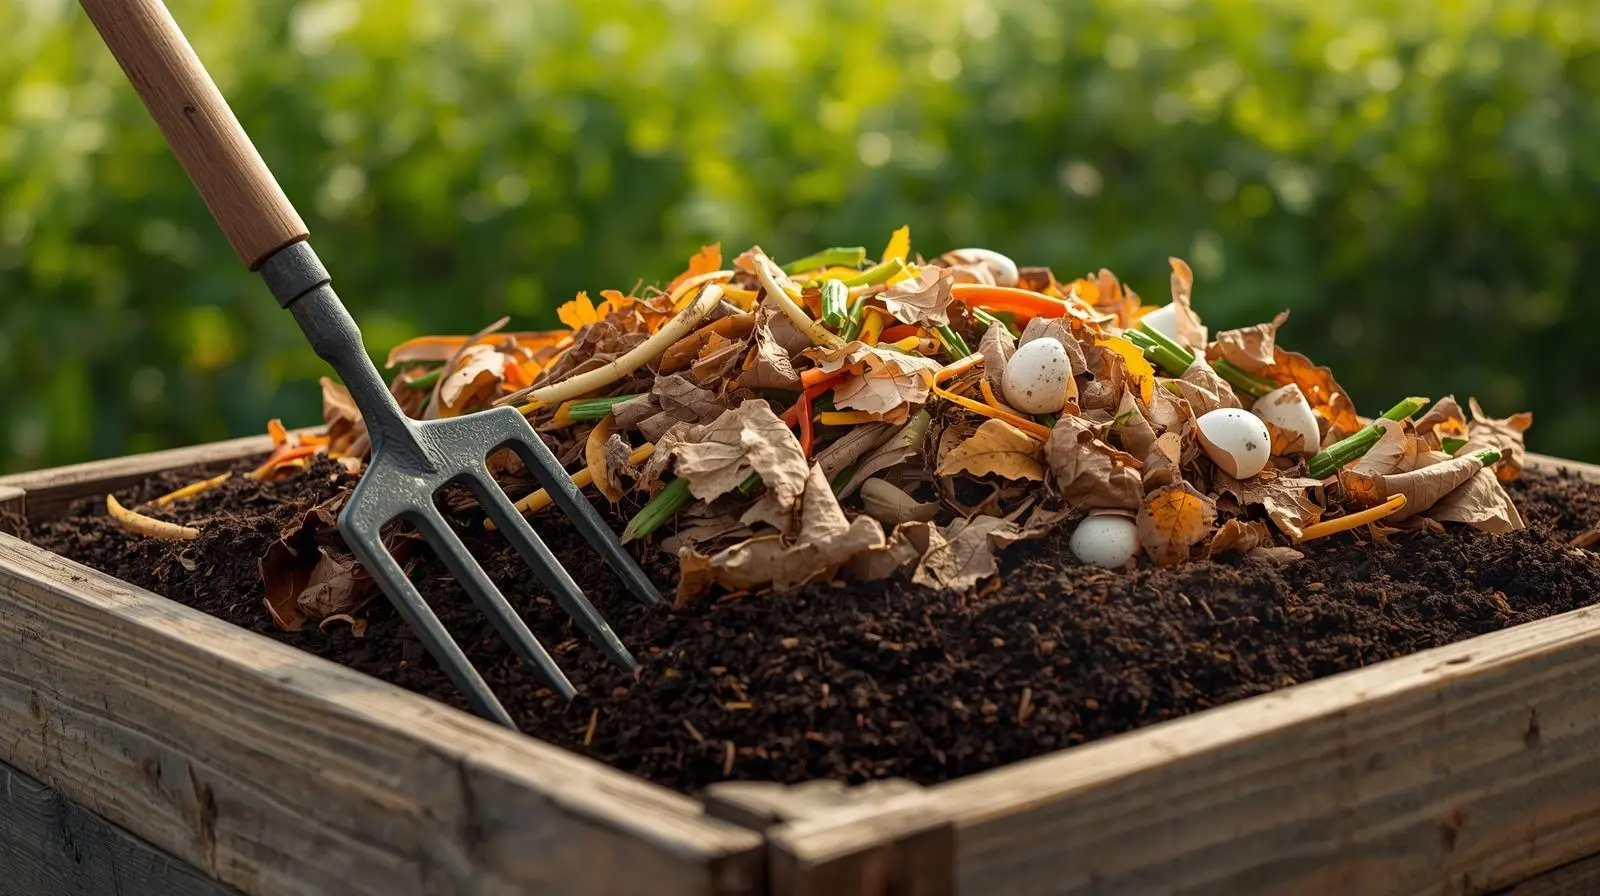
Composting at home is one of the easiest and most rewarding ways to reduce your household waste while creating free, nutrient-rich fertilizer for your plants. Whether you have a sprawling backyard garden or just a few potted plants on your balcony, anyone can start composting with a simple system and a bit of routine.
In this comprehensive beginner’s guide, you’ll learn everything you need to know about home composting — from understanding the basics of greens and browns to building your first compost pile, troubleshooting common problems, and using your finished “black gold” to supercharge your garden’s health and productivity.
The best part? Composting requires minimal investment, saves you money on fertilizers and soil amendments, and significantly reduces your environmental footprint. Let’s dive into the wonderful world of turning kitchen scraps into garden treasure!
What Is Composting and Why Do It?
Composting is the natural biological process where microorganisms, fungi, and other decomposers break down organic materials like kitchen scraps and garden waste into a dark, crumbly, soil-like material called compost or humus. This finished product is often called “black gold” by gardeners because of its incredible value for improving soil health.
During composting, billions of beneficial bacteria, fungi, and other microbes work together to decompose organic matter, transforming what would be waste into a valuable resource. The process mimics what happens naturally on forest floors, where fallen leaves and dead plants decompose to enrich the soil.
🌟 Top Benefits of Home Composting:
- Reduces Household Waste: Composting can divert 30-50% of household waste from landfills or incineration. The average family throws away about 200-300 pounds of organic waste annually that could be composted instead.
- Cuts Greenhouse Gas Emissions: When organic waste decomposes in landfills without oxygen, it produces methane, a greenhouse gas 25 times more potent than CO2. Composting prevents these harmful emissions.
- Saves Money: Finished compost replaces expensive store-bought fertilizers, soil conditioners, and mulch. A single compost bin can save you $50-200 annually on garden amendments.
- Improves Soil Structure: Compost enhances soil texture, helping clay soils drain better and sandy soils retain moisture and nutrients more effectively.
- Adds Essential Nutrients: Compost provides a slow-release source of nitrogen, phosphorus, potassium, and micronutrients that plants need to thrive.
- Increases Water Retention: Soil amended with compost can hold up to 20% more water, reducing irrigation needs and helping plants survive droughts.
- Supports Beneficial Soil Life: Compost introduces billions of beneficial microorganisms that suppress plant diseases, improve nutrient cycling, and create healthier soil ecosystems.
- Reduces Chemical Dependency: Healthy, compost-enriched soil reduces the need for synthetic fertilizers and pesticides, creating a more sustainable garden.
Understanding “Greens” and “Browns”
The secret to successful composting at home comes down to balancing two types of materials, commonly called “greens” and “browns.” These terms don’t refer to color but rather to the chemical composition of the materials.
Greens vs. Browns: Complete Comparison
| Category | Greens (Nitrogen-Rich) | Browns (Carbon-Rich) |
|---|---|---|
| Characteristics | Wet, fresh, nitrogen-rich materials | Dry, aged, carbon-rich materials |
| Function | Provide protein for microorganisms, heat up the pile | Provide energy for microorganisms, create air pockets |
| Examples | Fruit/vegetable scraps, coffee grounds, fresh grass clippings, tea leaves, fresh plant trimmings | Dry leaves, twigs, straw, shredded cardboard, paper, sawdust, pine needles |
| Moisture Level | High moisture content | Low moisture content |
| Decomposition Speed | Break down quickly | Break down slowly |
| Ideal Ratio | 1 part (by volume) | 2 parts (by volume) |
Greens (Nitrogen-Rich Materials)
Green materials are typically moist and fresh. They provide nitrogen, which acts as a protein source for the microorganisms doing the composting work. Greens also help heat up your compost pile, which accelerates decomposition.
Common green materials include:
- Fruit and vegetable scraps, peels, and cores
- Coffee grounds and paper filters
- Tea leaves and paper tea bags (remove staples and ensure no plastic)
- Fresh grass clippings (untreated lawns only)
- Fresh garden plant trimmings and weeds (without seeds)
- Fresh flowers and houseplant trimmings
- Seaweed and kelp
Browns (Carbon-Rich Materials)
Brown materials are typically dry and aged. They provide carbon, which serves as an energy source for microorganisms. Browns also create air pockets in the pile, improving oxygen circulation and preventing compaction.
Common brown materials include:
- Dry fallen leaves (the best brown material)
- Small twigs and branches (chop larger pieces)
- Straw and hay (ensure they’re seed-free)
- Shredded cardboard (remove tape and labels)
- Plain paper, newspaper, paper bags
- Paper towels and napkins (no chemicals or grease)
- Sawdust and wood chips from untreated wood
- Pine needles (use in moderation as they’re acidic)
- Corn stalks and dry plant stems
The Perfect Balance
Aim for roughly 2 parts browns to 1 part greens by volume. This ratio keeps the pile active and decomposing efficiently without becoming too wet, compacted, or smelly. If your pile is too wet or smells bad, add more browns. If it’s too dry and not breaking down, add more greens and water.
💡 Pro Tip: Most beginners don’t add enough browns. Keep a supply of dry leaves, shredded cardboard, or shredded paper near your compost bin so you can easily layer them with kitchen scraps.
What You Can and Can’t Compost
Understanding what materials are safe to compost prevents odors, pests, and potential problems in your garden. Here’s your comprehensive guide to composting ingredients.
✅ SAFE TO COMPOST AT HOME
- All fruit and vegetable scraps, peels, cores, and rinds
- Coffee grounds with paper filters
- Tea leaves and paper tea bags (check for plastic)
- Crushed eggshells (rinse first to avoid odors)
- Nutshells (except black walnut)
- Stale bread, crackers, cereal (in moderation)
- Grass clippings from untreated lawns
- Dry leaves, pine needles, straw
- Plant trimmings (disease-free)
- Dead flowers and houseplant trimmings
- Shredded cardboard and paper
- Paper towels, napkins, paper bags
- Newspaper and office paper
- Wood chips and sawdust (untreated wood)
- Hair (human and pet)
- Cotton and wool fabric scraps (100% natural)
- Wood ash in small amounts
❌ AVOID IN HOME COMPOST
- Meat, fish, shellfish, and bones
- Dairy products (milk, cheese, yogurt, butter)
- Fats, oils, and greasy foods
- Pet waste (dogs, cats, birds, reptiles)
- Human waste or soiled diapers
- Diseased or insect-infested plants
- Weeds with mature seeds
- Invasive plant species
- Black walnut leaves or twigs (toxic to plants)
- Coal or charcoal ash
- Treated or painted wood
- Glossy or colored magazines
- Synthetic materials or plastics
- “Compostable” plastics (need industrial facilities)
- Yard waste treated with pesticides
Special Considerations
Citrus Peels and Onions
Despite common myths, citrus peels and onions are safe to compost. However, use them in moderation as large quantities can slow decomposition and temporarily deter worms in vermicompost systems. Chop them into smaller pieces and mix well with other materials.
Bread, Pasta, and Cooked Grains
These are technically compostable but can attract pests like rats and raccoons. If pests are a concern in your area, either avoid these materials or bury them deep in the center of an active, hot compost pile.
Grass Clippings
Fresh grass clippings are excellent greens but should be added in thin layers to prevent matting and creating anaerobic (oxygen-free) conditions. Mix with browns and never add clippings from lawns treated with herbicides or pesticides within the last 2-4 weeks.
Paper Products
Stick to plain paper, newspaper, cardboard, and unbleached paper products. Avoid glossy magazines, colored paper with heavy inks, or paper with plastic coatings. Shred or tear paper products into smaller pieces for faster decomposition.
Choosing the Right Compost Method
There’s no one-size-fits-all approach to composting at home. The best method depends on your available space, climate, physical ability, and how quickly you want finished compost. Here are the most popular options:
1. Outdoor Compost Bin or Heap
Best for: Homeowners with yard space, gardens, or outdoor areas.
How it works: A designated area or enclosed bin where you layer kitchen scraps, garden waste, browns, and greens. The pile naturally heats up as materials decompose, and you turn it periodically to add oxygen.
Advantages:
- Can handle large volumes of material
- Minimal cost if using a simple pile or DIY bin
- Accommodates both kitchen scraps and yard waste
- Natural and straightforward process
Considerations:
- Requires outdoor space and ground contact
- Slower process (6-12 months) if not actively managed
- May attract wildlife if not properly maintained
- Turning large piles requires physical effort
Materials: You can build bins from untreated wood pallets, purchase plastic or metal bins, or simply create an open pile (minimum 1 cubic meter for best heat retention).
💡 Tip: Place your bin on bare soil in a sheltered, partially shady spot that’s easily accessible from both your kitchen and garden.
2. Tumbler Compost Bin
Best for: Gardeners who want faster compost with less physical effort.
How it works: A sealed drum mounted on a frame that you rotate by hand. Turning the drum mixes materials and adds oxygen without using a pitchfork.
Advantages:
- Produces finished compost in 4-8 weeks with regular turning
- Easier to turn than traditional piles (less strenuous)
- Enclosed design keeps pests out
- Clean, neat appearance
- Good for small to medium households
Considerations:
- Higher initial cost ($100-300+)
- Limited capacity (typically 50-80 gallons)
- Can’t add materials continuously while composting
- May need two tumblers for continuous composting
💡 Tip: Tumblers work best when filled all at once and then left to compost. Consider having two tumblers: one actively composting while you fill the second.
3. Worm Composting (Vermicomposting)
Best for: Apartment dwellers, indoor composting, and those with limited outdoor space.
How it works: Special composting worms (red wigglers) live in a bin and eat your food scraps, producing nutrient-rich worm castings (worm poop) that are excellent fertilizer.
Advantages:
- Perfect for apartments and small spaces
- Can be kept indoors (kitchen, basement, closet)
- Produces high-quality compost faster than traditional methods
- Odorless when properly maintained
- Educational and fun for families with children
- Worms reproduce, so you’ll have a sustainable system
Considerations:
- Requires purchasing red wiggler worms
- Limited capacity (process smaller amounts at a time)
- Worms are sensitive to temperature extremes
- Can’t compost all materials (no citrus, onions, or meat in large quantities)
- Requires slightly more attention and care
💡 Tip: Red wigglers thrive at 55-77°F (13-25°C). Keep bins in temperature-stable locations and start with 1 pound of worms for every pound of daily food scraps.
4. Bokashi Composting
Best for: Apartment dwellers who want to compost meat, dairy, and cooked foods.
How it works: An anaerobic (oxygen-free) fermentation process using special bokashi bran containing beneficial microorganisms. Materials ferment in a sealed bucket for 2 weeks, then are buried in soil to complete decomposition.
Advantages:
- Can compost meat, dairy, and cooked foods
- Very fast fermentation (2 weeks)
- Compact and indoor-friendly
- Minimal odor when properly sealed
- Produces nutrient-rich “compost tea” liquid fertilizer
Considerations:
- Requires purchasing bokashi bran regularly
- Fermented material must be buried in soil (need garden access)
- Two buckets needed for continuous use
- Initial learning curve
💡 Tip: Bokashi is ideal as a pre-composting step. Fermented material can be added to traditional compost bins or buried in garden beds where it finishes decomposing in 2-4 weeks.
5. Trench or Pit Composting
Best for: Gardeners who want the simplest possible method.
How it works: Dig a hole or trench directly in your garden bed, add kitchen scraps, cover with soil, and let it decompose underground.
Advantages:
- Absolutely free and requires no equipment
- Zero maintenance after burying scraps
- Nutrients go directly to plant roots
- No turning or monitoring needed
Considerations:
- Requires garden space
- Takes 6-12 months to decompose
- Can’t access finished compost for other uses
- May attract digging animals if buried too shallow
Step-by-Step: How to Start Composting at Home
Ready to begin? Follow this simple, practical process to create your first compost pile. These steps apply to traditional outdoor bins and piles (the most common beginner method).
1Pick the Perfect Location
Location matters for composting success. Choose a spot that is:
- Sheltered: Protected from extreme sun, wind, and heavy rain
- Convenient: Easily accessible from your kitchen and garden so you’ll actually use it
- Well-drained: Not in a low spot where water pools
- Partially shaded: Some sun is fine, but full sun can dry out the pile too quickly
- On bare soil: Allows beneficial organisms and worms to enter from below
- Level ground: Makes managing and turning easier
💡 Tip: Place your bin within easy reach during rain or snow – you’re more likely to keep composting year-round if it’s convenient!
2Prepare the Base Layer
Start with a foundation layer to improve airflow and drainage at the bottom of your bin:
- Add 4-6 inches of coarse materials like small twigs, branches, or straw
- Alternatively, use rough cardboard pieces
- This “drainage layer” prevents the pile from becoming waterlogged
- It also creates air channels that help oxygen reach deeper layers
Why this matters: Without proper drainage and airflow, your pile can become anaerobic (oxygen-starved), leading to bad smells and slow decomposition.
3Layer Browns and Greens
Build your compost pile using the lasagna layering method:
- Add a 4-6 inch layer of browns (dry leaves, shredded cardboard, straw)
- Add a 2-3 inch layer of greens (kitchen scraps, grass clippings, fresh plant material)
- Lightly moisten each layer with water – aim for “wrung-out sponge” dampness
- Repeat these alternating layers until the bin is one-third to half full
Remember the 2:1 ratio: For every bucket of greens, add about two buckets of browns. This maintains the ideal carbon-to-nitrogen balance.
💡 Tip: Chop or shred larger items into smaller pieces (2-4 inches). Smaller pieces decompose much faster because they have more surface area for microbes to work on.
4Maintain Proper Moisture and Aeration
Microorganisms need oxygen and water to break down materials efficiently. Here’s how to maintain ideal conditions:
Moisture Management:
- Target moisture: Like a wrung-out sponge – damp but not dripping
- Too dry: Sprinkle water while turning the pile
- Too wet: Add more brown materials and turn to incorporate air
- Test: Squeeze a handful – a few drops of water should appear, but it shouldn’t drip freely
Aeration (Adding Oxygen):
- Turn the pile every 1-2 weeks using a pitchfork or garden fork
- Move outer materials to the center and center materials to the outside
- This adds oxygen, which speeds decomposition dramatically
- Turning also redistributes moisture and heat throughout the pile
- A well-aerated pile won’t smell bad – odors indicate lack of oxygen
💡 Tip: If turning is difficult, simply poke holes into the pile with a stake or aeration tool every few days to allow oxygen to penetrate.
5Continue Adding Materials Regularly
Composting is an ongoing process. Here’s how to maintain your system:
- Collect kitchen scraps in a small countertop container, under-sink bucket, or compostable bags
- Empty container 2-3 times per week (more often in summer to prevent fruit flies)
- Always cover fresh scraps with a layer of browns to prevent odors and pests
- Maintain the 2:1 ratio: For every bucket of greens added, add 1-2 buckets of browns
- Keep a brown material supply near your bin for easy access (dry leaves in bags, shredded cardboard)
Kitchen scrap collection tips:
- Use a container with a tight-fitting lid to control odors
- Line with newspaper or compostable bags for easy cleaning
- Keep in the freezer to prevent smells (optional)
- Add a handful of browns in your kitchen container to absorb moisture
6Be Patient and Monitor Progress
Composting is a natural process that takes time. Here’s what to expect:
Timeline:
- Hot composting (active management): 2-3 months in warm weather
- Cold composting (minimal effort): 6-12 months
- Optimal conditions: Larger piles (1 cubic meter+) heat up faster and produce quicker results
Signs of Active Composting:
- Pile heats up (can reach 130-160°F/55-70°C in the center)
- Steam visible when turning on cool mornings
- Volume reduces by 40-60% as materials break down
- Original materials become unrecognizable
What to Monitor:
- Temperature: Insert a compost thermometer to check activity
- Moisture: Check weekly and adjust as needed
- Odor: Should smell earthy; bad smells indicate problems
- Pest activity: Properly maintained piles don’t attract pests
💡 Tip: Don’t worry if composting seems slow in winter. Microbial activity slows in cold weather but will resume when temperatures rise in spring.
How to Know When Compost Is Ready to Use
Finished compost looks, feels, and smells completely different from the original materials you added. Here’s how to know when your compost has fully matured and is ready to benefit your garden.
✅ Signs Your Compost Is Ready:
- Color: Dark brown to almost black, resembling rich soil or coffee grounds
- Texture: Crumbly and loose, not clumpy or wet; breaks apart easily in your hands
- Smell: Earthy, pleasant, sweet forest-floor aroma – never sour, ammonia-like, or rotten
- Appearance: Original materials are unrecognizable except for occasional twigs, sticks, or eggshell fragments
- Temperature: Pile has cooled to ambient outdoor temperature and no longer heating up in the center
- Volume: Pile has shrunk to 40-60% of its original size
- Moisture: Evenly moist but not soggy or dripping
The Squeeze Test
Grab a handful of finished compost and squeeze it:
- It should form a loose ball that crumbles apart when poked
- A few drops of moisture may appear, but it shouldn’t drip
- If it won’t hold together at all, it may be too dry
- If water runs out freely, it’s too wet and needs more time
What About Larger Pieces?
Don’t worry if you see some undecomposed materials like:
- Small sticks and twigs
- Eggshell fragments
- Avocado pits or corn cobs
- Walnut shells
These materials take much longer to break down. You have two options:
- Screen the compost: Use a 1/2-inch mesh screen to separate finished compost from larger pieces
- Return large pieces to a new pile: They’ll eventually break down and give your next batch a head start
Testing Compost Maturity
If unsure whether compost is fully mature, try this simple test:
- Fill a small pot with your compost
- Plant fast-growing seeds like radish or lettuce
- If seeds germinate and grow normally, the compost is ready
- If seeds fail to germinate or seedlings look stressed, let the compost mature longer
💡 Important: Immature compost can actually harm plants by tying up nitrogen during its final decomposition stages. When in doubt, let it age another month.
How to Use Your Finished Compost
Congratulations! You’ve created “black gold” for your garden. Now it’s time to put this nutrient-rich material to work. Here are the best ways to use finished compost:
1. Soil Amendment for Garden Beds
Best time: Spring before planting or fall after harvest
How to use:
- Spread 1-3 inches (2.5-7.5 cm) of compost over the soil surface
- Mix into the top 6-8 inches of soil using a garden fork or tiller
- For new beds, incorporate 25-50% compost by volume
- For established beds, add a 1-2 inch layer annually
Benefits: Improves soil structure, water retention, nutrient content, and microbial activity.
2. Top Dressing or Mulch
Best time: Any time during the growing season
How to use:
- Spread 1-2 inches of compost around existing plants
- Keep compost a few inches away from plant stems and tree trunks
- Apply around vegetables, perennials, shrubs, and trees
- Reapply 2-3 times per growing season for heavy feeders
Benefits: Slow-release fertilization, weed suppression, moisture retention, and temperature regulation.
3. Container and Potting Mix
Best time: When potting up plants or refreshing containers
How to use:
- Mix compost with potting soil at a ratio of 1:3 (1 part compost to 3 parts potting mix)
- For heavy feeders like tomatoes, increase to 1:2 ratio
- Ensure compost is fully mature and screened for containers
- Add perlite or vermiculite if additional drainage is needed
Benefits: Provides nutrients, improves water retention, and reduces the need for synthetic fertilizers.
⚠️ Note: Don’t use 100% compost in containers – it’s too dense and nutrient-rich for most plants.
4. Seed Starting Mix
Best time: When starting seeds indoors or in flats
How to use:
- Use only fine, fully mature, screened compost (pass through 1/4-inch mesh)
- Mix 1 part fine compost with 2 parts peat moss or coco coir and 1 part perlite
- Moisten before filling seed trays
- Avoid using uncomposted materials which can inhibit germination
Benefits: Provides gentle nutrients for seedlings and improves soil structure without burning tender roots.
5. Compost Tea (Liquid Fertilizer)
Best time: Throughout the growing season
How to make:
- Fill a 5-gallon bucket with water
- Add 2-3 cups of finished compost in a mesh bag or old pillowcase
- Let steep for 3-7 days, stirring daily
- Dilute the “tea” to the color of weak tea before using
- Use as a foliar spray or soil drench
Benefits: Quick nutrient boost, beneficial microorganisms, and disease suppression properties.
6. Lawn Top Dressing
Best time: Spring or early fall
How to use:
- Screen compost through 1/2-inch mesh for fine texture
- Spread a thin layer (1/4 inch) over the lawn
- Rake or brush it into the grass
- Water thoroughly after application
Benefits: Improves soil health, reduces thatch, fills in low spots, and creates a greener, healthier lawn.
Storage Tips
If you’re not using compost immediately:
- Store in covered bins or tarped piles to maintain moisture
- Keep moist but not soggy
- Use within 6-12 months for best microbial activity
- Aged compost (1+ years) is excellent for seed starting
Troubleshooting Common Compost Problems
Even with the best intentions, composting issues can arise. Here’s how to identify and fix the most common problems:
Problem: Bad Smell (Rotten, Sulfur-Like, or Ammonia Odor)
Causes:
- Too wet – excess moisture creates anaerobic conditions
- Too many greens – excess nitrogen creates ammonia smell
- Poor drainage – water pooling at the bottom
- Lack of oxygen – pile too compacted
Solutions:
- Add more brown materials (dry leaves, shredded cardboard, paper)
- Turn the pile thoroughly to add oxygen
- Check and improve drainage
- If very wet, remove materials and restart with better browns/greens ratio
- Cover pile to protect from rain
Problem: Dry and Not Breaking Down
Causes:
- Insufficient moisture
- Too many browns, not enough greens
- Materials too large or woody
Solutions:
- Add water while turning – moisten to “wrung-out sponge” consistency
- Mix in green materials (kitchen scraps, grass clippings)
- Chop or shred large pieces into smaller bits
- Turn the pile to redistribute moisture
- Cover to retain moisture
Problem: Attracting Flies, Rodents, or Other Pests
Causes:
- Food scraps left exposed on the surface
- Meat, dairy, or greasy foods in the pile
- Pile too accessible to animals
Solutions:
- Always bury fresh scraps under 4-6 inches of browns
- Remove any meat, dairy, or oily materials
- Turn pile regularly to speed decomposition
- Use a closed bin or add wire mesh barrier
- Add a thick layer of browns on top
- Keep the pile slightly moist, not wet (flies love excess moisture)
Problem: Pile Not Heating Up or Staying Cold
Causes:
- Pile too small (needs minimum 1 cubic meter to retain heat)
- Not enough nitrogen (greens)
- Too dry
- Cold weather (microbial activity slows below 50°F/10°C)
Solutions:
- Build a larger pile (minimum 3ft x 3ft x 3ft / 1m x 1m x 1m)
- Add nitrogen-rich green materials
- Increase moisture to proper levels
- Turn more frequently to generate heat through microbial activity
- Insulate pile with straw or leaves in winter
- Be patient in cold weather – activity will resume in spring
Problem: Lots of Ants in the Pile
Causes:
- Pile too dry (ants prefer dry conditions)
- Not enough activity/heat
Solutions:
- Add water and turn the pile
- Ants usually leave once moisture and activity increase
- Not harmful to composting, just annoying
Problem: Matted, Slimy Grass Clippings
Causes:
- Too many grass clippings added at once
- Clippings form a dense, oxygen-blocking mat
Solutions:
- Mix grass clippings with browns before adding
- Add clippings in thin layers (2-3 inches max)
- Let clippings dry slightly before composting
- Turn frequently to break up mats
Simple Tips for Composting Success
Make composting at home a sustainable, enjoyable part of your routine with these proven tips:
🌟 Top Tips for Beginners:
- Start small: Begin with one bin and focus on mastering the basics before expanding. Success with a small system builds confidence.
- Chop materials: Shred or break larger items into 2-4 inch pieces. Smaller pieces decompose exponentially faster due to increased surface area.
- Keep a kitchen container: A countertop or under-sink bucket makes collecting scraps effortless. Choose one with a tight lid and empty it 2-3 times weekly.
- Stockpile browns: Keep bags of dry leaves, shredded paper, or cardboard near your bin. Most beginners don’t add enough browns – having a ready supply solves this.
- Layer as you go: Every time you add greens, immediately cover with browns. This prevents odors and pests while maintaining the proper ratio.
- Turn regularly: Set a reminder to turn your pile every 1-2 weeks. Consistent turning makes the biggest difference in speed and quality.
- Monitor moisture: Check weekly and adjust. The pile should feel like a wrung-out sponge – damp but never dripping.
- Be patient: Composting is a natural process. Even “slow” compost eventually becomes finished product – it just takes longer.
- Learn from mistakes: Every compost pile teaches you something. Adjust based on what you observe and don’t be discouraged by setbacks.
- Make it convenient: The easier composting is to access and maintain, the more likely you’ll stick with it. Location and accessibility matter!
Remember the Basic Formula
When in doubt, return to these fundamentals:
- ✅ 2 parts browns + 1 part greens (by volume)
- ✅ Moisture like a wrung-out sponge
- ✅ Air through regular turning
- ✅ Patience and observation
Master these basics, and you’ll produce excellent compost consistently!
♻️ Ready to Start Composting Today?
Download our FREE Composting Cheat Sheet with a complete materials list, troubleshooting chart, and month-by-month maintenance calendar!
Get Free Cheat SheetConclusion
Composting at home is one of the most impactful things you can do for your garden and the environment. By transforming kitchen scraps and yard waste into nutrient-rich compost, you’re closing the loop in your own backyard – turning “waste” into a valuable resource that feeds your soil, saves money, and reduces landfill burden.
The beauty of composting lies in its simplicity. With just a basic understanding of greens and browns, proper moisture and aeration, and a little patience, anyone can produce high-quality compost. Whether you choose a traditional outdoor bin, a compact tumbler, indoor worm composting, or even simple trench composting, there’s a method that fits your space, lifestyle, and goals.
Remember, composting is both an art and a science. Don’t be discouraged by initial challenges – every composter has dealt with smelly piles, pest issues, or slow decomposition at some point. These experiences teach you to observe, adjust, and improve. Before long, you’ll develop an intuitive understanding of what your pile needs and when.
Start small, be consistent, and enjoy watching nature’s recycling system work its magic. Your plants, your wallet, and the planet will thank you. Happy composting! 🌱♻️
Frequently Asked Questions About Composting
How long does it take to make compost at home?
A well-maintained compost pile that is turned regularly can produce finished compost in 2-3 months during warm weather. A slower, less frequently turned pile typically takes 6-12 months. Larger piles (around 1 cubic meter) retain heat better and decompose faster than smaller piles. Factors affecting speed include temperature, moisture, aeration, material size, and the ratio of greens to browns.
Can I compost in an apartment without a yard?
Yes! Apartment dwellers have several excellent options: vermicomposting (worm bins) can be kept indoors in a closet, under the sink, or on a balcony; bokashi bins use fermentation to process food scraps indoors; and electric composters can handle small amounts of daily waste. These systems are compact, odor-free when maintained properly, and perfect for small spaces. Some cities also offer community composting programs or curbside compost collection.
Why does my compost smell bad?
Bad smells usually indicate too much moisture or too many green materials (nitrogen-rich scraps), which creates anaerobic (oxygen-free) conditions. Fix this by adding more brown materials like dry leaves or shredded cardboard, mixing the pile thoroughly to add oxygen, and checking that excess water can drain. A properly maintained compost pile should smell earthy and pleasant, like a forest floor – never rotten, sour, or like ammonia.
What is the ratio of greens to browns in composting?
The ideal ratio is approximately 2 parts brown materials to 1 part green materials by volume (not weight). Browns are carbon-rich and dry materials like leaves, cardboard, and paper. Greens are nitrogen-rich and moist materials like food scraps and grass clippings. This 2:1 ratio provides the optimal carbon-to-nitrogen balance that keeps the pile active and decomposing efficiently without becoming too wet, smelly, or attracting pests.
Can I put citrus peels and onions in my compost?
Yes, citrus peels and onions are safe to compost, though there are some considerations. While myths suggest they’re harmful, they can actually be composted successfully. However, use them in moderation as large quantities can slow decomposition, and they may temporarily deter worms in vermicompost bins. Chop citrus and onions into smaller pieces and mix well with other materials for best results. The acidity neutralizes during decomposition.
Do I need to add water to my compost pile?
Your compost pile should be as moist as a wrung-out sponge – damp to the touch but not dripping wet. If materials look dry and dusty, sprinkle with water while turning the pile. If too wet and soggy, add more brown materials and improve drainage. Proper moisture is essential because microorganisms need water to break down organic matter efficiently. Check moisture weekly and adjust as needed, especially after dry spells or heavy rain.
Can I compost meat and dairy products?
It’s not recommended to compost meat, fish, bones, dairy products, or greasy foods in a typical home compost bin. These materials attract pests like rats, raccoons, and flies; create strong, unpleasant odors; take much longer to decompose; and can harbor harmful pathogens that survive in home compost systems. Stick to plant-based kitchen scraps, coffee grounds, eggshells, and yard waste for safe, successful home composting. Industrial composting facilities can handle these materials.
How do I know when my compost is ready to use?
Finished compost is dark brown to black in color, has a crumbly texture similar to rich soil, smells earthy and pleasant (like a forest floor), and you can’t recognize the original materials except for perhaps some sticks or eggshell fragments. The pile should be at ambient outdoor temperature, not heating up in the center anymore. If some pieces are still large or undecomposed, screen the compost through 1/2-inch mesh and return the larger bits to a new pile.
Can I compost weeds and diseased plants?
You can compost weeds that haven’t gone to seed, but avoid weeds with mature seeds or invasive species that might sprout later. Diseased plants should not be added to home compost bins unless your pile consistently reaches 140-160°F (60-70°C) for several days, which kills most pathogens and weed seeds. Most home composters don’t achieve these temperatures reliably. When in doubt, dispose of diseased plants in municipal yard waste or burn them if allowed in your area.
Should I add worms to my compost pile?
You don’t need to add worms to an outdoor compost pile – they’ll find their way in naturally from the surrounding soil. However, if you’re doing vermicomposting (worm composting) in a closed bin or indoors, you’ll need to purchase red wiggler worms specifically bred for composting. Regular earthworms won’t thrive in confined bins. For traditional outdoor composting, simply ensure your bin has contact with bare soil and local worms will colonize naturally.
About Plant Blueprint
Plant Blueprint is your trusted source for expert gardening advice, sustainable growing practices, and plant care guides. Our team of horticulturists and passionate gardeners is dedicated to helping you create thriving, eco-friendly gardens through proven methods like composting, organic gardening, and soil health management.