
Tissue culture plants exist in a sterile, high-humidity, sugar-supplemented artificial environment that bears zero resemblance to your windowsill.
Micropropagated clones grow in sealed flasks at 95-100% relative humidity, fed by sucrose-enriched agar medium, under controlled photoperiods with zero pathogenic pressure. They develop thin, translucent leaves with underdeveloped cuticular wax—the waxy coating that prevents water loss in normal plants.
The problem: Ambient indoor air operates at 30-50% RH. When you remove a tissue culture plant from its flask and place it directly into this environment, transpiration rates exceed water uptake capacity by 300-500%. The plant experiences catastrophic cellular dehydration within 24-72 hours—a phenomenon known as flask shock.
The solution: An 8-week environmental stepping protocol that gradually transitions the clone from sterile laboratory conditions to ambient indoor horticulture through controlled humidity reduction, substrate inoculation, and cuticular wax development.
- Weeks 1-2: Total isolation in sealed 100% humidity dome, sterile substrate, LED photoperiod establishment
- Weeks 3-4: Gradual humidity reduction through controlled venting, introduction of diluted fertilization
- Weeks 4-8: Complete dome removal, hardening off to ambient conditions, cuticular wax maturation
- Week 8+: Transplant to permanent substrate with slow-release fertilizer application, transition to standard care protocols
Phase 1: Extraction and Sterilization—The Wash Protocol
The agar medium that sustained the plant in-vitro becomes a contamination vector the moment it contacts non-sterile air.
Tissue culture agar contains 2-4% sucrose (table sugar) as a carbon source for the developing plantlet. In the sealed sterile flask, this sugar supports growth. In ambient conditions with airborne fungal spores and bacteria, it becomes a microbial substrate—what we term “The Penicillin Risk.” Within 12-24 hours of flask opening, residual agar on roots will culture Aspergillus, Penicillium, and Rhizopus fungi that rapidly colonize and rot the root system—the same anaerobic root rot that kills overwatered houseplants.
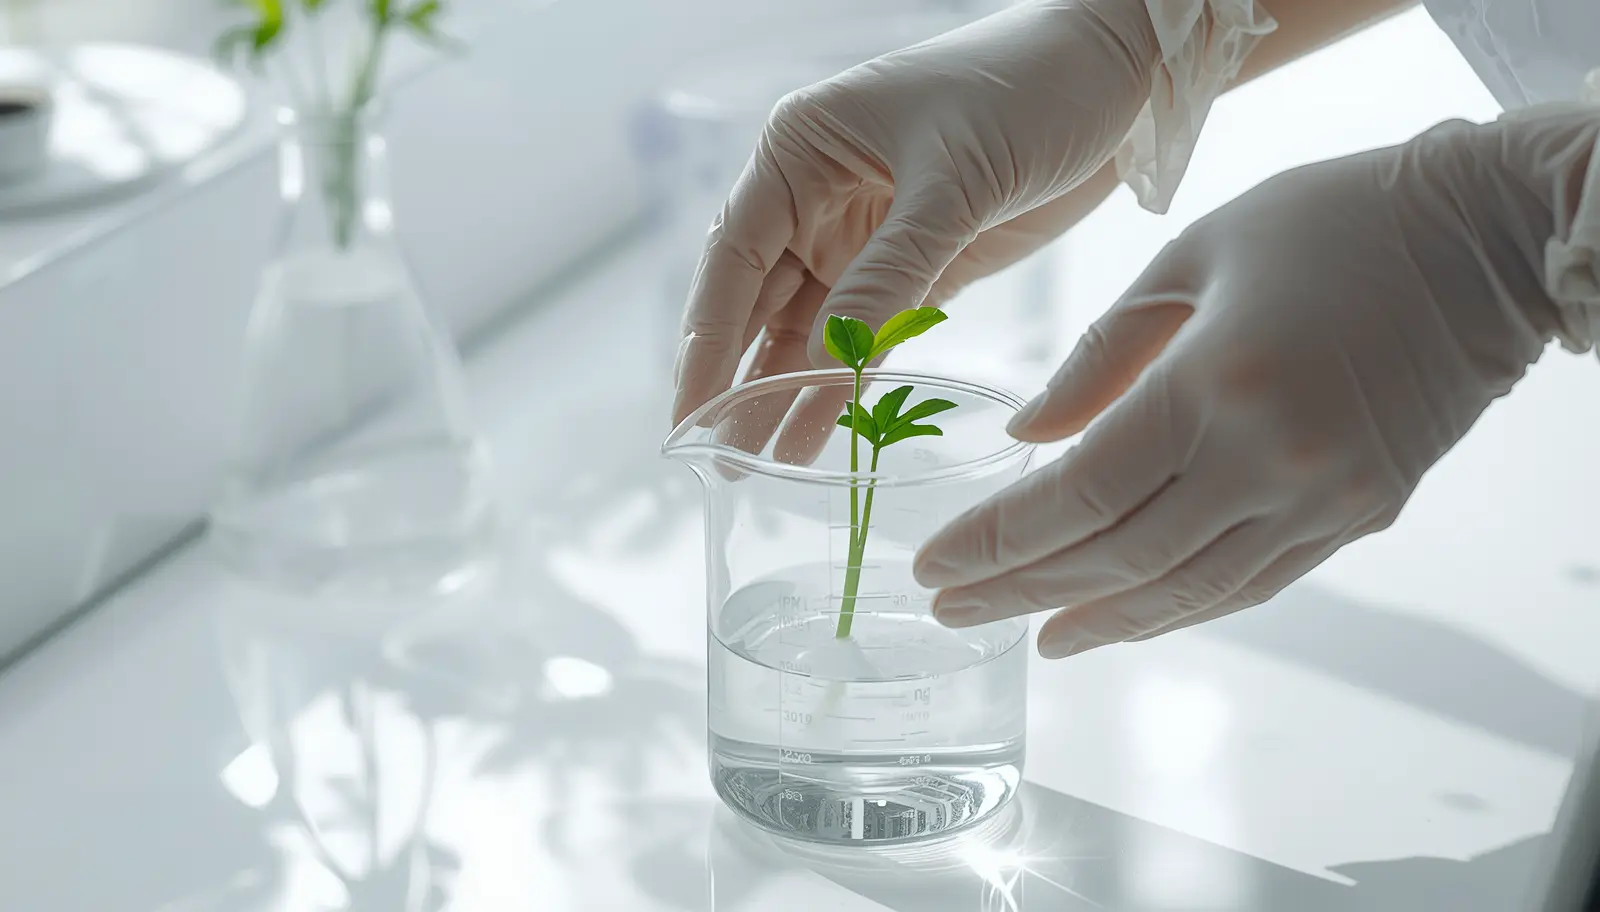
The Sterile Extraction Procedure
🧪 DEFLASKING AND ROOT SANITIZATION
- Prepare workspace: Clean, disinfected surface. Have ready: distilled water in bowl, clean tweezers or forceps, paper towels, IBA rooting hormone powder, sterile substrate
- Extract plant: Carefully remove plant from flask. Avoid damaging stems/leaves. In-vitro tissue is extremely fragile—handle by root mass only, similar to handling delicate aroid cultivars
- Initial rinse: Submerge entire root system in room-temperature distilled water. Gently agitate to dislodge agar chunks
- Complete wash: Under gentle running distilled water, carefully separate roots and remove ALL visible agar. Roots should be clean white/tan with zero gel residue. This step is non-negotiable—any remaining agar = fungal colonization within 24 hours
- Optional root pruning: Lab-grown roots are thin, fragile, and poorly adapted to substrate. Pruning 30-50% of weak root mass stimulates development of robust soil-adapted roots—similar to the pruning strategy for propagating Monstera cuttings. Cut with sterilized scissors 1/2 inch from root crown
- Pat dry: Gently blot roots with clean paper towel. Do not desiccate—just remove excess water
Critical timing: Complete entire wash and planting procedure within 30 minutes of flask opening. Extended air exposure begins desiccation process—in-vitro leaves lose turgor rapidly in ambient humidity, experiencing the same cellular collapse seen in severely dehydrated succulents.
⚠️ The Penicillin Risk
Sugar-rich agar is a growth medium for both plants and microorganisms.
The same sucrose that fed your clone in sterile conditions will feed fungal and bacterial colonies in non-sterile ambient air. Penicillium spores (common indoor mold) germinate within 6-12 hours on agar residue, producing visible blue-green colonies within 24-48 hours. Root rot follows within 3-5 days. The wash protocol eliminates this carbon source, removing the substrate for microbial colonization. This single step increases survival rate from 40-60% (unwashed) to 85-95% (properly washed). For additional pathogen prevention strategies, see our hydrogen peroxide root sterilization guide.
Phase 2: Substrate Engineering and Hormone Application
The transition substrate must balance three requirements: sterility (minimal microbial load), drainage (prevents anaerobic rot), and structural stability (supports fragile stems).
Unlike standard tropical houseplant substrates or succulent mixes, tissue culture acclimation substrate prioritizes inorganic components for maximum aeration and minimal pathogen risk.
Substrate Comparison Matrix
| Substrate Type | Composition | Advantages | Disadvantages | Recommendation |
|---|---|---|---|---|
| 50/50 Fluval Stratum + Perlite | Volcanic soil (baked clay granules) + expanded volcanic glass for aeration | Excellent drainage (60%+ air-filled porosity). Neutral pH. Easy unpotting without root disturbance. Low pathogen load from heat processing. | More expensive than coco coir. Requires sourcing aquarium substrate (Fluval Stratum). | Primary choice. Minimizes rot risk during vulnerable acclimation period. Allows clean transplant to permanent substrate at week 8 without root damage. |
| Compressed Coco Coir Plugs | Dehydrated coconut husk fiber in peat-like pellets | Aggressive root penetration—promotes rapid growth. Readily available. Budget-friendly. | High rot risk if overwatered (retains 8-10x weight in water). Difficult to unpot—roots integrate into fiber matrix, causing damage during transplant. | Secondary choice. Use only if Fluval Stratum unavailable. Requires strict moisture control. Plan to keep plant in plug long-term or accept root loss during transplant. |
IBA Rooting Hormone Application
Indole-3-butyric acid (IBA) is a synthetic auxin that triggers adventitious root formation at the application site.
According to Penn State Extension research on rooting hormones, IBA outperforms natural auxins (IAA) in tissue culture applications due to greater chemical stability and localized action at wound sites. The same hormone manipulation used in Fiddle Leaf Fig notching protocols applies here—but instead of disrupting apical dominance, we’re stimulating basal root initiation.
🧬 HORMONE TREATMENT PROTOCOL
- Use powdered IBA rooting hormone (0.1-0.3% concentration)—brands like HydroDynamics Clonex or Garden Safe TakeRoot
- Dip only the basal 1/4 inch of the stem/root crown into powder
- Tap off excess—light coating only, not caked-on
- Plant immediately into pre-moistened substrate
- Critical: Keep crown (where stem meets roots) above substrate line—burying crown causes stem rot within 7-14 days, identical to the trunk rot failure mode in Pachira aquatica
- Gently firm substrate around roots to eliminate air pockets
- Water with distilled water until substrate uniformly moist but not waterlogged
Phase 3: The 8-Week Environmental Stepping Protocol
This is the critical phase where gradual vapor pressure deficit (VPD) adjustment allows cuticular wax development and stomatal regulation maturation.
The same environmental physics that govern tropical plant humidity requirements apply here—but tissue culture plantlets start with zero adaptive capacity and must build tolerance incrementally.
Weeks 1-2: Total Isolation (100% RH Maintenance)
- Humidity: 95-100% RH (sealed dome, no venting)
- Light: LED grow lights 12-18 inches above dome, 16 hours on / 8 hours off
- Temperature: 20-24°C (68-75°F) constant
- Watering: Substrate stays moist—mist with distilled water if surface dries
- Fertilization: None—plant is still metabolizing residual in-vitro nutrients
⚠️ Critical Dome Safety Warning
NEVER place sealed humidity dome in direct sunlight.
The greenhouse effect inside a sealed dome can raise internal temperature to 40-50°C (104-122°F) within 30-60 minutes of direct sun exposure. This causes catastrophic protein denaturation and cellular death. Tissue culture plants have zero heat tolerance—they’ve never experienced temperature fluctuation. Use artificial LED lighting exclusively during dome phase. Natural window light acceptable only after dome removal in Week 4+. This is the same thermal damage mechanism that kills Dracaena trifasciata placed in hot south-facing windows.
Week 1-2 monitoring: Check daily for mold development on substrate surface or leaf tissue. If mold appears, increase air circulation slightly by cracking dome 1/8 inch for 2-4 hours daily, then reseal. Remove any affected leaves immediately with sterilized scissors. For fungal prevention strategies, see our biological pest control protocols.
Weeks 3-4: The Humidity Transition (Controlled Venting)
- Humidity: 70-85% RH (gradual vent opening over 14 days)
- Venting schedule: Day 1-3: crack 1/4 inch. Day 4-7: crack 1/2 inch. Day 8-10: crack 1 inch. Day 11-14: remove top, leave base tray
- Light: Same 16/8 photoperiod, can reduce distance to 10-12 inches as leaves harden
- Watering: Reduce frequency—allow top 1/4 inch to dry between waterings. Similar moisture monitoring used for high-humidity aroids
- Fertilization: Begin Week 3: diluted liquid fertilizer (5-5-5 or 7-9-5) at 1/4 strength, once weekly
Cuticular wax development: During this phase, leaves transition from thin/translucent to thicker/glossier as epicuticular wax layer forms. This is visible as increased leaf rigidity and reduced wilting during venting. According to USDA research published in Plant Physiology, cuticular wax synthesis requires 14-21 days of gradual humidity reduction to achieve functional transpiration control in micropropagated species. If severe wilting occurs when dome is opened, slow venting schedule—add 3-5 extra days between increases.
Weeks 4-8: Hardening Off (Ambient Adaptation)
- Humidity: Ambient room RH (40-60%)—dome completely removed
- Light: Can transition to natural window light (bright indirect) or continue LED supplementation. For light intensity guidelines, see our houseplant PPFD optimization guide
- Temperature: Ambient room temperature acceptable (18-26°C / 65-80°F)
- Watering: Standard houseplant protocol—water when top 1-2 inches dry, using distilled or RO water (same water purity standards as carnivorous plants)
- Fertilization: Increase to 1/2 strength liquid fertilizer, weekly
Week 8 transplant: By end of Week 8, root system should have colonized entire starter substrate volume. Visible roots at drainage holes indicate readiness. Transplant to permanent pot with quality potting mix + slow-release fertilizer (Osmocote 14-14-14). After transplant, resume normal care appropriate to species—whether Monstera Thai Constellation, Monstera Albo, Philodendron Birkin, or other rare cultivars commonly sold as tissue culture clones.
Frequently Asked Questions
Can I skip the humidity dome phase?
No. Attempting direct ambient acclimation results in 80-95% mortality rate within 72 hours. In-vitro plants lack functional stomatal control and cuticular wax protection—they cannot regulate water loss in low humidity. The dome phase is non-negotiable for survival. The only exception: if you have a controlled grow tent with adjustable humidifier maintaining 90-100% RH, this can substitute for dome. For detailed humidity control strategies, see our comprehensive humidity management guide.
What if mold appears during acclimation?
Increase air circulation by extending daily venting time. Remove affected plant material immediately with sterilized scissors. Reduce watering frequency—substrate should be moist, not wet. Light surface mold on substrate is manageable; extensive mold on leaves/stems requires emergency intervention (sulfur dust or dilute hydrogen peroxide spray 1:10 with distilled water). Prevention: ensure complete agar removal during wash protocol. For fungal prevention, consider integrating biological control agents like Pinguicula near acclimation setup to capture fungus gnats that spread spores.
Why use distilled water instead of tap water?
Tissue culture plants are extremely sensitive to mineral accumulation during vulnerable acclimation phase. Tap water minerals (calcium, magnesium, chlorine) at 200-400 ppm TDS can cause leaf necrosis and root damage in plants adapted to sterile, mineral-free agar medium. According to Oregon State University Extension water quality research, tissue culture plantlets show 40-60% higher survival rates with TDS <50 ppm during first 4 weeks post-deflasking. Use distilled, RO, or rainwater for first 4-6 weeks. After hardening off complete, can transition to tap water gradually if TDS <200 ppm—the same water quality threshold used for sensitive aroids and velvet-leaf Philodendrons.
The Lab Verdict: Biological Sanitization Meets Environmental Engineering
Tissue culture acclimation is the intersection of microbiology and horticulture—bridging sterile laboratory propagation with ambient indoor cultivation.
The protocol operates on three principles: (1) Elimination of contamination vectors through complete agar removal, (2) Gradual VPD adjustment via humidity stepping to allow cuticular wax maturation, and (3) Controlled substrate inoculation with beneficial microorganisms while preventing pathogenic colonization.
The Urban Lab 8-Week Protocol: Sterile extraction with complete wash, IBA hormone application, planting in high-drainage substrate (50/50 Fluval Stratum/perlite), sealed dome maintenance at 100% RH for 14 days, gradual venting over 14 days, complete dome removal by Day 28, and ambient hardening through Week 8. Adherence to this timeline produces 85-95% survival rates—versus 20-40% survival with rushed or improvised acclimation.
This same methodological precision used in surgical plant modification, emergency pathogen intervention, and genetic mutation management applies to micropropagation acclimation. The difference between a $200 tissue culture clone surviving or dying is protocol adherence—not luck, not intuition, not “green thumb.” Just data, discipline, and environmental control.
Flask shock is preventable. Patience and protocol precision are the only requirements.
The Lab | Micropropagation Protocols Division
Tissue Culture Acclimation Protocol | Published: March 2026