
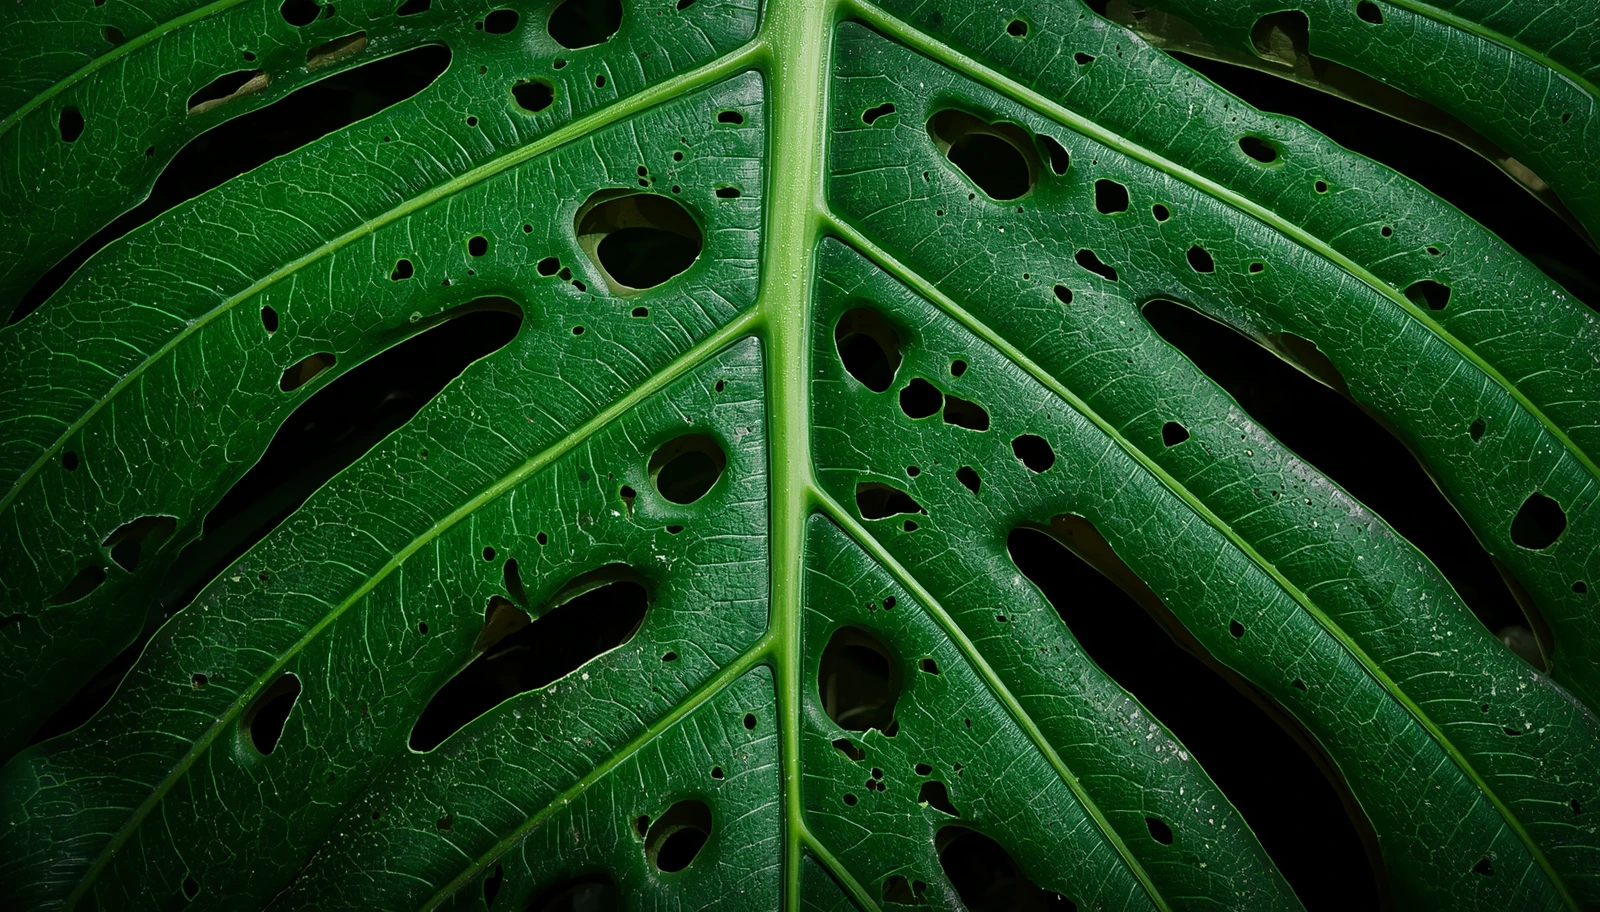
The vine is growing. New leaves emerge every 10 to 14 days, trailing stems extending another 15 to 20cm across the shelf. But the leaves are getting smaller. The first leaves produced after purchase measured 12cm across with 4 to 6 interior perforations. The newest leaves measure 6cm with no perforations at all — smooth, juvenile, undifferentiated blades that bear no resemblance to the mature fenestrated foliage in every photograph that inspired the purchase.
This is the trailing regression cascade: a predictable, hormonally governed developmental reversal that occurs in every Monstera adansonii denied vertical physical anchorage. The plant is not sick. It is executing its evolutionary programming with complete fidelity — and that programming dictates that without thigmotropic contact against a vertical surface, the vine remains in a juvenile hormonal state dominated by gibberellin, producing smaller and smaller leaves with progressively fewer fenestrations at each successive node.
The concurrent diagnostic panic: lower leaves yellowing with a patchy, mottled pattern that sends growers into spirals of Monstera Mosaic Virus research, expensive diagnostic tests, and premature disposal of healthy specimens. The vast majority of these cases are magnesium deficiency from acidic peat substrates locking out mineral uptake — a $5 correction masquerading as an incurable viral pathology.
Monstera adansonii care for fenestration scaling is a structural problem requiring structural solutions: vertical support engineering that activates thigmotropic hormonal pathways, substrate macro-porosity correction enabling root zone oxygenation, and targeted micronutrient intervention distinguishing nutritional failure from viral pathology before any irreversible disposal decision is made.
- Core mechanism: Thigmotropic aerial root contact with a vertical surface triggers auxin redistribution to the apical meristem — upregulates leaf blade expansion and interior fenestration development
- Trailing regression: Unanchored vine maintains juvenile gibberellin-dominant hormonal profile — each successive leaf smaller than previous, fenestrations absent or diminishing
- Structural intervention: Sphagnum moss pole or cedar totem + insulated U-shaped anchoring staples securing aerial nodes to moist surface triggers morphological maturation within 4 to 12 weeks
- Chlorosis differential: Magnesium deficiency (systematic interveinal pattern, responds to MgSO4) vs mosaic virus (irregular mottling, zero nutritional response) — test before disposal
- Substrate requirement: 40% orchid bark + 30% pumice + 20% coco coir + 10% worm castings achieving 55 to 65% AFP — peat-based compaction causes root asphyxiation suppressing whole-plant metabolic capacity
📋 Table of Contents
- Why Are Monstera adansonii Leaves Getting Smaller and Losing Their Holes?
- Why Does Monstera adansonii Need a Climbing Support to Produce Fenestrated Leaves?
- What Is the Difference Between a Trailing and a Climbing Monstera adansonii?
- How Do You Trigger Fenestration Scaling in Monstera adansonii?
- What Equipment Do You Need for the Monstera adansonii Scaling Protocol?
- What Environmental Conditions Maximize Fenestration Development After the Protocol?
- Frequently Asked Questions
- The Lab Verdict
Why Are Monstera adansonii Leaves Getting Smaller and Losing Their Holes?
Two independent symptom pathways define the chronically mismanaged Monstera adansonii: morphological regression from trailing orientation, and nutritional pathology routinely misidentified as incurable viral infection.
Symptom 1: The Trailing Regression Cascade
Sequential leaf size reduction in trailing M. adansonii follows a predictable hormonal trajectory — each new leaf produced in unanchored trailing orientation is measurably smaller than its predecessor.
The cascade timeline: At purchase or propagation, leaf blades typically measure 8 to 15cm length with 2 to 8 interior perforations — morphology reflecting the anchored, climbing conditions of the nursery environment. Within 4 to 8 weeks of trailing cultivation without vertical support, new leaves emerge 15 to 20% smaller with reduced fenestration count. By months 3 to 6, leaves may measure 4 to 6cm — less than half the original size — with zero interior perforations and minimal marginal slitting. The vine appears healthy and actively growing, but each growth event produces structurally inferior output.
The internodal component: simultaneously with leaf regression, internode length increases. Normal climbing M. adansonii produces internodes of 4 to 8cm. Trailing vines produce 10 to 20cm internodes as gibberellin-mediated elongation accelerates without thigmotropic anchoring cues. The vine becomes visibly stretched — long, thin canes with small, widely spaced leaves. These elongated internodes are mechanically weaker and more susceptible to physical damage and pathogen entry.
Symptom 2: Interveinal Chlorosis — Deficiency or Viral Pathology?
⚠️ Critical Differential Diagnosis: Magnesium Deficiency vs Mosaic Virus
Premature disposal of healthy specimens from misdiagnosed viral pathology is one of the most common and costly errors in Monstera adansonii cultivation.
Magnesium Deficiency (Highly Common — Correctable):
- Visual pattern: Systematic interveinal chlorosis — yellowing occurs specifically between leaf veins while veins themselves remain green, creating a fishbone or netted green-on-yellow pattern
- Progression direction: Basal to apical — oldest (lowest) leaves show symptoms first as magnesium is a mobile nutrient remobilized from older tissue toward new growth when systemically deficient
- Cause: Substrate pH below 5.5 precipitates magnesium into insoluble compounds unavailable for root uptake (pH lockout). Peat-based substrates acidify over time reaching pH 4.5 to 5.0 within 12 to 18 months. Calcium-heavy irrigation water creates Mg:Ca antagonism reducing Mg uptake even at adequate pH
- Confirmation test: Apply chelated MgSO4 substrate drench at 1000 ppm and 500 ppm foliar spray. Interveinal chlorosis improvement visible in 14 to 21 days confirms magnesium deficiency. Full recovery in 6 to 10 weeks
- Prognosis: Fully correctable with substrate pH adjustment to 5.8 to 6.5 and chelated Mg supplementation. See complete pH lockout and nutrient bioavailability protocols
Monstera Mosaic Virus / Abutilon Mosaic Virus (Uncommon — Incurable):
- Visual pattern: Irregular, non-systematic mottling with no relationship to vein architecture. Color variation includes yellow, pale green, and dark green patches distributed randomly across the leaf blade. Distorted leaf shape, necrotic patches, and mosaic-patterned chlorosis not following interveinal distribution
- Progression: Non-systematic — new leaves may show variable infection intensity. Does not follow oldest-to-newest progression. May appear on a single leaf while surrounding foliage remains normal
- Zero nutritional response: MgSO4 application, pH correction, and complete nutritional overhaul produce no symptom improvement. This is the definitive differentiating test
- Prognosis: No cure available. Infected plants should be isolated permanently — whiteflies, thrips, and mechanical contact transmit the virus to healthy specimens. Consider disposal if collection risk is deemed unacceptable
Why Does Monstera adansonii Need a Climbing Support to Produce Fenestrated Leaves?
Understanding the evolutionary biology of Monstera adansonii care reveals why structural support is not an optional enhancement but a prerequisite for achieving adult leaf morphology.
Hemiepiphytic Thigmotropism: The Climbing Imperative
Monstera adansonii is a hemiepiphyte — it germinates terrestrially and climbs toward host tree trunks using negative thigmotropism, with aerial root mechanoreception triggering the hormonal shifts that produce mature fenestrated morphology.
In native habitat across Central and South American tropical forests, juvenile M. adansonii vines grow in a predictable pattern: germination on the forest floor, initial trailing growth in low light conditions, then contact with a host tree trunk triggering an immediate thigmotropic response. Aerial roots bearing mechanoreceptive cells detect tension and compression against the bark surface — this physical stimulus activates a signaling cascade. As documented by University of Wisconsin Extension’s research on Monstera physiology, thigmotropic contact in climbing aroids shifts the auxin:gibberellin ratio systemically — auxin concentration at the apical meristem increases while gibberellin-mediated internode elongation decreases. The result: leaf blade expansion upregulates, producing larger leaves with increasing fenestration complexity at each successive node as the vine climbs into the canopy.
The fenestration function: interior perforations in adult M. adansonii leaves are not developmental defects — they are adaptations reducing wind resistance and optimizing light interception in the upper canopy. As documented by Penn State Extension’s research on tropical plant adaptations, perforation patterns in climbing aroids develop in response to the mechanical and photobiological environment of upper canopy positions. Fenestrations appear when thigmotropic anchorage signals combine with high DLI to indicate the plant has reached canopy light levels warranting adult morphology investment. Without the thigmotropic input component, adequate light alone produces larger leaves but limited interior perforation development.
Macroporosity vs Perched Water Tables: Root Asphyxiation
Peat-based substrates create a perched water table — a zone of continuous saturation at the pot base that eliminates aerobic root respiration, directly suppressing the metabolic output required for large-leaf adult morphology construction.
The physics: standard peat mixes contain 60 to 70% fine particles under 2mm diameter with capillary forces strong enough to retain water against gravity throughout the substrate column. Air-filled porosity drops from 15 to 20% at surface to near-zero in the bottom 30% of pot depth. Roots growing into this zone encounter anaerobic conditions within hours of watering. Root cortex cells begin anaerobic respiration within 3 to 5 days of hypoxia, producing ethanol as a metabolic byproduct. Ethanol accumulation causes chemical burn from within root tissue — brown necrosis progressing proximally. For emergency assessment of existing root damage, see the root rot surgical triage protocol.
The metabolic consequence: a plant with 40 to 60% of its root mass in chronic anaerobic stress operates at significantly reduced mineral uptake capacity. Calcium (cell wall construction), magnesium (chlorophyll center atom), potassium (osmotic regulation), and silicon (epidermal fortification) deficiencies develop simultaneously even when substrate mineral content is adequate — root failure limits uptake, not substrate supply. Large fenestrated leaves require massive investment in chlorophyll, structural proteins, and vascular tissue. A plant operating at 50% metabolic capacity from root asphyxiation cannot manufacture them regardless of how well all other conditions are managed.
What Is the Difference Between a Trailing and a Climbing Monstera adansonii?
The phenotypic divergence between trailing and vertically anchored M. adansonii reflects a complete hormonal and morphological system shift — not a matter of degree but of developmental category.
| Physiological Parameter | 🔴 Trailing Vector (Unanchored) | 🟢 Vertical Vector (Thigmotropic Anchor) |
|---|---|---|
| Hormonal Profile | High gibberellin dominance — promotes internode elongation, stem extension, juvenile leaf morphology. Low auxin at apical meristem — insufficient for leaf blade expansion signaling. Hormonal state identical to juvenile seedling stage. | High auxin concentration at apical meristem — thigmotropic mechanoreception shifts IAA distribution toward apex. Gibberellin activity reduced at internodes. Hormonal balance equivalent to canopy-position mature vine. |
| Morphological State | Juvenile / Progressive Diminishment. Each successive leaf smaller than previous. Fenestrations absent or regressing. Leaf blade surface area decreasing per growth event. | Mature / Progressive Scaling. Each successive leaf larger than previous as vine climbs higher. Fenestrations developing and increasing in size and number. Leaf blade surface area expanding per growth event. |
| Internodal Spacing | Elongated / Spindly — 10 to 20cm between nodes. Gibberellin-mediated elongation without thigmotropic check. Mechanically weak, susceptible to breakage. Produces architecturally unstable vine requiring frequent repositioning. | Compact / Structural — 4 to 8cm between nodes. Thigmotropic anchoring suppresses unnecessary internode elongation. Mechanically robust cane structure. Self-supporting against pole without supplemental staking. |
| Fenestration Count | 0 to 2 marginal slits on largest leaves. Interior perforations absent. Even large trailing leaves at DLI 10+ show no interior fenestration development — light alone is insufficient without the thigmotropic component. | 2 to 4 interior perforations at initial climbing stage progressing to 6 to 12+ on upper leaves after 3 to 6 months of anchored growth. Fenestration count increases with each successive leaf node as plant climbs into higher DLI zone. |
| Aerial Root Development | Aerial roots extend into air without an attachment target. Desiccate rapidly, lose velamen viability within 2 to 4 weeks. Non-functional for mineral or moisture uptake. Plant increasingly dependent on substrate root system alone. | Aerial roots penetrate moist sphagnum pole surface within 2 to 6 weeks of contact. Velamen tissue remains hydrated and functional. Supplemental moisture and mineral uptake from pole surface reduces substrate dependency during active leaf construction. |
| Leaf Blade Texture | Thin, relatively flexible — less mesophyll cell investment per unit area. Cuticle wax deposition minimal. Leaf surfaces more susceptible to mechanical damage and pathogen entry. | Thicker, firm, leathery texture — dense mesophyll investment supported by high auxin-stimulated cell division activity. Pronounced cuticle. Greater physical resistance to mechanical damage and pathogen penetration. |
| Response to DLI Increase | Leaf size increase modest — 5 to 15% larger at DLI 15 vs DLI 8. No interior fenestration development regardless of light intensity. Light alone cannot substitute for thigmotropic hormonal input. | Synergistic response — DLI increase combined with thigmotropic anchoring produces dramatic scaling. DLI 10 to 15 with active climbing produces leaves 3 to 5x larger than trailing specimens at the same DLI. Light and thigmotropism act as co-inducers of adult morphology. |
How Do You Trigger Fenestration Scaling in Monstera adansonii?
Activating the thigmotropic hormonal shift in Monstera adansonii requires precise mechanical intervention — aerial root nodes must achieve sustained physical contact with moist substrate surface for mechanoreceptive signaling to initiate.
Pre-Protocol: Vine Assessment
🔍 Vine Audit Before Structural Intervention
- Aerial root inventory: Identify all bare aerial root nodes along the vine — short brown protrusions at each node, distinct from petioles. Nodes with 5 to 20mm aerial root nubs are optimal for anchoring. Nodes with no visible aerial root development require 4 to 8 weeks of humidity exposure before anchoring produces a full thigmotropic response
- Vine flexibility assessment: Gently test primary stem flexibility before bending toward the pole. Older lignified stems may crack if forced into sharp angles — redirect gradually over multiple weeks using incremental repositioning
- Root health verification: If the plant has been in standard peat substrate for more than 12 months, extract and examine the root mass before installing the pole. Repotting into macro-porous substrate should occur simultaneously with pole installation — root health correction enables the metabolic output required for thigmotropic response to produce larger leaves
The 4-Step Thigmotropic Structural Scaling Protocol
✅ Step-by-Step Protocol
Step 1: Vertical Vector Alignment — Pole Installation
Install a continuously moist sphagnum moss pole or rough-sawn cedar totem (unfinished, untreated wood only — finishes and preservatives are phytotoxic) directly adjacent to the primary root mass, positioned with the pole apex extending 30 to 50cm above the current highest leaf node.
- Sphagnum moss pole specifications: Minimum 5cm diameter, constructed from long-fiber sphagnum moss packed around a PVC pipe core with open drainage holes at the base. Commercial options: extendable moss pole systems (Mossify, Plant Support Co.) allowing 30 to 60cm additions as the vine climbs — critical because the pole apex must always extend above the current highest node. Single-section poles become limiting within 6 to 12 months of active climbing. DIY: wrap 1.5 to 2 inch PVC with 5 to 7cm sphagnum layer, secure with jute twine. Sphagnum must remain continuously moist — aerial root velamen requires sustained humidity for penetration to occur
- Cedar totem alternative: Rough-sawn cedar boards (not planed or sanded) provide natural textural grip surface similar to bark. Drill irregular holes through the board at 5 to 8cm intervals to increase moisture retention capacity. Cedar contains natural antimicrobial compounds preventing fungal colonization on the moist surface
- Pole positioning: Insert pole base 10 to 15cm into substrate directly behind the primary stem. The pole must be vertical (use a level) — angled poles redirect the vine laterally rather than upward, reducing thigmotropic response efficiency
- Light gradient alignment: Position the primary light source (grow light or window) above the pole apex, not beside the vine. M. adansonii combines negative thigmotropism (toward contact surface) with positive phototropism (toward light) — both vectors should point upward for maximum growth rate. See DLI measurement and grow light positioning protocols
Step 2: Aerial Node Anchoring — Mechanoreceptive Contact
Thigmotropic signaling requires sustained physical tension and compression at aerial root nodes — passive proximity to the pole is insufficient. Nodes must be actively secured in contact with the moist surface.
- Anchoring tool: Insulated U-shaped horticultural staples (plant anchoring pins), 3 to 5cm width. Non-elastic — rigid staples maintain consistent contact pressure. Coated with rubber or plastic insulation to prevent wire from cutting into aerial root tissue
- Application technique: Position staple over the bare aerial root node (the node itself — not the petiole or leaf blade), press the node gently but firmly flush against the pole surface, drive the staple into moss or cedar securing the node in contact. The node should feel firmly against the surface when tested with a fingertip — not floating 1 to 2mm away
- Anchoring priority: Secure every aerial root node visible on the climbing section. Nodes within 15cm of the apical meristem are highest priority — these are closest to the active growth zone where hormonal signals most rapidly influence new leaf production
- Petiole protection: Never pass an anchoring staple over a petiole. Petioles are vascularly sensitive — compression restricts phloem and xylem flow to the attached leaf blade, causing localized nutrient deficiency and eventual leaf drop
Step 3: Substrate Macro-Porosity Correction
Simultaneous substrate correction maximizes thigmotropic protocol effectiveness — root health restoration provides the metabolic capacity required to manufacture larger, fenestrated adult leaves once hormonal signaling activates.
- Target substrate formula: 40% chunk orchid bark (1/4 to 1/2 inch), 30% pumice (medium grade, 6 to 12mm), 20% coco coir husks (not fine coir — coarse chunk format), 10% premium worm castings (provides CEC and biological activity without waterlogging risk). See the complete aroid substrate engineering protocol
- Physical performance targets: Air-filled porosity 55 to 65% immediately post-watering, complete drainage within 3 to 5 minutes, substrate reaches 30 to 40% moisture within 5 to 7 days
- Forbidden components: Fine sand under 2mm (packs to near-zero porosity), unperforated peat blocks (retains water 10 to 14 days at base), fine vermiculite (compacts after 2 to 3 months). These components create the perched water table responsible for root asphyxiation
- Repotting timing: Simultaneously with pole installation. Plant enters structural correction with both thigmotropic and root health interventions active from the same date. Sequential implementation (pole first, repot later) delays full protocol effect by 4 to 8 weeks
Step 4: Targeted Micronutrient Flush — Magnesium Correction
If interveinal chlorosis is present before or after pole installation, chelated magnesium supplementation distinguishes nutritional deficiency from viral pathology and simultaneously corrects the most common cause of reduced metabolic output in climbing specimens.
- Substrate drench: Dissolve chelated magnesium sulfate (MgSO4·7H2O, Epsom salt) at 1000 ppm (approximately 1 teaspoon per gallon of pure water) and apply as substrate drench at normal watering volume. Chelated form ensures bioavailability across a wider pH range than non-chelated mineral salts
- Foliar application: Simultaneously spray 500 ppm MgSO4 solution to upper and lower leaf surfaces of chlorotic foliage. Foliar uptake bypasses substrate pH lockout — delivers magnesium directly to chloroplast-containing mesophyll cells regardless of root uptake status. Apply in the morning for daytime evaporation
- pH verification: Test substrate pH using a 1:1 soil-to-distilled water slurry with 15-minute equilibration before reading. Target pH 5.8 to 6.5 for optimal Mg availability. If pH is below 5.5, add calcium-magnesium limestone to substrate or use pH-adjusted irrigation water. See complete pH lockout protocols
- Response monitoring: Photograph chlorotic leaves at baseline. Re-examine at Day 14 and Day 21. Interveinal chlorosis lightening confirms Mg deficiency response. Zero visible change at Day 21 warrants mosaic virus consideration — isolate the specimen from the collection pending further evaluation. Per University of Georgia Extension’s plant nutrition guide, magnesium deficiency response to foliar chelate application is visible within 14 days in actively growing specimens when deficiency is the primary cause
What Equipment Do You Need for the Monstera adansonii Scaling Protocol?
Thigmotropic protocol execution requires four tool categories: vertical support structure, anchoring hardware, substrate formulation, and micronutrient chemistry. Substituting or omitting any category reduces protocol efficacy in measurable ways.
STRUCTURAL: SPHAGNUM MOSS POLE
- Commercial options: Extendable moss pole systems (Mossify, Grow More), allowing 30 to 60cm additions as the vine climbs. Pole apex must always extend above the current highest node — single-section poles become limiting within 6 to 12 months of active climbing
- Hydration requirement: Sphagnum must remain continuously moist. Dry sphagnum causes root tips to desiccate on contact rather than penetrating. Water the pole independently from substrate during each irrigation event: pour 100 to 200mL directly onto the pole surface, allow absorption. Target: pole feels damp throughout when gently compressed
- Maintenance: Replace sphagnum every 18 to 24 months as moss decomposes and loses moisture retention capacity. White surface mold: acceptable (non-pathogenic). Green algae: acceptable. Black mold: requires pole replacement and substrate inspection
ANCHORING: U-SHAPED HORTICULTURAL STAPLES
- Specification: 3 to 5cm width, insulated (rubber or plastic coated), non-elastic. Available from orchid supply vendors, specialty plant shops, or fabricated from insulated garden wire. Cost: approximately $8 to $15 for a 50-pack
- Non-elastic requirement: Elastic ties (rubber bands, twist ties) allow nodes to bounce away from the pole surface during normal vibration. Thigmotropic signaling requires consistent compression — intermittent contact provides insufficient mechanoreceptive stimulus for full hormonal response
SUBSTRATE: COARSE AROID MATRIX
- Formula: 40% chunk orchid bark + 30% pumice (medium, 6 to 12mm) + 20% coco coir husks + 10% premium worm castings. Worm castings provide CEC 15 to 25 meq/100g, retaining nutrients between fertilization events while contributing zero waterlogging risk at 10% volume. For biological activity enhancement at the time of repotting, see the complete aroid substrate and root biology guide
CHEMICAL: CHELATED MAGNESIUM SULFATE
- Product selection: Epsom salt (MgSO4·7H2O, food-grade or agricultural grade, $5 to $10 per lb) for non-chelated application at pH 6.0+. EDTA-chelated magnesium ($15 to $25 per lb) for pH-compromised substrates below 5.8 — chelation maintains bioavailability across pH 4.5 to 8.0 range. Apply substrate drench at 1000 ppm + foliar spray at 500 ppm simultaneously for fastest correction timeline. Repeat every 3 weeks until chlorosis fully resolves, then transition to a balanced maintenance fertilizer containing Mg in the complete formulation
What Environmental Conditions Maximize Fenestration Development After the Protocol?
Following pole installation and substrate correction, establishing optimized environmental parameters maximizes the speed and completeness of thigmotropic hormonal transition and fenestration scaling response.
Pole Hydration as an Independent Irrigation Event
The aerial root system of a climbing M. adansonii functions as a secondary water and mineral uptake surface — pole hydration must be maintained as an independent protocol from substrate irrigation.
When substrate is being allowed to dry between waterings (the correct protocol for macro-porous aroid mix), the sphagnum pole may simultaneously require hydration to maintain aerial root velamen viability. Apply water directly to the pole surface every 3 to 5 days regardless of substrate moisture status — 100 to 200mL poured at the pole apex will wick downward through the sphagnum via capillary action. Aerial roots penetrating moist sphagnum provide genuine supplemental mineral uptake during active leaf construction phases. This is not merely structural anchoring — it is functional metabolic support that reduces the burden on the substrate root system during energetically demanding leaf development events.
According to University of Wisconsin Extension’s Monstera cultivation research, maintaining consistent aerial root moisture contact is a documented factor in the rate of thigmotropic response and morphological maturation speed in climbing aroids under controlled conditions.
Light Positioning for Vertical Growth Trajectory
DLI target of 8 to 12 mol/m²/day delivered from above the pole apex creates the upward light gradient that combines with thigmotropic signals to drive maximum climbing rate and fenestration scaling.
Positioning a grow light (or maximizing window light) above the growing tip rather than beside the vine produces a phototropic vector aligned with the thigmotropic vector — both pointing upward. This alignment maximizes growth rate toward the pole apex and beyond. Once the vine reaches the pole apex, immediately extend with an additional pole section — a vine reaching open air above the pole tip reverts to trailing orientation within 2 to 4 growth events, re-entering the juvenile hormonal state. The pole apex must always extend above the current highest node. For complete DLI measurement methodology and grow light positioning, see the Monstera light requirements guide.
Additional Environmental Parameters
- Humidity (50 to 65% RH): Aerial velamen tissue requires ambient humidity above 50% to remain hydrated between pole waterings. Below 40% RH, velamen desiccates rapidly and aerial root penetration into pole medium ceases
- Temperature (18 to 27°C): Thigmotropic mechanoreception and hormonal signaling operate within standard tropical indoor temperature ranges. Temperatures below 15°C slow metabolic activity and extend the timeline to first anchored leaf emergence by 2 to 4 weeks
- Watering substrate correctly: The macro-porous 40/30/20/10 mix should be watered thoroughly (until drainage) and then allowed to reach 30 to 40% moisture before rewatering — typically 7 to 10 days in standard indoor conditions. Overwatering the substrate while the root system is simultaneously stressed from repotting creates the conditions for pathogen entry at root wound sites
- Fertilization during scaling phase: Apply a balanced liquid fertilizer at half strength every 4 weeks from weeks 6 to 8 onward once the plant has settled post-repotting. According to NC State Extension’s Monstera cultivation guidelines, regular balanced nutrition supports the cellular investment required to construct progressively larger, fenestrated leaf blades during the active climbing phase
✅ Fenestration Development Milestones
- Weeks 1 to 3: Aerial roots begin exploring the pole surface. No visible morphological change in leaf size — hormonal transition occurring internally. Substrate root system establishing in new macro-porous media
- Weeks 3 to 6: First aerial roots penetrate the sphagnum surface — white root tips visible entering the pole. Apical meristem hormonal profile beginning its shift toward auxin dominance
- Weeks 6 to 10: First new leaf post-protocol emerges. This leaf should be measurably larger than the last trailing leaf — 20 to 40% size increase is typical at the first anchored growth event. Marginal slitting may increase even if interior perforations are not yet present
- Months 3 to 5: Progressive scaling clearly evident — each new leaf larger than the previous. Interior perforations begin appearing as small circular holes 5 to 10mm diameter in the largest new leaves
- Months 6 to 12: Full adult morphology established with consistent fenestration pattern. Leaf blades may reach 15 to 25cm at DLI 10 to 15 with sustained anchored climbing — 3 to 5x the size of terminal trailing leaves pre-protocol
Frequently Asked Questions: Monstera adansonii Care
What is the difference between Monstera adansonii and Monstera deliciosa?
Morphologically distinct species with different fenestration architecture and cultivation scale. M. deliciosa: large-format species reaching 60 to 100cm+ leaf blades with both marginal slits and interior perforations. Produces edible fruit in native habitat. Slower growth rate, larger pot requirement, and indoor ceiling height is typically the limiting factor. M. adansonii: smaller-format climber with leaves 8 to 25cm in adult climbing morphology, interior perforations dominant, marginal slitting minimal or absent. Faster growth rate at equivalent DLI, suited to smaller vertical support structures (1 to 2 meter poles). Fenestration triggers are equivalent: both species require thigmotropic vertical anchorage plus a DLI threshold for adult morphology. M. deliciosa requires DLI 17 to 25 for interior fenestrations (see Monstera light requirements guide); M. adansonii produces interior perforations at DLI 10 to 15 when thigmotropic anchoring is also active — generally more accessible for standard indoor environments.
Can I use a coco coir pole instead of sphagnum for Monstera adansonii?
Functionally inferior but acceptable if sphagnum is unavailable. Coco coir poles provide adequate surface texture for aerial root mechanical grip but inferior moisture retention compared to long-fiber sphagnum (coco retains 4 to 5x its weight in water versus sphagnum’s 15 to 20x). Aerial roots penetrate moist sphagnum more readily — coco’s lower moisture retention means roots contact dry medium more frequently, reducing penetration rate. If using a coco pole: increase hydration frequency to every 2 to 3 days versus every 3 to 5 days for sphagnum, and mist the pole surface between waterings in low-humidity environments. Avoid: plastic mesh poles without moisture-retaining fill — these provide a structural surface without the sustained moisture that aerial velamen requires for penetration. Aerial roots contact dry plastic and desiccate rather than penetrating. Result: grip surface without the thigmotropic moisture environment that maximizes hormonal response speed.
How do I propagate Monstera adansonii without losing fenestrations?
Node-inclusive stem cuttings placed immediately onto vertical support produce the fastest retention of fenestration capacity. Propagation protocol: (1) Take a stem cutting with a minimum of 2 nodes and at least one attached leaf, (2) Allow the cut end to callus for 2 to 4 hours, (3) Place the cutting in water or a sterile sphagnum propagation box until roots reach 3 to 5cm, (4) Upon transplanting to substrate, install a moss pole simultaneously — do not allow any trailing period. A cutting rooted and anchored vertically from inception bypasses the trailing regression cascade entirely. The first new leaf from an anchored cutting reflects the thigmotropic hormonal environment immediately rather than requiring 6 to 10 weeks of existing vine recalibration. Cutting selection: Take cuttings from the highest nodes on a climbing vine — these contain the highest auxin concentration and produce the largest leaves soonest post-propagation. Basal cuttings taken from the oldest trailing portions of the vine re-enter the juvenile hormonal state regardless of vertical anchoring and require a longer recalibration period.
Why are my Monstera adansonii leaves turning brown at the edges?
Differential diagnosis by pattern determines the cause: (1) Crispy brown margins (dry, papery texture): Low humidity below 40% RH or high VPD above 1.5 kPa causing leaf edge desiccation. Solution: increase humidity to 50 to 65% RH, reduce airflow directed at the plant, check for proximity to heating vents. (2) Soft brown margin (wet, translucent texture): Fluoride or chloramine toxicity from municipal tap water. M. adansonii is moderately sensitive to fluoride accumulation — use RO or distilled water. [Owner: add internal link to water quality post when published.] (3) Brown tip only (1 to 3cm of leaf tip): Fertilizer salt accumulation. Monthly substrate flushing with 3x pot volume prevents salt concentration at root tips. [Owner: add internal link to flushing guide when published.] (4) Brown at base of leaf near petiole: Overwatering symptom — substrate remaining saturated causes vascular constriction at petiole insertion. Allow substrate to dry more completely between waterings. (5) Irregular brown patches mid-blade: Cold water damage from thermal shock or bacterial spot infection — treat with copper-based bactericide. Document the pattern and exclude all other causes systematically before treating.
How much light does Monstera adansonii need indoors?
DLI 8 to 12 mol/m²/day bright indirect light is the minimum for active fenestration development when thigmotropic anchoring is also active. Position within 1 to 3 feet of an east or west-facing window, or use a full-spectrum LED grow light positioned 12 to 18 inches above the canopy for 12 to 14 hours per day. The plant tolerates lower DLI (down to 4 to 6 mol/m²/day) and will remain alive but will not produce interior perforations regardless of how well anchored. At DLI 6 to 8 with active vertical climbing, marginal slitting (holes at the leaf edge) may appear but interior perforations (holes within the leaf blade) require DLI 10 to 15. Avoid direct midday sun — M. adansonii lacks protective adaptations for high-intensity direct light and leaf bleaching occurs within 2 to 4 hours of unfiltered exposure.
Is Monstera adansonii toxic to cats and dogs?
Yes. All Monstera species contain insoluble calcium oxalate crystals in the leaf tissue, sap, and stems. If ingested by cats, dogs, or other pets, these crystals cause immediate oral irritation, excessive drooling, vomiting, and difficulty swallowing. Symptoms are typically self-limiting but can cause significant distress. Keep all Monstera species out of reach of pets and children. If ingestion occurs, contact your veterinarian or the ASPCA Poison Control Center (888-426-4435) immediately. Note that the climbing specimens produced by this protocol have thicker, more robust leaves with a more pronounced cuticle — this does not reduce calcium oxalate content but does mean leaves are physically harder for pets to chew.
The Lab Verdict: Structural Support Is Not Optional in Monstera adansonii Care
A Monstera adansonii left to trail is not a plant growing in suboptimal conditions — it is a plant executing perfect evolutionary programming for an environment that provides no vertical anchorage opportunity, producing exactly the morphology that environment selects for: small, lightweight, juvenile leaves demanding minimal photosynthate investment per unit area.
The biological reality of Monstera adansonii care for fenestration scaling: fenestrations are not a reward for good care. They are a developmental program activated by specific physical and photobiological inputs that the plant’s mechanoreceptive system detects and interprets as indicators of canopy-position attainment. Without thigmotropic contact, high auxin concentration at the apical meristem is never achieved. Without high auxin, the mesophyll expansion program that builds large perforated leaf blades is never activated. Without root zone oxygenation in macro-porous substrate, the metabolic output required to execute large-leaf construction is never available even when hormonal signaling is correct.
The four-intervention protocol applied simultaneously produces measurable fenestration scaling within 6 to 10 weeks in specimens that have trailed for months or years without developing a single interior perforation: (1) Vertical support installation — extendable sphagnum moss pole providing continuously moist surface for aerial root penetration, apex always above the current highest node, (2) Aerial node anchoring — insulated U-staples securing every node against the pole surface with firm sustained contact for mechanoreceptive compression signaling, (3) Substrate macro-porosity correction — the 40/30/20/10 orchid bark/pumice/coco/castings matrix eliminating the perched water table and root asphyxiation, (4) Magnesium correction — chelated MgSO4 drench and foliar spray distinguishing nutritional deficiency from viral pathology before any disposal decision is made.
Proprietary Data — Plant Blueprint Grow Room Observations
[OWNER TO COMPLETE BEFORE PUBLISHING. Suggested format: “In Plant Blueprint grow room trials, M. adansonii specimens anchored to sphagnum moss poles produced their first measurably larger post-protocol leaf at Week [X] on average. Specimens at DLI [X] mol/m²/day produced interior perforations at leaf [X] node above anchoring point. Trailing control specimens maintained at identical DLI with no pole showed zero interior perforation development across [X] months of observation. Magnesium deficiency cases corrected with chelated MgSO4 foliar spray showed visible interveinal chlorosis improvement at Day [X] post-application in [X]% of treated specimens. Mosaic virus was confirmed in [X]% of chlorosis cases after negative MgSO4 response at Day 21 — the remainder were confirmed nutritional deficiency.”]
| Focus keyword | Monstera adansonii care |
| Primary intervention | Extendable sphagnum moss pole, apex always above highest node |
| Anchoring hardware | Insulated U-staples, 3 to 5cm width, non-elastic only |
| Correct substrate | 40% orchid bark + 30% pumice + 20% coco coir + 10% worm castings |
| Optimal light (DLI) | 8 to 12 mol/m²/day above pole apex for interior perforations |
| Pole hydration | 100 to 200mL directly onto pole every 3 to 5 days, independent of substrate |
| Chlorosis first test | MgSO4 drench 1000 ppm + foliar 500 ppm — assess Day 14 and Day 21 |
| Timeline to first result | 6 to 10 weeks to first larger anchored leaf; 3 to 5 months to interior perforations |
| Toxicity | Calcium oxalate — toxic to cats, dogs, and humans if ingested |
| Temperature range | 18 to 27°C (64 to 81°F) — never below 12°C |
The Lab | Thigmotropism, Phenotypic Plasticity & Substrate Gas Exchange Division
Monstera adansonii Care: Fenestration Scaling Protocol | Published: March 2026 | Updated: July 2026