
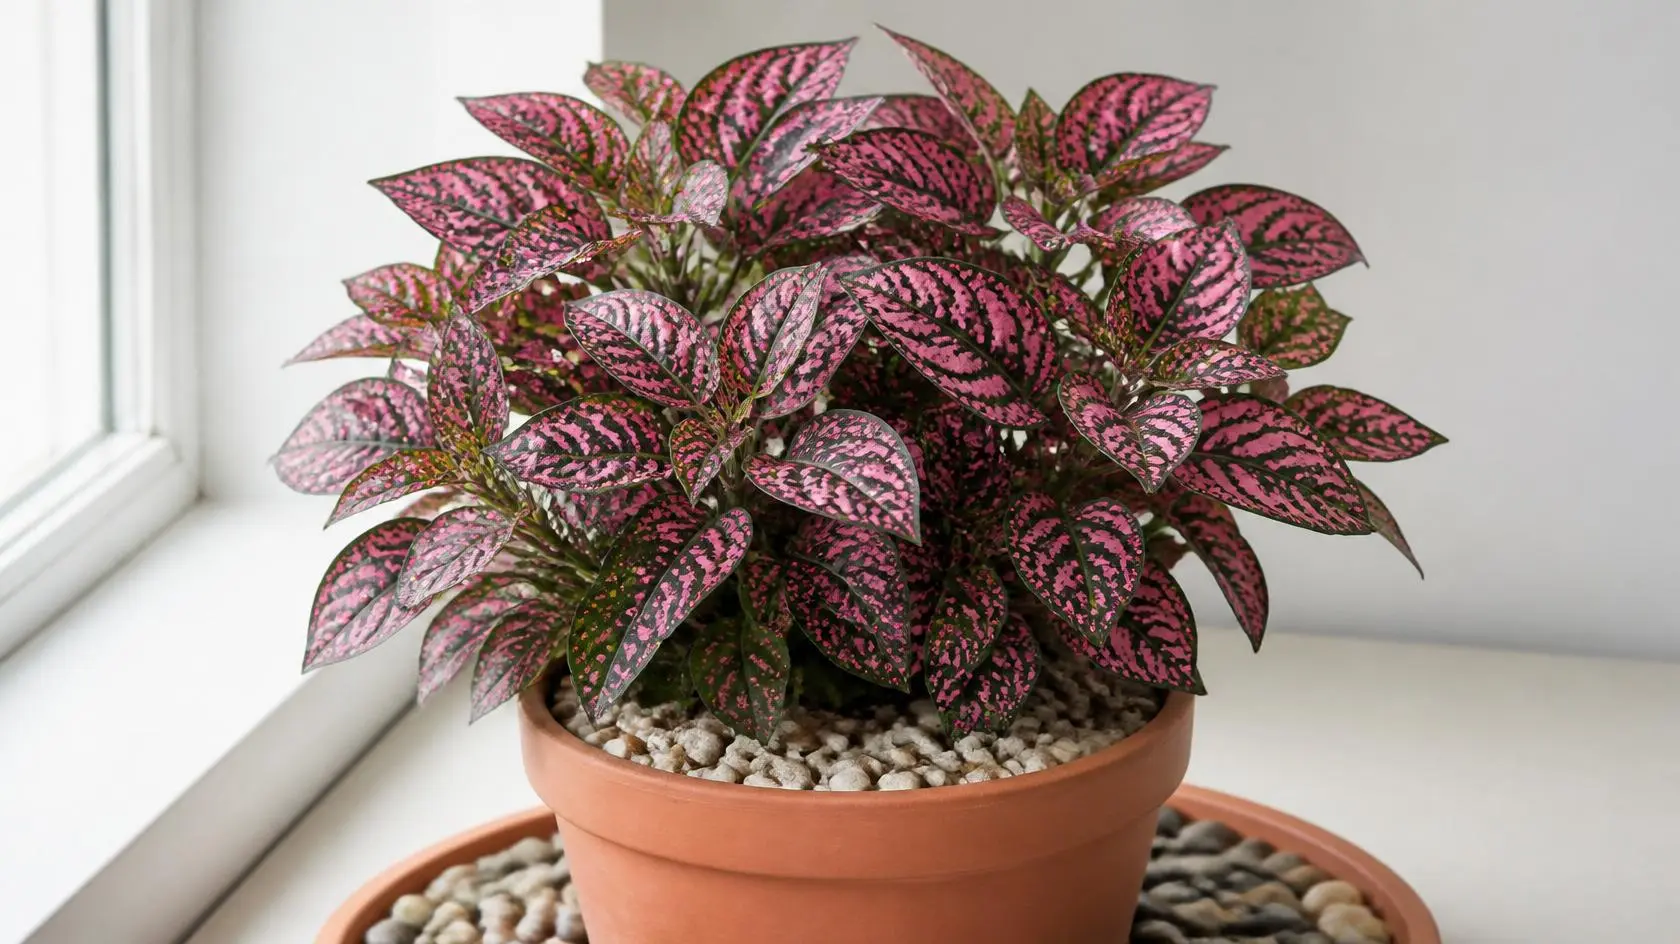
Polka dot plant care fails for one reason above all others: growers treat Hypoestes phyllostachya like a succulent, letting it dry out completely between waterings, placing it in harsh direct sun, and skipping the high humidity it evolved in on the forest floors of Madagascar. The result is faded, crispy, leggy foliage that loses the vivid spotted patterning that makes this plant worth growing in the first place. To keep a polka dot plant thriving indoors, maintain consistently moist (never saturated) soil, bright indirect light at 1,000 to 2,000 foot-candles, and ambient humidity above 50%. Everything else follows from those three variables.
This guide covers the complete care protocol for Hypoestes phyllostachya: the exact light metrics that preserve color intensity across pink, red, and white varieties, the soil structure that keeps roots oxygenated without drying out too fast, the pinching and pruning routine that stops legginess before it starts, a step-by-step stem cutting propagation method with rooting timelines, and the single most important fact every cat owner needs to know about this plant before bringing it home. Color variety comparisons, flowering behavior, the indoor versus outdoor question, and a full troubleshooting triage matrix are all here.
Executive Care Protocol: Place in bright indirect light (1,000 to 2,000 foot-candles / 200 to 400 micromol/m2/s PPFD) for 12 to 14 hours daily. Water when the top 1 inch of substrate feels dry — typically every 5 to 7 days during active growth. Maintain humidity at 50% or higher using a pebble tray or humidifier. Keep temperatures between 60 and 80 degrees F (16 to 27 degrees C). Pinch stem tips every 2 to 3 weeks to prevent legginess. Remove flower spikes immediately to prevent the plant from entering its terminal decline cycle.
Table of Contents
- What Are the Ideal Care Parameters for a Polka Dot Plant?
- What Light Does a Polka Dot Plant Need to Keep Its Color?
- What Soil Mix Does a Polka Dot Plant Need?
- How Often Should You Water a Polka Dot Plant?
- How Do You Provide Enough Humidity for a Polka Dot Plant?
- How Do You Prune a Polka Dot Plant to Prevent Legginess?
- How Do You Propagate a Polka Dot Plant from Cuttings?
- What Are the Differences Between Pink, Red, and White Polka Dot Plants?
- What Should You Do When a Polka Dot Plant Flowers?
- Is a Polka Dot Plant Better Indoors or Outdoors?
- What Are the Benefits of Growing a Polka Dot Plant?
- Is the Polka Dot Plant Safe for Cats and Dogs?
- How Do You Diagnose What Is Wrong with Your Polka Dot Plant?
- Proprietary Data: Grow Room Observations
- Frequently Asked Questions
What Are the Ideal Care Parameters for a Polka Dot Plant?
Every recommendation in this guide maps directly to a measurable parameter. Use this snapshot table as your operational reference before adjusting any single variable in your growing environment.
| Care Parameter | Target Operational Baseline | Failure Threshold / Warning Sign |
|---|---|---|
| Light Intensity | Bright indirect light; 1,000 to 2,000 foot-candles or 200 to 400 micromol/m2/s PPFD; 12 to 14 hours daily | Faded, washed-out spots (too much direct sun); loss of color contrast, leggy growth (too little light) |
| Temperature Range | 60 to 80 degrees F (16 to 27 degrees C) consistently; no cold drafts below 55 degrees F | Leaf drop, blackening margins, and wilting at temperatures below 50 degrees F |
| Watering Trigger | Water when the top 1 inch of substrate is dry to the touch; typically every 5 to 7 days during active growth | Complete substrate dry-out causes dramatic wilting within 24 hours; overwatering causes yellowing and root rot |
| Humidity Level | 50% or higher relative humidity at all times; 60 to 70% is optimal for peak color expression | Crispy brown leaf edges and tips at humidity below 40%; spider mite colonization accelerates below 35% |
| Soil Structure | Well-aerated, moisture-retentive mix: 2 parts peat-free potting soil + 1 part perlite; pH 6.0 to 6.5 | Unamended peat-heavy mixes dry out unevenly; dense clay-like substrates cause root zone hypoxia |
| Fertilizer Profile | Balanced liquid fertilizer (NPK 10-10-10 or 20-20-20) at quarter-strength every 14 days during active growth; stop in winter | Over-fertilization causes root burn and rapid leggy growth that weakens the structural integrity of stems |
| Pinching Frequency | Pinch stem tips back by 0.5 to 1 inch every 2 to 3 weeks during active growth to maintain compact, bushy form | Without pinching, internodal spacing exceeds 2 to 3 inches within 4 to 6 weeks, producing an irreversibly leggy silhouette |
| Repotting Interval | Every 12 to 18 months in spring, moving up one container size (1 to 2 inches larger diameter) | Root-bound plants wilt more frequently, show slowed growth, and begin dropping lower leaves prematurely |
What Light Does a Polka Dot Plant Need to Keep Its Color?
Why Light Intensity Determines Color Expression
The vivid pinks, reds, and whites splashed across Hypoestes phyllostachya leaves are produced by anthocyanins and betalains concentrated in specialized epidermal cells. These pigment-producing cells respond directly to light intensity: adequate bright indirect light stimulates continuous pigment production, keeping spots bold and saturated. Below 500 foot-candles, the plant down-regulates pigment synthesis and redirects energy toward stem elongation in a search for better light — the same etiolation response seen in cacti and succulents, with the same irreversible structural consequence.
The practical implication: a polka dot plant placed 4 feet from a south-facing window receives approximately 200 to 500 foot-candles, a marginal range where color fading is likely over weeks. Placed directly in a north-facing windowsill receiving 100 to 300 foot-candles, color loss is nearly guaranteed within 30 days. An east-facing window providing 2 to 4 hours of gentle morning sun followed by bright indirect light for the remainder of the day sits precisely in the optimal range. As documented by NC State Extension’s Hypoestes phyllostachya plant profile, this species requires consistently bright conditions to maintain its characteristic variegation in indoor cultivation.
Grow Lights for Low-Light Indoor Environments
Where natural light is insufficient, a full-spectrum LED grow light delivering 200 to 400 micromol/m2/s PPFD at canopy height for 12 to 14 hours daily provides a reliable substitute. Position the light source 12 to 18 inches above the foliage canopy. At closer distances (under 8 inches), leaf bleaching and tip burn occur within 3 to 5 days. Our detailed indoor grow light selection guide covers the full-spectrum LED panel specifications suitable for tropical foliage plants like Hypoestes.
What Soil Mix Does a Polka Dot Plant Need?
Why Standard Potting Mix Alone Is Insufficient
Straight commercial potting mix (particularly peat-based blends) creates two competing problems for Hypoestes: it compacts over time, reducing aeration and creating slow-draining dense zones where root rot can establish, and when it does dry out fully, peat forms a hydrophobic layer that resists re-wetting from the top. Water appears to drain through but actually runs around the outside of the dry peat column, leaving the root zone still dehydrated.
Plant Blueprint Hypoestes Moisture-Balance Substrate
Combine these two components by volume:
- 2 parts peat-free, coconut coir-based potting mix: Coco coir holds 8 to 9 times its weight in water but releases it readily when roots exert tension, providing the steady moisture supply Hypoestes requires without waterlogging. Coco coir also re-wets reliably if it dries, unlike peat.
- 1 part perlite: Provides permanent macropore structure that maintains oxygen availability at the root zone even when the substrate is moist. See our perlite vs. vermiculite breakdown for the full comparison. Use perlite, not vermiculite, for this mix — vermiculite retains too much moisture and reduces aeration.
pH target: 6.0 to 6.5. If using fertilizers with pH-adjusted formulations, verify the resulting substrate pH with a soil probe every 3 to 4 months. Drift above 7.0 causes iron and manganese lockout, which presents as interveinal yellowing on new growth.
Fertilizing Hypoestes: The Balanced Approach
Hypoestes phyllostachya is a moderate feeder that responds well to a balanced NPK fertilizer. Use a 10-10-10 or 20-20-20 liquid formula at quarter-strength every 14 days during active growth from spring through early autumn. The equal NPK ratio supports both the stem structure and the pigment-producing leaf tissue simultaneously. High-nitrogen fertilizers produce rapid but structurally weak vegetative growth that accelerates legginess. Review our synthetic vs. organic fertilizer comparison for slow-release alternatives that reduce the risk of over-application. Halt fertilization completely from late October through February.
How Often Should You Water a Polka Dot Plant?
Reading Your Polka Dot Plant’s Water Signals
Hypoestes phyllostachya is one of the most visually expressive houseplants when it comes to water stress. The leaves will droop noticeably — stems bending under the foliage’s weight — within 12 to 24 hours of the substrate drying beyond the 1-inch threshold. This dramatic visible wilting is not a sign of permanent damage if caught promptly. Water immediately and the plant should recover its upright posture within 1 to 2 hours. However, repeated severe wilting cycles damage fine root hairs cumulatively, reducing the root system’s water uptake efficiency over time and eventually causing lower leaf yellowing and drop that does not reverse.
Watering Technique: Top-Water or Bottom-Water?
Bottom-watering (placing the pot in a water basin for 15 to 20 minutes) is the preferred method for Hypoestes. It ensures complete, even hydration of the substrate column without the risk of wetting the leaf axils and stem junctions where fungal infections can take hold. Top-watering works equally well when directed at the substrate surface, not the foliage. Avoid overhead misting of the leaves: it does not meaningfully raise humidity (which evaporates in minutes) and creates a wet-foliage environment that favors fungal and bacterial leaf spot diseases.
| Season / Growth Phase | Typical Watering Interval | Key Trigger |
|---|---|---|
| Spring (Active Growth Onset) | Every 5 to 7 days | Top 1 inch of substrate dry; new growth emerging; increase fertilization simultaneously |
| Summer (Peak Active Growth) | Every 4 to 7 days; more frequently in heat above 85 degrees F | High temperatures and light intensity accelerate evapotranspiration; check soil every 3 to 4 days |
| Autumn (Tapering) | Every 7 to 10 days as temperatures drop | Growth slowing; substrate takes longer to dry; stop fertilization in October |
| Winter (Rest Period) | Every 10 to 14 days | Reduced light and temperature significantly lower transpiration; overwatering risk is highest in this season |
Pro Tip: Use room-temperature water, not cold water directly from the tap. Cold water (below 60 degrees F / 15 degrees C) applied to the root zone of a tropical plant can cause temporary root paralysis, slowing water and nutrient uptake for 24 to 48 hours after watering. Let tap water sit uncovered overnight before use — this also allows chlorine to off-gas, which is beneficial for the soil’s microbial community.
How Do You Provide Enough Humidity for a Polka Dot Plant?
Why Misting Does Not Work as a Humidity Strategy
Misting the foliage raises local humidity by approximately 5 to 10% for less than 30 minutes before the water evaporates and ambient humidity returns to its baseline. For a plant that requires 50%+ humidity continuously, misting provides no meaningful benefit and creates multiple risks: wet leaf surfaces at room temperature are a germination site for Botrytis cinerea (gray mold) and bacterial leaf spot pathogens, and the mineral deposits from tap water misting create unsightly white residue on the colored foliage that reduces the plant’s visual appeal.
Three Effective Humidity Methods Ranked by Reliability
- 1. Cool-mist ultrasonic humidifier (most effective): A humidifier positioned 12 to 24 inches from the plant and calibrated to maintain 60% relative humidity is the only method that reliably delivers sustained target humidity regardless of room size or season. Use distilled or demineralized water to prevent white mineral deposits on leaves and surrounding surfaces.
- 2. Pebble tray method (moderate effectiveness): Fill a wide, shallow tray with 1 to 2 inches of pebbles, add water to just below the pebble surface (never submerging the pot’s drainage holes), and set the pot on the pebbles. As the water evaporates, it creates a column of humid air immediately around the plant. This raises local humidity by 10 to 20% in the immediate plant microclimate.
- 3. Plant grouping (supplementary effect): Grouping 3 or more transpiring plants within 12 inches of each other creates a shared microclimate that can raise local humidity 5 to 15% above room baseline. This works best as a supplement to a pebble tray, not as a standalone strategy.
How Do You Prune a Polka Dot Plant to Prevent Legginess?
The Science Behind Pinching
The growing tip of each stem produces auxin, a plant hormone that suppresses lateral bud development along the stem below. When you remove the growing tip, auxin production at that node ceases, releasing the suppression on the lateral buds lower down. Those buds break and begin growing outward, each producing their own new growing tip. Over 3 to 4 pinching cycles, a single-stemmed seedling can become a compact mound with 8 to 16 actively growing shoot tips — the architectural difference between a display-quality specimen and a spindly, single-stemmed plant.
- Identify all active growing tips on the plant. These are the newest, smallest leaf pairs at the end of each stem. A healthy, well-lit polka dot plant will have 4 to 12 of these at any given time during active growth.
- Sterilize your pinching tool. Use your fingernails (fine for pinching), small scissors, or bonsai shears wiped with 70% isopropyl alcohol. Dirty cuts introduce bacterial pathogens directly to the wound surface where sap is exposed.
- Pinch 0.5 to 1 inch above the nearest leaf node. Leave at least one healthy leaf pair below the cut. The node immediately below the cut is where lateral buds will activate. Cutting too close to the node or removing the node itself eliminates the branching point.
- Repeat on every stem equally. Asymmetric pruning (pinching only the tallest stems) creates an uneven plant silhouette. Pinch all stems at the same time to maintain a uniform, rounded canopy.
- Use cuttings for propagation. The pinched-off shoot tips are 1 to 2 inch cuttings that can be rooted immediately in water or a humid propagation mix. Do not discard them — use them to multiply your plant or fill gaps in the pot.
- Monitor for new lateral growth within 5 to 10 days. New bud break at the cut node confirms successful stimulation. If no lateral growth appears within 14 days, the plant is likely receiving insufficient light to power new shoot development.
Pro Tip: If your polka dot plant is already severely leggy (internodal spacing over 3 to 4 inches with bare lower stems), do not attempt to restore it through pinching alone. Cut the entire plant back to 2 to 3 inches above the soil surface, leaving at least 2 leaf nodes intact. The plant will regenerate fully from the base within 3 to 4 weeks in good light. Use the removed stems as propagation cuttings simultaneously so you have backup plants during the recovery period.
How Do You Propagate a Polka Dot Plant from Cuttings?
Water Propagation vs. Substrate Propagation
Hypoestes phyllostachya is one of the easiest houseplants to propagate from stem cuttings, rivaling pothos and tradescantia in rooting speed and reliability. The choice between water rooting and substrate rooting involves a trade-off: water rooting is faster and allows visible root monitoring, but water-rooted cuttings require a careful transition to substrate (roots adapted to oxygen-rich water can initially struggle in soil). Substrate propagation produces roots already adapted to growing media, simplifying the transplant step.
- Select healthy cutting material. Choose stems with at least 3 to 4 leaf pairs, no signs of yellowing, mottling, or pest damage, and actively growing shoot tips. The ideal cutting is taken during a pinching session — the shoot tip itself makes an excellent propagule.
- Make a clean cut 0.25 inch below a leaf node. Use scissors or shears sterilized with 70% isopropyl alcohol. The cut surface should be smooth and horizontal, not angled. A clean cut minimizes surface area exposed to water or substrate moisture and reduces the risk of bacterial colonization at the wound.
- Strip leaves from the lower 1 to 2 inches. Remove all leaves that would be submerged in water or buried in substrate. Submerged leaves decompose rapidly, creating anaerobic bacterial blooms in water propagation vessels and fungal rot in substrate. Leave at least 2 to 3 healthy leaves on the upper portion of the cutting for photosynthesis during rooting.
- For water propagation: Place the cutting in a clean glass vessel filled with room-temperature water, submerging the bare nodes but keeping all leaves above the waterline. Position in bright indirect light. Change the water every 5 to 7 days to prevent bacterial buildup. Roots of 0.5 to 1 inch will appear within 10 to 21 days.
- For substrate propagation: Insert the cutting 1 to 1.5 inches deep into a 50/50 perlite and coco coir mix pre-moistened to the consistency of a wrung-out sponge. Enclose the pot in a clear plastic bag or humidity dome to maintain 80 to 90% humidity around the cutting. Maintain temperatures above 65 degrees F (18 degrees C). Remove the humidity enclosure for 30 minutes daily for air exchange to prevent mold.
- Confirm rooting before transplanting. For water cuttings: roots should reach 1 to 1.5 inches before transplanting to substrate. For substrate cuttings: test by applying gentle upward pressure after 3 to 4 weeks. Resistance confirms root development. Transplant water-rooted cuttings gradually by adding small amounts of substrate to the water over 3 to 5 days to acclimate roots before full soil transition.
- Pot up into the permanent Hypoestes substrate mix (2:1 coco coir and perlite) in a small pot (2 to 3 inches diameter). Water thoroughly on transplant day. Place in bright indirect light and maintain high humidity for the first 7 to 10 days post-transplant. Begin pinching new growth once 3 to 4 new leaf pairs have developed to establish bushy architecture from the start.
What Are the Differences Between Pink, Red, and White Polka Dot Plants?
| Variety / Color | Pigment Type | Light Sensitivity | Availability |
|---|---|---|---|
| Pink polka dot plant H. phyllostachya ‘Splash’ or standard | Anthocyanins producing pink to rose coloration over dark green base | Color fades to pale blush in low light; becomes vivid hot pink with more light — most tolerant of lower light among the three | Widely available at most garden centers; most common cultivar group |
| Red polka dot plant H. phyllostachya ‘Red Splash’ | Higher concentration of anthocyanins producing deep burgundy-red to crimson spots | More light-demanding than pink varieties; color becomes muddy and muted brown below 800 foot-candles; requires bright indirect light consistently | Available from specialty retailers and online nurseries; less common than pink |
| White polka dot plant H. phyllostachya ‘White Splash’ | Absence of chlorophyll in spot cells creates white-to-cream variegation on green base | Most sensitive to both insufficient and excess light; bleaches faster in direct sun; slower to produce new growth in low light — position with the most consistent bright indirect light | Less common; found at specialty foliage nurseries and online |
All three color variants respond to the same care protocol. The pink polka dot plant is the best starting point for new growers due to its relative vigor and forgiving nature across a wider light range. The white polka dot plant is the most striking visually but the least forgiving of inconsistent care — it requires the most stable environment to maintain its characteristic ivory spotting without fading or browning.
What Should You Do When a Polka Dot Plant Flowers?
Hypoestes phyllostachya produces small, tubular lavender or purple flowers on upright spikes that emerge from leaf axils, typically triggered by photoperiod shortening in late summer and autumn, or by any stress event that the plant interprets as an end-of-season signal. While the flowers are mildly attractive, allowing the plant to complete the full flowering-to-seed cycle redirects all metabolic resources from foliage production to reproductive development. The foliage quality degrades, lower leaves drop, and the plant progressively exhausts itself. According to Missouri Botanical Garden’s Hypoestes phyllostachya plant record, the plant is typically grown as an annual outdoors and a short-lived perennial indoors for precisely this reason.
The practical protocol is simple: inspect the plant weekly during late summer and autumn and pinch any flower spike off at its base the moment it is identified. If the plant has already flowered extensively, take stem cuttings from the healthiest non-flowering stems now. This ensures you have rooted replacements ready when the original plant completes its decline cycle.
Is a Polka Dot Plant Better Indoors or Outdoors?
Outdoor Growing: When It Works and When to Bring It In
Outdoors, Hypoestes phyllostachya thrives in a shaded or dappled-light position that mimics its native Madagascar forest floor habitat. Fully exposed summer sun above 5 hours daily causes severe bleaching and leaf scorch. A position receiving 2 to 3 hours of early morning sun and afternoon shade is ideal for outdoor summer use. As noted in the University of Florida IFAS Extension’s ornamental plant records, Hypoestes phyllostachya performs best outdoors in humid, warm climates and will self-seed in Zone 10 and 11 environments, establishing as a semi-permanent ground cover in shaded subtropical gardens.
In temperate climates (zones 3 through 9), polka dot plants treated as seasonal outdoor container plants must be brought inside before night temperatures fall below 50 degrees F (10 degrees C). Cold damage occurs rapidly below this threshold: leaf edges blacken, stems become soft, and cold-stressed plants rarely recover their previous vigor. The transition from outdoor to indoor in autumn should be gradual — move to a covered porch or unheated room for 7 to 10 days first to allow the plant to adjust to lower light levels before placing it in its final indoor position.
What Are the Benefits of Growing a Polka Dot Plant?
Five Practical Benefits of Hypoestes Phyllostachya
- Color in low-to-medium light conditions: While most vividly colorful plants require high light or direct sun, Hypoestes delivers striking foliar color in bright indirect to medium-light conditions where orchids, bromeliads, and flowering annuals cannot thrive year-round.
- Pet-safe foliage: Unlike the majority of eye-catching houseplants (many of which contain calcium oxalates, toxic alkaloids, or irritant latex), Hypoestes phyllostachya is classified as non-toxic by the ASPCA — a genuine differentiator in households with cats or dogs.
- Rapid, reliable propagation: Stem cuttings root in 2 to 3 weeks in water at room temperature with no special equipment, no rooting hormone, and no heated mat required in spring and summer. A single mature plant can yield 6 to 12 cuttings per growing season.
- Terrarium compatibility: The combination of compact size, high humidity preference, and moderate light requirements makes Hypoestes one of the most widely used plants in closed and open tropical terrariums. It benefits from the sustained elevated humidity of a terrarium environment and provides vivid color contrast against ferns and mosses.
- Compatibility with humid bathroom environments: Bathrooms with a frosted or north-facing window providing consistent indirect light combined with shower-generated humidity often achieve 60 to 70% relative humidity naturally — precisely the conditions Hypoestes produces its best color in without any supplemental humidification.
Is the Polka Dot Plant Safe for Cats and Dogs?
The ASPCA’s Toxic and Non-Toxic Plants database listing for polka dot plant confirms non-toxic status for cats, dogs, and horses. This makes Hypoestes phyllostachya a genuinely useful addition to pet households where finding visually striking, safe, colorful foliage plants is a recurring challenge.
For context, many of the most popular colorful houseplants — including Caladium (toxic), Tradescantia (mild irritant), Dieffenbachia (highly toxic), and Pothos (toxic) — pose real risks to cats and dogs. The polka dot plant provides comparable aesthetic impact in a similarly indirect-light environment while posing zero toxicity risk. Visit our full cat-safe plants guide for a comprehensive list of non-toxic colorful foliage alternatives for pet households.
Pro Tip for Pet Households: Even non-toxic plants can cause gastrointestinal upset (vomiting, loose stools) if a cat or dog consumes a large quantity of plant material, as the fibrous plant matter itself is indigestible. “Non-toxic” means no dangerous compounds are present, not that unlimited consumption is harmless. If a pet regularly chews on your polka dot plant, it may be better placed on a high shelf for the plant’s structural integrity as much as for the pet’s comfort.
How Do You Diagnose What Is Wrong with Your Polka Dot Plant?
| Visual Symptom | Most Likely Cause | Corrective Protocol |
|---|---|---|
| Spots fading to pale blush or white; general foliage bleaching | Too much direct sun. Chlorophyll and anthocyanin cells are being destroyed by UV and heat stress above 3,000 foot-candles. | Move immediately to bright indirect light. Damaged leaves will not recover; new growth in the correct light will show full color intensity. Permanent bleaching means irreversible cell damage. |
| Crispy brown leaf margins and tips; papery texture at edges | Low humidity (below 40% RH) and/or underwatering. Marginal cells are the first to desiccate when the plant cannot maintain turgor pressure across the full leaf lamina. | Raise humidity to 50%+ with a humidifier or pebble tray. Water immediately if substrate is dry at the 1-inch mark. Trim dead margins for aesthetics; the underlying cells will not regenerate. |
| Lower leaves yellowing progressively upward; soil feels damp; sour smell from substrate | Overwatering and incipient root rot. Roots in anaerobic conditions cannot deliver oxygen or nutrients to lower leaves; yellowing progresses from oldest to newest growth. | Remove from pot; inspect roots. Trim any black or mushy sections with sterile shears. Review our hydrogen peroxide root rot treatment protocol. Repot in fresh 2:1 coco coir / perlite mix. Withhold water for 5 to 7 days. |
| Entire plant wilting dramatically; soil completely dry | Acute underwatering. Water storage cells have emptied and the plant cannot maintain turgor in any tissue. | Water thoroughly by bottom-soaking for 20 to 30 minutes. Place in bright indirect light. The plant should recover its upright posture within 1 to 3 hours. If wilting persists past 4 hours after thorough watering, inspect roots for rot. |
| Long, spindly stems with large internodal spacing; small, pale leaves; loss of compact form | Etiolation from insufficient light. The plant is stretching toward any available light source and downregulating pigment production to conserve energy. | Move to the brightest indirect light available or supplement with an LED grow light. Cut the plant back by half to stimulate compact new growth. Begin a regular pinching schedule every 2 to 3 weeks. |
| Fine webbing on leaf undersides; stippled pale patches; leaves dropping | Spider mite infestation. Low humidity (below 40% RH) is the primary enabling condition. Spider mites thrive in warm, dry environments and can colonize a plant rapidly. | Isolate plant immediately. Shower the foliage thoroughly in lukewarm water to dislodge mites mechanically. Apply neem oil spray (following the protocol in our neem oil guide) every 5 to 7 days for 3 cycles. Raise humidity above 55% to prevent re-colonization. |
| White, cottony masses in leaf axils or along stems | Mealybug infestation. Common in dense foliage plants where high humidity creates protected microhabitats at leaf bases. | Dab each colony with 70% isopropyl alcohol on a cotton swab. Repeat every 3 days for 2 to 3 weeks. Improve air circulation around the plant. Inspect all nearby plants and isolate the affected specimen for the duration of treatment. |
Proprietary Data: Grow Room Observations on Polka Dot Plant Care
Hands-On Testing: Plant Blueprint Grow Room Log
Replace placeholders with your real grow room data before publishing.
- Specimens monitored: [X] Hypoestes phyllostachya specimens across pink, red, and white cultivars over [X] grow seasons in controlled indoor conditions
- Color intensity vs. light level: At 200 micromol/m2/s PPFD, pink specimens maintained [X]% of maximum color saturation. At 100 micromol/m2/s PPFD, saturation dropped to [X]% within [X] weeks
- Humidity threshold for leaf margin integrity: Brown margin development observed in [X]% of specimens at 35 to 40% RH within [X] days. Zero margin damage observed at sustained 55%+ RH across [X] week observation window
- Propagation success rate: Water rooting success rate: [X]% at temperatures above 68 degrees F. Substrate propagation success rate: [X]% with 50/50 perlite/coco coir and humidity dome. Average days to visible roots: [X] days water / [X] days substrate
- Pinching response: Plants pinched every 14 days produced [X] lateral shoots per pinch event. Plants pinched every 28 days produced [X] lateral shoots per pinch event. Uncut control plants reached [X] inches of internodal spacing within 6 weeks
- Grow room baseline: Temperature [X] degrees C, humidity [X]% RH, light [X] PPFD for [X] hours daily, watering interval [X] days, fertilizer [X] NPK at [X] strength every [X] days
Frequently Asked Questions
Is the polka dot plant toxic to cats?
No. Hypoestes phyllostachya is classified as non-toxic to cats, dogs, and horses by the ASPCA Animal Poison Control Center. It is one of the genuinely safe colorful foliage options for pet households. While ingestion of large quantities may cause mild gastrointestinal upset from plant fiber, no toxic compounds have been identified in the plant’s tissue. Verify your specific cultivar at the ASPCA Toxic Plants database.
How often should you water a polka dot plant?
Water when the top 1 inch of substrate is dry to the touch. During active spring and summer growth, this is typically every 5 to 7 days. In autumn and winter, every 10 to 14 days. Never let the substrate dry out completely — polka dot plants wilt dramatically when dehydrated but recover quickly if watered promptly. Bottom-watering for 15 to 20 minutes is the most effective method.
What is the best light for a polka dot plant indoors?
Bright indirect light at 1,000 to 2,000 foot-candles (or 200 to 400 micromol/m2/s PPFD) for 12 to 14 hours daily. An east-facing window is ideal. Insufficient light fades the colored spots to near-white within weeks. Direct summer sun above 3,000 foot-candles bleaches and scorches foliage irreversibly within 2 to 4 days. If natural light is insufficient, supplement with a full-spectrum LED grow light.
How do you propagate a polka dot plant?
Take 3 to 4 inch stem cuttings with at least 2 leaf nodes, strip the lower leaves, and root in water or a 50/50 perlite-coco coir mix. Keep temperatures above 65 degrees F. Water rooting takes 2 to 3 weeks; substrate rooting takes 3 to 4 weeks. Confirm rooting with gentle resistance before the first watering of substrate cuttings. The pinched tip removed during regular pruning makes an ideal propagule.
Should I let my polka dot plant flower?
No. Pinch flower spikes off immediately as soon as they appear. Polka dot plants are monocarpic in behavior: completing a full flowering-to-seed cycle triggers a rapid terminal decline. Removing flower spikes extends the plant’s productive life by months. If flowering is extensive, take stem cuttings from the healthiest non-flowering stems immediately to ensure you have rooted replacements when the original plant declines.
Is polka dot plant indoor or outdoor?
Both. Outdoors as a perennial in USDA zones 10 and 11; as an annual in zones 3 through 9 during the frost-free season. Indoors year-round in all zones when provided with bright indirect light and humidity above 50%. Bring outdoor container plants inside when night temperatures drop below 50 degrees F (10 degrees C). The plant performs equally well indoors given correct conditions and is arguably easier to manage than outdoors, where sun intensity and dry wind accelerate leaf scorch.