
You have killed at least three succulents. The leaves turned translucent and fell off with the slightest touch. The stem turned black at the base. Or perhaps your plant stretched into a pale, leggy monstrosity reaching desperately toward any available window light. These failures are not your fault. They are the predictable result of following generic houseplant advice that actively destroys succulents.
This guide dismantles the myths. You will learn the exact soak-and-dry method that prevents root zone hypoxia, the precise soil ratios that replicate native desert substrates, and the container specifications that eliminate standing water. No more guessing. No more dead plants.
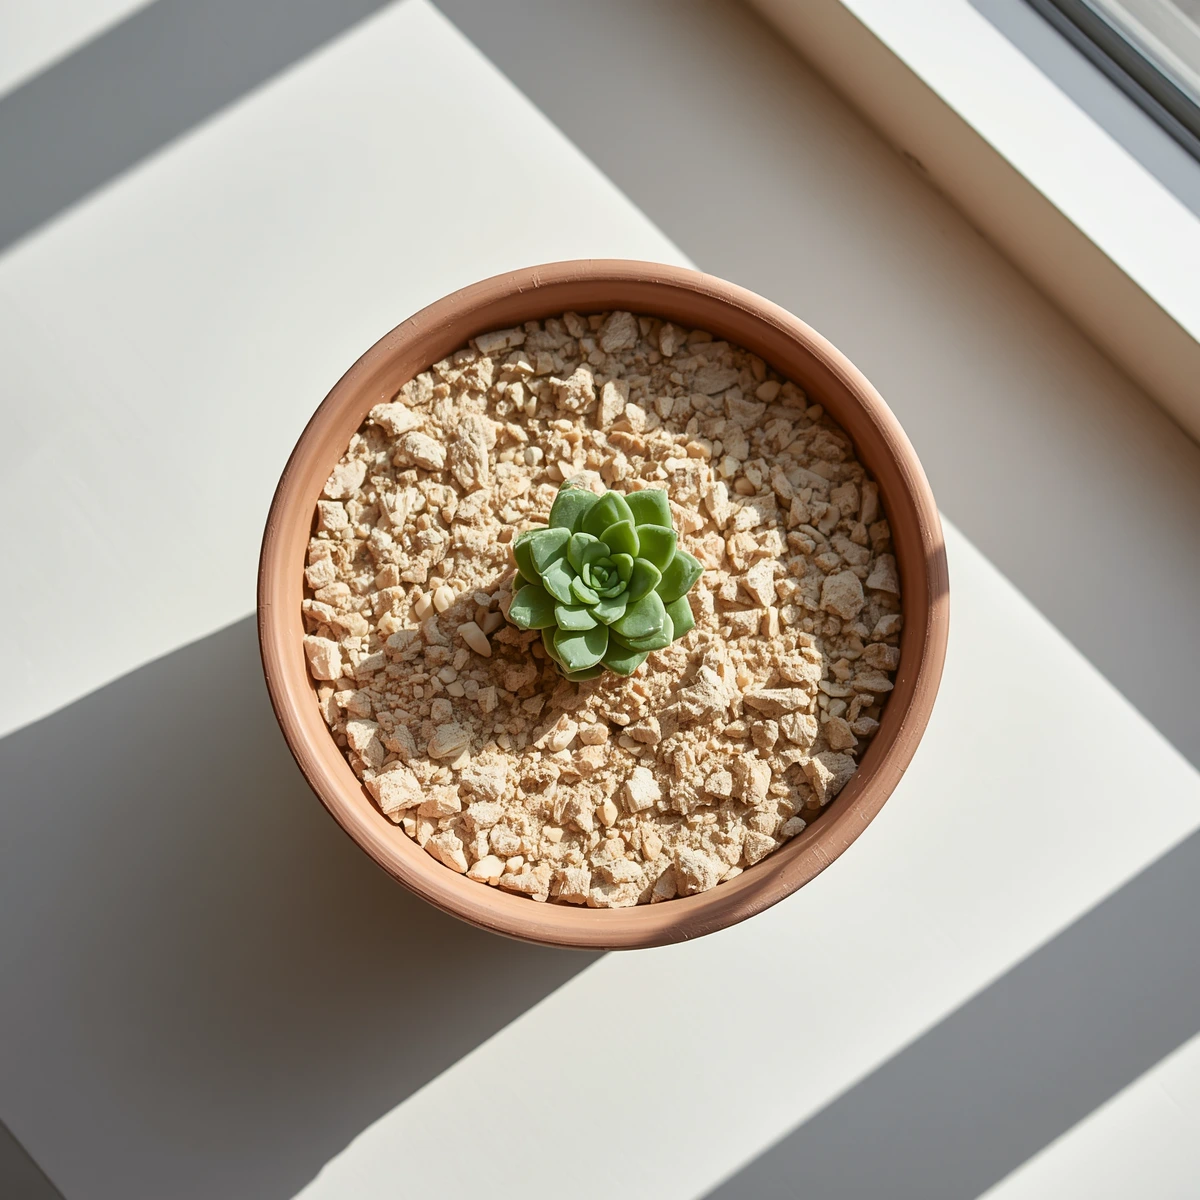
Executive Care Protocol: Planting and growing succulents successfully requires replicating their native arid environments. Select an unglazed terracotta pot that is roughly 10% larger than the plant’s current root ball and features functional drainage holes. Fill the container with a highly porous succulent soil mix consisting of equal parts organic potting soil, coarse sand, and perlite or pumice to prevent root zone hypoxia. Employ a strict “soak-and-dry” watering protocol, drenching the substrate completely and withholding water until the soil profile is entirely dry. Provide a minimum of 6 hours of bright, direct or indirect sunlight daily to prevent structural stretching (etiolation).
Operational Benchmarks: The Data-Driven Cultivation Matrix
Succulent cultivation is not art. It is applied physics and plant physiology. The following table provides measurable parameters that separate thriving specimens from rotting casualties. Memorize these thresholds.
| Cultivation Parameter | Target Operational Baseline | Pathological Threshold / Warning Sign |
|---|---|---|
| Light Radiation | 6+ hours of bright, direct or indirect sunlight daily. | Pale, leaning foliage with elongated stem gaps (Etiolation). |
| Soil Substrate Mix | 1:1:1 ratio of organic potting soil, coarse sand, and pumice/perlite. | Unamended peat moss or regular potting soil (traps moisture, causing rot). |
| Watering Cadence | Fully drench only when soil is dry 2–3 inches deep. | Calendar-based watering or misting leaves with a spray bottle. |
| Container Selection | Unglazed terracotta or clay with wide base drainage holes. | Sealed glass terrariums, cachepots, or decorative pots lacking drainage. |
| Soil Dry-Time Window | Substrate must dry out completely within 48–72 hours of watering. | Soil remaining damp or stagnant past 96 hours (hypoxia risk). |
| Pot Sizing Threshold | Pot diameter should be exactly 10% larger than the root ball. | Oversized containers that collect and retain excess moisture pools. |
Pro Tip: Purchase a simple wooden skewer or moisture probe. Insert it 3 inches deep before every watering. If any substrate clings to the probe when withdrawn, wait 48 hours and test again. This eliminates guesswork and prevents 90% of root rot cases.
The Master Protocol for Sizing and Container Selection
Do Succulents Prefer Small Pots or Big Pots?
Succulents despise spacious accommodations. The root systems of most common varieties—Echeveria, Haworthia, Sedum, and Crassula—are shallow, fibrous, and designed to absorb rainfall rapidly before it evaporates. When placed in oversized containers, the unused soil volume becomes a moisture trap, harboring stagnant water that promotes anaerobic bacterial growth.
The rule is mathematical: select a pot with a diameter only 10% larger than the plant’s current root ball. For a succulent with a 4-inch root spread, use a 4.4-inch pot. For a 6-inch specimen, use a 6.6-inch container. This tight fit ensures the roots access water quickly, and the substrate dries within the critical 48–72 hour window.
Material Selection: Terracotta vs. Ceramic vs. Plastic
Pot material determines evaporation rate. Here is the hierarchy:
- Unglazed Terracotta/Clay (Optimal): The porous walls wick moisture outward, accelerating dry time by 30–40% compared to non-porous materials. This biological air conditioning prevents the anaerobic conditions that cause root zone hypoxia. We recommend investing in quality unglazed terracotta pots for all valuable specimens.
- Glazed Ceramic (Acceptable with Modifications): The impermeable glaze traps moisture internally. If using glazed containers, reduce organic matter in your soil mix by 25% and extend dry-time monitoring to 96 hours.
- Plastic/Nursery Pots (Functional but Risky): Lightweight and affordable, but retain moisture longest. Only use if equipped with oversized drainage apertures and paired with an extremely gritty substrate (increase perlite/pumice to 40% of mix).
The No-Drainage Workaround Protocol
Decorative pots without drainage holes are death traps—unless you engineer an internal drainage reservoir. Do not simply add gravel to the bottom of a sealed container. This creates a perched water table that keeps the root zone saturated.
Instead, implement this protocol:
- Select a plastic nursery pot that fits comfortably inside your decorative cachepot, leaving at least 1 inch clearance on all sides.
- Drill or punch additional drainage holes in the nursery pot if necessary.
- Create a false bottom in the cachepot using 1 inch of activated horticultural charcoal topped with 0.5 inch of coarse gravel.
- Plant your succulent in the nursery pot using standard gritty mix.
- Insert the nursery pot into the cachepot, ensuring the base does not sit in standing water.
- Remove the inner pot for watering, allow complete drainage, then return to the decorative container.
Soil Architecture: DIY Gritty Soil Recipes
The Nursery Trap
Commercial succulent soil is engineered for greenhouse environments with intense light, constant airflow, and rapid turnover. In your apartment or home, that same mix stays wet for 10–14 days, destroying roots through root zone hypoxia. You must amend or replace it.
The 1:1:1 Gritty Mix Recipe (Standard Protocol)
- 1 part organic potting soil (base nutrients and structure)
- 1 part coarse sand (sharp drainage, prevents compaction; do not use playground sand which is too fine)
- 1 part perlite or pumice (aeration, water retention without saturation)
Mixing Protocol: Combine dry ingredients in a large container. Add water gradually while stirring until the mixture feels damp but no water pools at the bottom. The finished substrate should crumble when squeezed, never forming a cohesive clod.
Understanding Drainage Grade Function
Each component serves a specific hydrological purpose:
The organic potting soil provides ion exchange capacity and minor nutrition. It should constitute no more than 33% of the final mix, or water retention exceeds safe parameters. Avoid peat-heavy mixes; they become hydrophobic when dry and then impossibly soggy when rehydrated.
Coarse sand (grit size 0.5–2mm) creates mechanical separation between particles, preventing the compaction that collapses air pockets. Builders sand or horticultural grit works. Do not substitute fine beach sand, which packs densely and negates drainage.
Perlite and pumice are volcanic minerals with complex internal porosity. They hold water on their internal surfaces while keeping the surrounding space airy. Pumice is superior—heavier, more durable, and mineral rich but premium perlite is more widely available and functionally adequate.
The Gravel Mulch Top Dressing
Apply a 0.5-inch layer of fine gravel or aquarium pebbles atop the soil surface after planting. This layer accomplishes three objectives: it stabilizes the stem base during watering, reduces fungal spores splash-back onto lower leaves, and provides thermal mass that moderates soil temperature fluctuations.
Pro Tip: For expensive collector specimens (Variegated Echeveria, rare Haworthia), upgrade to a 1:2:2 ratio (1 part soil, 2 parts sand, 2 parts pumice). This ultra-porous mix dries within 24 hours, providing maximum protection against rot in humid climates.
The “Soak and Dry” Watering Protocol
The Misting Myth: Why Spray Bottles Kill Succulents
Misting is horticultural malpractice for succulents. When you spray leaves with a fine mist, you accomplish three destructive outcomes: you hydrate only the surface soil, encouraging shallow, weak root development; you leave water droplets on leaves that focus sunlight like magnifying lenses, burning epidermal tissue; and you create a humid microclimate around the stem that invites fungal pathogens.
Native succulents experience rare but intense rainfall events followed by extended drought. Your watering must replicate this pattern precisely.
The Correct Execution of Soak-and-Dry
- Verify Dryness: Insert a wooden skewer or your finger 2–3 inches into the substrate. If any moisture is detectable, wait 48 hours.
- Position for Drainage: Place the pot in a sink, bathtub, or outdoors where runoff can escape freely.
- Drench Completely: Pour room-temperature water slowly and evenly across the soil surface until it streams freely from the drainage holes. Continue for 30 seconds after initial runoff to ensure complete saturation.
- Drain Thoroughly: Allow the pot to rest in drainage position for 15–30 minutes until no additional water drips.
- Return to Location: Place the pot back in its growing position only after drainage is complete.
- Withhold Until Dry: Do not water again until the soil profile is completely desiccated 2–3 inches deep.
The Seasonal Watering Matrix
Succulents are not static organisms. Their metabolic demands shift dramatically with photoperiod and temperature.
Spring and Summer (Active Growth): As daylight extends past 12 hours and temperatures stabilize above 65°F (18°C), succulents enter anabolic growth phase. Roots actively seek water; leaves expand; new offsets proliferate. During this period, execute the soak-and-dry method every 14–21 days, adjusting for your specific climate humidity.
Late Autumn and Winter (Dormancy): Below 55°F (13°C) and under 10 hours of daylight, most succulents enter metabolic slowdown. Cell division halts. Water demand plummets. Reduce watering cadence to every 4–6 weeks. In some cool, humid winter climates, you may water only once every 8 weeks.
Light Physics: Preventing and Fixing Leggy Growth
What Is Etiolation?
Etiolation is a morphological stress response to insufficient light energy. When photosynthetically active radiation drops below the threshold needed for energy production, the plant elongates internodes (stem segments) and reduces leaf size, desperately stretching toward any available light source. The tissue becomes pale, chlorotic, and structurally weak.
Early etiolation signs include: widening gaps between leaf pairs, leaves flattening or pointing downward to maximize light capture surface area, and a general pale green or yellowing hue. Advanced etiolation produces stems several inches long with sparse, undersized leaves at the terminal end only.
Correcting Light Deficiency
Relocating an etiolated plant to brighter conditions will stop further stretching but will not reverse existing elongation. The stretched stem cannot compress; those cells have permanently expanded. You have two options:
Option A: Gradual Transition (For Early-Stage Etiolation)
If gaps between leaves are under 0.5 inches, move the plant to a south-facing window or provide 6+ hours of bright direct light. New growth from the center will compact to normal spacing. The existing stretched section remains, but the overall form improves over successive growth cycles.
Option B: The Beheading Procedure (For Advanced Etiolation)
- Select a clean, sharp blade (sterilize with 70% isopropyl alcohol to prevent infection).
- Identify the compact rosette or healthy top growth at the stem tip.
- Cut through the stem 0.5 inches below the lowest healthy leaves, creating a clean perpendicular sever.
- Set the severed top aside on a paper towel in indirect light for 3–5 days. Allow a hard callus window to form over the cut—this sealed tissue prevents pathogen entry when planted.
- Prepare a fresh pot with dry gritty mix (1:1:1 ratio).
- Insert the callused stem 0.5 inches into the soil. Do not water for 7 days.
- After 7 days, initiate the standard soak-and-dry protocol. The cutting will root within 2–4 weeks.
- The remaining stem base (with roots) may produce new offsets from leaf axils. Continue caring for it normally.
Supplemental Lighting for Apartment Dwellers
If your available windows provide less than 6 hours of direct sun, install an indoor LED grow light positioned 12–18 inches above the plant canopy. Operate the light 12–14 hours daily on a timer. Look for units rated 3000–4000K color temperature with minimum 2000 lumens output.
Pro Tip: Rotate your pots 90 degrees every time you water. This corrects the natural directional leaning toward light sources and promotes symmetrical rosette development.
Step-by-Step Propagation Protocol
Leaf Cutting Selection and Removal
Propagation from leaves is genetically identical cloning. Not all leaves propagate equally—lower, older leaves have reduced meristematic potential. Select plump, healthy leaves from the second or third row from the center.
Critical technique: Do not cut leaves. Place fingers at the leaf base where it meets the stem. Gently twist laterally while pulling outward. A clean propagation leaf detaches with the entire basal tissue intact. Torn leaves, partial detachment, or damaged bases will not produce plantlets.
The Callus Window Protocol
Freshly detached leaves are open wounds. Planting them immediately invites rot. The callus window is mandatory.
Arrange detached leaves on a dry paper towel or propagation tray in indirect light. Do not expose to direct sun, which desiccates the tissue. Wait 3–5 days until the cut end hardens to a dull, rough texture. This callus layer is waterproof armor against soil pathogens.
Root Induction and Plantlet Development
Once callused, place leaves atop—not buried in—dry gritty mix. Position horizontally with the callused end facing the soil. Do not water. Within 1–3 weeks, pink or white root initials emerge from the callus, growing downward into the substrate.
Only when roots are visibly established (0.5 inches long) and a miniature rosette has formed at the leaf base should you introduce moisture. Use a syringe or dropper to apply 1–2 teaspoons of water directly to the root zone every 5–7 days. Never wet the parent leaf, which can cause decomposition.
The parent leaf will shrivel as nutrients transfer to the new plantlet. When it becomes papery and dry, gently separate it and pot the established young succulent normally.
Emergency Triage and Troubleshooting Matrix
Visual diagnosis is rapid when you know the pathological signatures. Use this matrix to identify and treat common failure modes.
| Visual Plant Symptom | Primary Root-Cause | Corrective Triage Protocol |
|---|---|---|
| Leaves are yellow, translucent, soft, and drop at the slightest touch. | Advanced Overwatering / Early Root Rot. Plant tissue cells are rupturing from water volume. | Emergency Rescue: Unpot immediately. Inspect the root system and slice away any black or mushy rot. Allow the bare plant to air dry for 48 hours, then repot in completely dry, gritty soil mix. |
| Foliage appears shriveled, thin, wrinkled, and physically crisp. | Severe Underwatering. The succulent has depleted its internal water storage cells. | Execute a deep, thorough watering cycle using the soak-and-dry method. Ensure water completely exits the drainage holes. Foliage should plump back up within 24–48 hours. |
| Stems are stretching long, thin, and pale while leaning toward the glass. | Etiolation. Severe lack of direct UV light exposure. | Gradually transition the plant into a south-facing window or install an indoor LED grow light. Execute a clean “beheading” prune if the structural stretching is permanent. |
| White, cotton-like fuzzy clusters nesting in the leaf joints. | Mealybug Infestation. Sap-sucking insects destroying plant tissue. | Dip a cotton swab directly into 70% isopropyl alcohol and physically dab away every visible pest cluster. Isolate the plant from your collection to prevent spreading. Repeat every 3 days for 2 weeks. |
Root Rot Surgical Intervention
If overwatering has advanced to root rot, you must operate. Unpot the plant and rinse all soil from the root system. Healthy roots are firm, white or tan, and fibrous. Rotting roots are black, brown, or gray, and feel slimy or hollow.
Using sterilized shears (wiped with 70% isopropyl alcohol), excise all diseased tissue until only healthy, firm root remains. Even if you remove 90% of the root mass, the plant can recover via adventitious root regeneration.
Apply cinnamon powder—a natural fungicide—to the cut surfaces. Allow the plant to air dry for 48–72 hours in indirect light. The roots must desiccate completely. Then repot in fresh, dry gritty mix and wait 7 days before the first cautious watering.
Semi-Hydroponic Cultivation: The LECA Transition Protocol
LECA (Lightweight Expanded Clay Aggregate) cultivation is gaining popularity for succulents, offering complete control over moisture delivery. Transitioning requires a specific protocol to prevent shock.
Step 1: Unpot your succulent and remove all organic soil from the roots under running water. Organic residue in LECA causes anaerobic bacterial blooms.
Step 2: Trim roots by 30% to stimulate new fibrous growth adapted to water uptake from clay surfaces.
Step 3: Place a 1-inch reservoir of LECA balls in a clear glass container without drainage. Add the plant, filling around it with additional LECA to the base of the lowest leaves.
Step 4: Fill the reservoir with water mixed with hydroponic nutrients at 25% strength. The water level should reach 1/3 of the way up the LECA layer—roots will grow down toward moisture.
Step 5: Change the reservoir water every 14 days. Never allow the reservoir to dry completely; LECA cultivation depends on consistent capillary moisture, unlike soil-based soak-and-dry.
Important: LECA transitions succeed best with plants showing active root growth (spring/early summer). Dormant plants often fail to establish in semi-hydroponic systems.
Seasonal Maintenance Calendar
Spring (March–May)
Resume regular watering as daylight increases. Inspect for pest emergence as temperatures rise. Begin fertilization with diluted succulent-specific nutrients (half strength, once monthly). This is optimal propagation season—take leaf cuttings now for highest success rates.
Summer (June–August)
Monitor for sunburn if transitioning plants outdoors gradually. Shade cloth may be necessary in climates exceeding 90°F (32°C). Water in early morning to prevent fungal issues. Watch for mealybug infestations in leaf axils—heat stress increases pest pressure.
Autumn (September–November)
Reduce watering frequency as photoperiod shortens. Withhold fertilizer entirely. Inspect plants before bringing outdoor specimens inside for winter—quarantine for 2 weeks to prevent introducing pests to your collection. Prepare indoor lighting adjustments.
Winter (December–February)
Minimal intervention required. Water only when leaves show slight wrinkling. Maintain temperatures above 40°F (4°C) for most varieties. Avoid repotting or propagation—root development is minimal during dormancy and failure rates are high.
Pro Tip: Create a simple care log. Record watering dates, repotting events, and observed growth phases. After one full year, you will have customized data showing exactly how your specific plants respond to your home’s unique light, humidity, and temperature patterns.
Advanced Diagnostic FAQ
Why are my succulent’s leaves pointing downward?
This is typically a light-seeking behavior (phototropism) combined with slight etiolation. The leaves flatten to maximize light interception surface area. Increase light exposure gradually over 1 week to prevent sunburn.
Can I save a succulent with a completely black stem?
If the stem base is black, mushy, and emits an odor, the plant is beyond recovery. However, if any healthy tissue remains above the rot, execute the beheading procedure immediately. The severed top can root and continue living.
How do I transition a succulent from low light to high light without burning it?
Acclimate over 7–10 days. Start with 1 hour of direct morning sun, increasing by 1 hour daily. Afternoon sun is more intense and can burn unadapted tissue. Watch for purple or bronze coloration—this is sun stress, a protective pigment accumulation, and is healthy unless accompanied by browning or crisping.
Is tap water safe for succulents?
Tap water is generally acceptable, but dissolved minerals can accumulate as white crust on soil surfaces. If your water is highly chlorinated, let it sit uncovered overnight to dissipate. If very hard (high calcium/magnesium), collect rainwater or use distilled water monthly to flush accumulated salts.
Why do my propagation leaves shrivel without producing roots?
Either the callus window was insufficient (plant rotted from the base), the parent leaf was too old to contain viable meristematic tissue, or environmental humidity was too low for root initiation. Try again with younger leaves and maintain 50–60% ambient humidity during the rooting phase.
Should I remove dead leaves from the base of my succulent?
Yes. As lower leaves naturally senesce and dry, they become habitat for pests and fungal spores. Gently pull them away once completely papery. If still partially attached (pliable), the plant is still extracting nutrients—leave it until dry.
How do I repot a succulent without damaging the farina?
Farina is the powdery epicuticular wax coating on leaves like Echeveria and Pachyphytum that provides UV protection. It does not regenerate. Handle only by the root ball or pot edges. Never touch the leaves directly if avoidable. Water the plant 2 days before repotting—slightly flexible leaves resist abrasion better than fully dehydrated ones.
What causes brown, corky spots on my succulent leaves?
Physiological edema: cells ruptured from rapid water uptake after drought stress. It is cosmetic damage, not disease. Prevent by avoiding dramatic swings between bone-dry and saturated soil. Edema is common in autumn when warm days follow cool nights and root water uptake outpaces leaf transpiration.
Can I plant multiple succulents together in one pot?
Arrangement planting is possible but requires discipline. All grouped specimens must share identical water and light requirements. Do not combine winter-dormant species with summer-dormant species. Do not mix slow-growing rosettes with aggressive spreading Sedum. Use a container only 10% larger than the combined root mass. If one plant develops rot, the entire arrangement is compromised.
My aerial roots are growing from the stem—what does this mean?
Aerial roots indicate either high ambient humidity triggering adventitious root formation (harmless), or the root ball is struggling and the plant is attempting to anchor above soil level for stability. If the stem is firm and leaves are healthy, simply tuck aerial roots into soil or trim them. If accompanied by leaf shriveling, unpot and inspect for hidden root loss.