
You spent weeks searching for the perfect specimen. You placed it on your desk or patio with pride, determined to keep this living sculpture alive. Three months later, the leaves are yellowing, the branches look brittle, and you’re watering it exactly as the nursery tag instructed — yet it’s dying. The brutal truth about bonsai mortality is this: over 80% of beginner bonsai trees die within the first six months, and the culprit is almost never neglect. It’s misunderstood care, generic advice, and a fundamental failure to recognize what kind of tree you’re actually growing.
Bonsai tree care is not simply gardening at a smaller scale. It is a disciplined horticultural practice that forces you to understand root physiology, substrate science, species-specific dormancy requirements, and the precise timing of pruning for miniaturization. Get these elements right, and a well-maintained bonsai can outlive you. Get them wrong, and even a $500 specimen becomes compost within weeks. This guide replaces guesswork with measurable protocols.
Bonsai cultivation is a mindful horticultural art requiring precise moisture management, specific lighting, and structural pruning to maintain miniaturized tree forms. The primary cause of bonsai mortality is overwatering and poor drainage; therefore, trees must be planted in a highly porous, fast-draining substrate, typically a mix of 70% Akadama clay and 30% pumice. Cultivation requirements depend entirely on the species classification: indoor tropical bonsai (like Ficus) require temperatures of 60-75°F and >40% ambient humidity, while outdoor cold-hardy bonsai (like Juniper and Maple) require 6+ hours of direct sunlight and mandatory winter dormancy. Watering should never be executed on a calendar schedule; growers must use the “touch test” and water deeply — often by full immersion — only when the top inch of the soil profile is completely dry.
Your Operational Baseline: The Cultivation Target Metrics
Before you touch a pair of shears or water a single drop, you need hard numbers. Bonsai trees do not forgive vague care. The table below isolates the exact operational baselines you must maintain versus the pathological thresholds that signal your tree is in crisis.
| Cultivation Parameter | Target Operational Baseline | Pathological Threshold / Warning Sign |
|---|---|---|
| Indoor Light (Tropicals) | 2–4 hours of natural or full-spectrum artificial light. | Yellowing leaves and slow, stunted growth. |
| Outdoor Light (Hardy) | 6+ hours of direct sunlight (morning sun, afternoon shade). | Weak internode stretching or leaf scorch from midday heat. |
| Watering Cadence | Wait until the top 1 inch of soil feels dry, then immerse fully. | Constant wetness leading to root suffocation and black roots. |
| Substrate Mix | 70% Akadama clay + 30% pumice/lava rock for drainage. | Compacted, generic potting soil where water pools on the surface. |
| Pruning Technique | Prune shoots extending 4–5 leaves back to 2–3 leaves. | Unchecked growth destroying the tree’s carefully designed silhouette. |
| Repotting Frequency | Every 2 years in early spring; trim 1/3 of the root mass. | Roots circling the pot and water running straight down the sides. |
The 2026 Shift: Bonsai as Mindful Wellness
The Cultural Renaissance
Bonsai cultivation is poised to become one of the defining wellness movements of 2026. What began as an ancient Japanese art form is now being rediscovered as a deliberate counter-practice to the overstimulation of digital life. The trend is measurable: search volume for bonsai care has increased over 140% since 2023, and specialty nurseries are reporting sold-out inventories of beginner-friendly tropical varieties before spring even arrives.
This surge is not a fleeting aesthetic trend. People are not buying miniature trees solely for decoration. They are seeking an analog ritual — something that demands slowness, observation, and hands-on presence. In an era of constant notifications and algorithmic feeds, the act of pruning a single branch with intent becomes an act of resistance. The bonsai does not care about your deadlines. It grows on its own schedule, and that unhurried pace is precisely what makes the practice restorative.
The Science of Horticultural Mindfulness
The deliberate focus required for proper bonsai cultivation functions as a form of horticultural therapy backed by measurable physiology. Research in environmental psychology demonstrates that hands-on plant interaction activates the body’s parasympathetic nervous system, producing measurable reductions in cortisol levels and systolic blood pressure within 20 minutes of sustained engagement. Unlike passive houseplants that sit in the background, bonsai demand active participation: the touch-test method for moisture assessment, the visual scanning for directional growth, the tactile precision of trimming shoots to maintain scale.
This is where horticultural mindfulness diverges from simply owning plants. It is a structured practice of sensory attunement. You learn to read the subtle curvature of new growth, the texture shift in leaf color that signals nutritional distress, and the specific weight of a pot that indicates whether the root mass needs water. This depth of observation trains the same cognitive circuits used in meditation — sustained attention without judgment — but with the added feedback loop of a living organism that responds visibly to your care.
As we move deeper into 2026, expect to see bonsai workshops replacing spin classes in certain wellness circles. The practice offers what high-intensity exercise cannot: a parasympathetic reset that compounds over time rather than depleting reserves.
Pro Tip: Create a weekly “bonsai ritual” of 20–30 minutes on the same day each week. Remove your phone from the room. Use this time exclusively for observation — watering, checking new growth, noting any color changes — and let your breathing slow to match the deliberate pace of the work. Treat it as scheduled nervous system maintenance, not a chore.
The Rule of Location: Indoor vs. Outdoor Species
The #1 Beginner Trap
The single most common and fatal mistake in bonsai tree care is treating an outdoor species as a houseplant. If you take one lesson from this section, make it this: species classification determines location, and location is non-negotiable. A Juniper bonsai placed on a windowsill will not adapt to indoor life. It will slowly decline over a period of weeks or months as its biological cycle breaks down, and by the time the foliage shows visible distress, the internal damage is often irreversible.
The biological distinction is rooted in dormancy. Cold-hardy outdoor trees have evolved to require a winter dormancy period where temperatures drop below 40°F for sustained intervals. This is not a preference. It is a hard-coded survival mechanism that triggers cellular repair processes, hormone recalibration, and bud-setting for the following spring. Depriving these species of winter cold is equivalent to forcing a bear to skip hibernation and stay awake for two years straight.
Indoor Bonsai: Tropical Species
Indoor tropical bonsai are species native to equatorial climates where temperature fluctuations are minimal and frost never occurs. These trees do not require a winter dormancy period and will actively grow year-round given sufficient light and warmth. The most reliable indoor species for beginners include Ficus microcarpa (Ginseng Ficus), Portulacaria afra (Jade), and Carmona microphylla (Fukien Tea).
The environmental requirements are precise but achievable in most homes. Maintain a stable temperature range of 60–75°F at all times — tropical bonsai cannot tolerate drops below 55°F without cellular damage. Humidity must stay above 40% ambient humidity; dry indoor air during winter heating season will cause leaf drop and tip die-back. Use a humidity tray filled with pebbles and water placed beneath the pot (ensuring the pot itself sits above the waterline to avoid root rot) to create a localized microclimate. Position the tree within 2–4 feet of a south-facing window for direct morning exposure, or supplement with full-spectrum LED grow lights if your space lacks adequate natural light.
Outdoor Bonsai: Coniferous and Deciduous Species
Outdoor cold-hardy bonsai include Juniper, Pine, Japanese Maple, Chinese Elm, and most deciduous broadleaf species. These trees must live outside year-round in USDA Hardiness Zones 4–8. They require a minimum of 6+ hours of direct sunlight daily, ideally structured as morning sun with partial afternoon shade to prevent leaf scorch during peak summer heat. If you are serious about bonsai tree care and your living situation has no outdoor space, these species are categorically off-limits. Do not attempt to make them work indoors.
The dormancy requirement is absolute. These species must experience sustained cold between 32–40°F for 8–12 weeks minimum during winter. This triggers essential metabolic processes including carbohydrate redistribution, enzymatic rest, and vernalization (the cold exposure that enables bud-break in spring). A Juniper brought indoors for as few as 5 consecutive days during winter can have its dormancy cycle disrupted sufficiently to cause cascading hormonal failure and death the following spring.
Quick Species Classification Guide
If you are unsure whether your bonsai belongs indoors or outdoors, use this identification framework:
- Thick, glossy evergreen leaves with smooth bark — Likely tropical; keep indoors year-round.
- Needle-like foliage (scale or awl-shaped) with woody, rough bark — Coniferous outdoor species; must remain outside.
- Broad, palmate deciduous leaves that seasonally change color and drop — Cold-hardy outdoor species; requires winter dormancy.
- Small oval leaves with fissured bark and tiny white flowers — Likely Carmona (Fukien Tea); indoor tropical.
The “Touch Test” and Immersion Watering Protocol
Abandon the Calendar: The Touch-Test Method
The most dangerous advice ever given to bonsai growers is “water every X days.” No two environments have the same evaporation rates. No two pots dry at the same speed. A Ficus bonsai in a dry, air-conditioned office may need water every 3–4 days in August and every 10 days in January. A Juniper in a humid outdoor garden may go a full week between waterings in spring and need daily attention in a summer heatwave.
The only reliable method for determining when to water is the touch-test method. Place your finger approximately 1 inch deep into the soil substrate — either by gently scratching the topsoil surface or by lifting the edge of the decorative moss layer. If the substrate at that depth feels dry to the touch, with no clinging moisture on your fingertip, it is time to water thoroughly. If any moisture is detectable, wait and test again the following day. This single habit will prevent more root rot deaths than any other technique in bonsai care.
Environmental factors that accelerate drying include high indoor heating, low ambient humidity, direct sun exposure on dark-colored pots, small pot volume relative to canopy size, and active growth phases in spring and summer. Conversely, winter dormancy, high humidity, overcast conditions, and larger ceramic pots all extend the interval between waterings. The touch test accounts for all of these variables simultaneously because it measures the actual condition of the root zone rather than guessing at it.
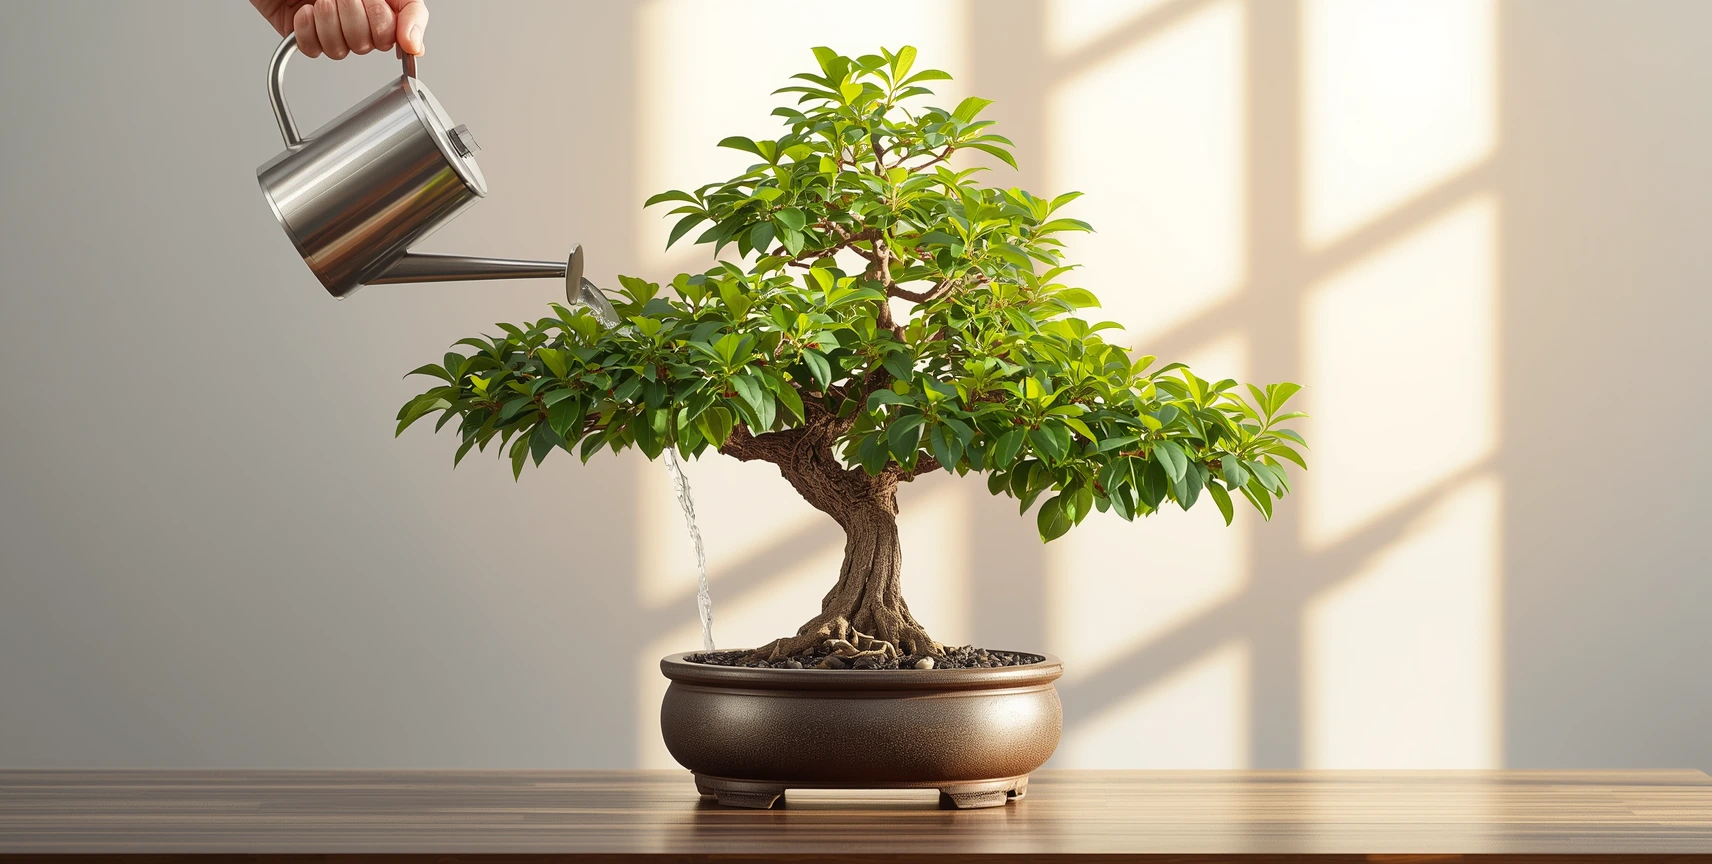
The Immersion Watering Technique
Once the touch test confirms dryness, the next critical decision is how to apply water. Top-watering with a can or hose is the most common approach — and the most problematic for established bonsai. Over time, the dense, compacted root mass of a bonsai can become slightly hydrophobic, especially if allowed to dry out too far. Water applied from above will channel through the edges of the pot or run across the surface without penetrating the core root ball, leaving the center of the root system invisibly dry while the grower believes they’ve watered adequately.
The professional solution is the immersion watering technique. This method guarantees complete and uniform saturation of the entire substrate profile without dislodging soil or blasting delicate surface roots. Follow this exact protocol:
- Fill a basin, sink, or bucket with room-temperature water. The water level should be deep enough to reach the soil surface when the pot is submerged, but not so deep that it overflows the pot’s rim.
- Gently lower the entire bonsai pot into the water. Hold it steady as air begins to escape from the drainage holes at the bottom of the pot.
- Watch for air bubbles rising to the water’s surface. These bubbles indicate trapped air being forced out of the root ball by capillary action as water is drawn upward into the substrate.
- Keep the pot fully submerged until the bubbling slows to a near stop — typically 5 to 10 minutes, though very dry specimens may require up to 15 minutes. This ensures the entire root mass is saturated, not just the edges.
- Lift the pot from the basin and allow it to drain completely on a rack or in a sink. Never return a dripping-wet bonsai to its display tray; standing water at the base is an open invitation for root rot.
The immersion watering technique is particularly critical for trees that show signs of chronic underwatering despite regular top-watering. If your bonsai foliage is crispy and the soil always seems to dry out impossibly fast, your root ball has likely become hydrophobic and is repelling surface water. A 10–15 minute immersion soak will break this cycle and rehydrate the core root system.
The Complete Watering Protocol Card
- Test daily using the 1-inch finger insertion test.
- Water only when dry — never on a schedule.
- Immerse fully for 5–10 minutes at room temperature.
- Drain completely before returning to display position.
- Reduce frequency by 50% during winter dormancy periods.
- Never use cold tap water directly on tropical species; let it reach room temperature first.
Pro Tip: For large or heavy specimens that cannot be easily immersed, use a watering can with a very fine rose attachment and water in three slow passes around the pot, allowing 30 seconds between passes for absorption. The first pass breaks surface tension; the second begins penetrating the root ball; the third achieves full saturation. If water begins draining from the bottom before you finish the third pass, you’re applying it too fast.
Precision Pruning: The 4-to-2 Rule
Maintenance Pruning for Miniaturization
The defining characteristic of a bonsai is not the size of the pot. It is the illusion of a full-sized tree rendered in miniature — and that illusion is maintained almost entirely through disciplined pruning. Unchecked, a bonsai will rapidly lose its proportional structure as shoots elongate, internodes stretch, and the canopy becomes an undifferentiated blob rather than a scaled-down ancient tree.
The golden rule for maintenance pruning is the 4-to-2 method. Allow any given shoot to extend and develop 4 to 5 leaves. Then, using sharp bonsai shears, cleanly cut it back to 2 or 3 leaves. This accomplishes two critical objectives simultaneously: it halts the shoot’s vertical elongation, preserving the compact silhouette, and it redirects the tree’s growth hormone (auxin) to stimulate back-budding on the remaining wood. Over time, this produces the dense ramification — the fine branching structure — that distinguishes exhibition-quality bonsai from neglected shrubs in small pots.
The distinction between structural pruning vs. maintenance pruning is essential to understand. Maintenance pruning, governed by the 4-to-2 rule, happens throughout the active growing season and is concerned with refinement and density. It is the ongoing, frequent work that keeps the tree in scale. Structural pruning, by contrast, is the heavy, transformative work of removing major branches to establish the tree’s fundamental design — the primary trunk line, the first branch placement, the overall front of the tree. These are fundamentally different operations with different timing requirements.
Structural Pruning Timing and Protocol
Major branch removal to dictate the tree’s core shape should only be performed during two specific windows: early spring, before new buds begin to push, or early autumn, after the summer growth flush has hardened off but before temperatures drop enough to slow wound healing. Removing large branches outside these windows subjects the tree to excessive stress without the metabolic resources to compartmentalize the wound or redirect growth effectively.
Before making any structural cut, identify the tree’s “front” — the viewing angle that displays the best trunk movement and root spread. Every structural cut should reinforce this perspective. Use a concave branch cutter rather than flat shears for branch removal; the curved blade creates a slightly hollow wound that heals flush with the trunk rather than leaving a protruding knob. Seal wounds larger than a pencil diameter with cut paste (a specialized wound-sealing compound) to prevent desiccation and fungal entry.
Soil Architecture and the 2-Year Repotting Cycle
The Substrate: Why Regular Potting Soil Kills Bonsai
Standard peat-based potting soil is the second most common cause of bonsai death after overwatering. It is engineered for moisture retention in standard nursery containers — exactly the opposite of what bonsai roots require. Within 6–12 months in a bonsai pot, peat composts, compacts, and collapses into an anaerobic brick that traps water against the roots and suffocates them through oxygen deprivation. Water pools on the surface rather than draining through, and the roots begin to rot invisibly beneath the soil line.
Professional bonsai cultivation demands a substrate engineered for the opposite properties: maximum drainage, high gas exchange, and structural stability that does not break down over time. The industry-standard recipe used by Japanese masters and professional growers worldwide is precise:
Professional Bonsai Substrate Recipe
- 70% Akadama clay — Japanese baked clay granules that hold water within their microporous structure without becoming waterlogged or breaking down for 2–3 years.
- 30% pumice or lava rock — Volcanic aggregates that create macro-pores for drainage, prevent compaction, and provide trace mineral content.
- Sieve to uniform particle size — Discard all fine dust and particles smaller than 2mm. Uniform sizing prevents the fine material from filling the gaps between larger granules and destroying drainage.
- Never add organic compost, peat, or standard potting mix — These components defeat the entire purpose of the mineral substrate.
Akadama clay is the irreplaceable core of this mix. Mined in Japan and kiln-baked to precise hardness, it absorbs water into its internal structure and releases it slowly to the roots as the surrounding environment dries. This creates a moisture buffer that prevents both drought stress and waterlogging simultaneously. Unlike peat or coconut coir, Akadama maintains its granular structure for years without decomposing, ensuring that drainage does not degrade over time.
Pumice provides the complementary function of pure drainage and aeration. Its irregular, highly porous surface also provides ideal anchorage for new feeder roots. The combination of these two materials creates a substrate that is nearly impossible to overwater — excess moisture simply drains through the bottom — while still retaining sufficient hydration in the Akadama granules to sustain the tree between waterings.
The 2-Year Repotting Protocol and 1/3 Root Reduction
Even the best substrate eventually breaks down, and even the most perfectly potted tree eventually becomes root-bound. Every bonsai must be repotted on a 2-year cycle in early spring, just as buds begin to swell but before they open into leaves. This timing is non-negotiable: the tree’s stored carbohydrate reserves are at their peak, root regeneration capacity is maximum, and the stress of root disturbance is minimized because the tree is not yet supporting active canopy growth.
The repotting procedure itself is methodical and must be executed without rushing:
- Remove the tree from its pot by running a root hook or blunt chopstick around the interior perimeter to break the root-to-pot adhesion. Gently ease the tree out without yanking or pulling on the trunk.
- Using a root hook or fine comb, carefully tease out the outer root mass. Untangle any circling root mass that has wrapped around the pot’s interior. These girdling roots will eventually strangle the trunk base if left untreated.
- Using sharp, clean root shears, trim away exactly 1/3 of the total root mass — focusing on the outer perimeter and bottom of the root ball. This reduction keeps the tree miniaturized by limiting its ability to expand its root system and signals the plant to generate fresh, fine feeder roots rather than thick structural roots.
- Replace the drainage mesh over the pot holes and add a thin layer of coarse substrate at the bottom to ensure unimpeded drainage.
- Position the tree in the pot (or a slightly larger pot if the tree has outgrown its current container) and fill around the root mass with fresh 70/30 Akadama-pumice mix. Work the substrate into gaps using a chopstick to eliminate air pockets.
- Water thoroughly by immersion immediately after repotting to settle the soil and initiate root-soil contact. Place the tree in partial shade for 2–3 weeks to reduce transpiration stress while new root growth establishes.
The Diagnostic Failure Matrix: Why Is It Dying?
When a bonsai shows distress, panic is counterproductive. The symptoms are a language, and each visual cue points to a specific physiological failure with a specific corrective protocol. Use this matrix to diagnose accurately and act decisively.
| Visual Symptom | Primary Root-Cause | Corrective Triage Protocol |
|---|---|---|
| Leaves are turning brown/black and dropping, soil is heavy | Overwatering / Poor Drainage. The roots are suffocating in stagnant water and rotting. | Stop watering immediately. Ensure the pot’s drainage holes are clear. Let the soil dry out entirely before the next watering cycle. |
| Foliage is crispy, brittle, and falling off rapidly | Severe Underwatering. The dense root ball has become hydrophobic and repels top-watering. | Execute a full immersion soak for 10–15 minutes until all bubbling stops. |
| Tree has yellowing leaves, pale color, and stunted growth | Nutritional Distress or Low Light. The tree has exhausted the nutrients in its tiny pot, or is light-starved. | Relocate to a brighter window (if indoor) and begin applying a liquid fertilizer every 2 weeks during the spring and summer growing season. |
| Water runs immediately down the sides of the pot during watering | Root-Bound Soil Compaction. The roots have completely filled the pot, leaving no room for water absorption. | You must repot the tree. Wait until early spring, remove from the pot, trim the root mass by 1/3, and replant in fresh Akadama mix. |
Brown Leaves: The Four Pathologies
Brown leaves are the most alarming symptom for bonsai growers, and they have four distinct causes that require different responses. Misdiagnosing brown foliage leads to the wrong intervention — often worsening the problem.
Brown, soft, and translucent leaves indicate root rot from overwatering. The leaf tissue is waterlogged, and the brown coloration spreads from the tips inward. The soil will smell musty. Intervention: stop watering, check drainage, and allow the substrate to dry completely before resuming the touch-test protocol. In severe cases, remove the tree from the pot, trim all black or mushy roots back to healthy white tissue, and repot in fresh dry Akadama mix.
Brown, crispy, and dry leaves signal underwatering or desiccation from low humidity. The leaf tissue has dried out and the browning is brittle to the touch, often starting at the margins. Intervention: perform a full immersion soak for 10–15 minutes, increase ambient humidity with a tray, and check whether the root ball has become hydrophobic.
Uniform yellowing followed by brown drop is classic nutritional distress. The tree is cannibalizing nutrients from older leaves to support new growth because the tiny pot offers no nutritional reservoir. Intervention: begin a consistent liquid fertilizer regimen at half strength every 2 weeks during the growing season. For organic growers, use a balanced liquid bonsai fertilizer or diluted fish emulsion.
Localized brown scorch patches on otherwise healthy leaves suggests sunburn from sudden exposure to intense direct light, particularly after the tree has been in lower light conditions. Intervention: move the tree to a location with morning sun and afternoon shade, and never transition a tree from indoor low light to full outdoor sun without a 2-week acclimation period.
Frequently Asked Questions
How often should I water my bonsai tree?
Never on a fixed schedule. Use the touch-test method daily: insert your finger 1 inch into the soil, and water only when that depth is completely dry to the touch. Frequency varies from every 2 days in hot, dry conditions to every 10–14 days in cool, humid winter dormancy. The immersion watering technique provides the most reliable saturation when watering is needed.
Can I keep a Juniper bonsai indoors?
No. Juniper bonsai are cold-hardy outdoor species that require a mandatory winter dormancy period with sustained temperatures between 32–40°F for 8–12 weeks. Bringing a Juniper indoors for even 5 consecutive days can disrupt its biological cycle and cause death. If you lack outdoor space, choose a tropical indoor species like Ficus microcarpa instead.
What is the best soil mix for bonsai trees?
The professional standard is 70% Akadama clay and 30% pumice or lava rock. This mineral-based substrate provides exceptional drainage while retaining adequate moisture within the Akadama granules. Never use standard peat-based potting soil — it compacts, drowns roots, and will kill your bonsai within months.
When should I prune my bonsai?
Maintenance pruning using the 4-to-2 rule — cutting shoots back from 4–5 leaves to 2–3 leaves — can be performed throughout the active growing season. Structural pruning (removing major branches) should only be done in early spring before buds push, or in early autumn after the summer growth has hardened. Never remove more than 30% of total foliage in a single session.
How do I know if my bonsai needs repotting?
The clearest indicator is water behavior: if water runs straight down the sides of the pot during watering rather than soaking in, the root mass has filled the pot entirely and the substrate has compacted. Other signs include slowed growth despite adequate care, roots visible at the drainage holes, and a general decline in vigor. Repot every 2 years in early spring regardless, trimming 1/3 of the root mass each time.
Why are my bonsai leaves turning yellow?
Yellowing leaves indicate one of three conditions: low light (move the tree to a brighter location or add grow lights), nutritional deficiency (begin fertilizing every 2 weeks during the growing season), or overwatering (check that the top inch of soil is dry before watering and ensure the substrate drains freely). Observe whether the yellowing starts on older leaves first — this pattern confirms nutrient deficiency.
What fertilizer should I use for bonsai trees?
Use a balanced liquid fertilizer with an NPK ratio close to 10-10-10 or 7-7-7, diluted to half the manufacturer’s recommended strength. Apply every 2 weeks during the spring and summer growing season. Reduce to once monthly in autumn, and stop entirely during winter dormancy for outdoor species. Organic options include organic liquid bonsai fertilizer, liquid seaweed extract, and diluted fish emulsion. Never fertilize a tree within 4–6 weeks of repotting.
How do I save a bonsai that was overwatered?
Immediate intervention is critical. Remove the tree from its pot and inspect the roots. Using sterilized shears, cut away all brown, black, or mushy roots until only firm, white or light-colored healthy tissue remains. Repot in completely fresh, dry 70/30 Akadama-pumice mix. Do not water for 48–72 hours after repotting to allow cut surfaces to callus. Resume the touch-test protocol conservatively — test deeper than 1 inch initially to ensure the lower root zone has dried adequately.
Do bonsai trees need direct sunlight?
It depends on the species classification. Outdoor cold-hardy bonsai (Juniper, Pine, Maple) require a minimum of 6 hours of direct sunlight daily, ideally morning sun with afternoon shade. Indoor tropical bonsai need 2–4 hours of direct or bright indirect light; supplement with full-spectrum LED grow lights positioned 12–18 inches above the canopy if natural light is inadequate. Insufficient light produces weak, stretched growth and pale yellow foliage.
What tools do I actually need for bonsai care?
The essential toolkit is minimal but specialized: a pair of sharp carbon steel bonsai shears for pruning, a concave branch cutter for removing branches flush with the trunk, a root hook or rake for untangling roots during repotting, and a set of long-tweezers for removing dead foliage and placing wire. For wiring and shaping, add aluminum training wire in 1.0mm, 1.5mm, and 2.5mm gauges. A humidity tray is strongly recommended for indoor tropical species.