
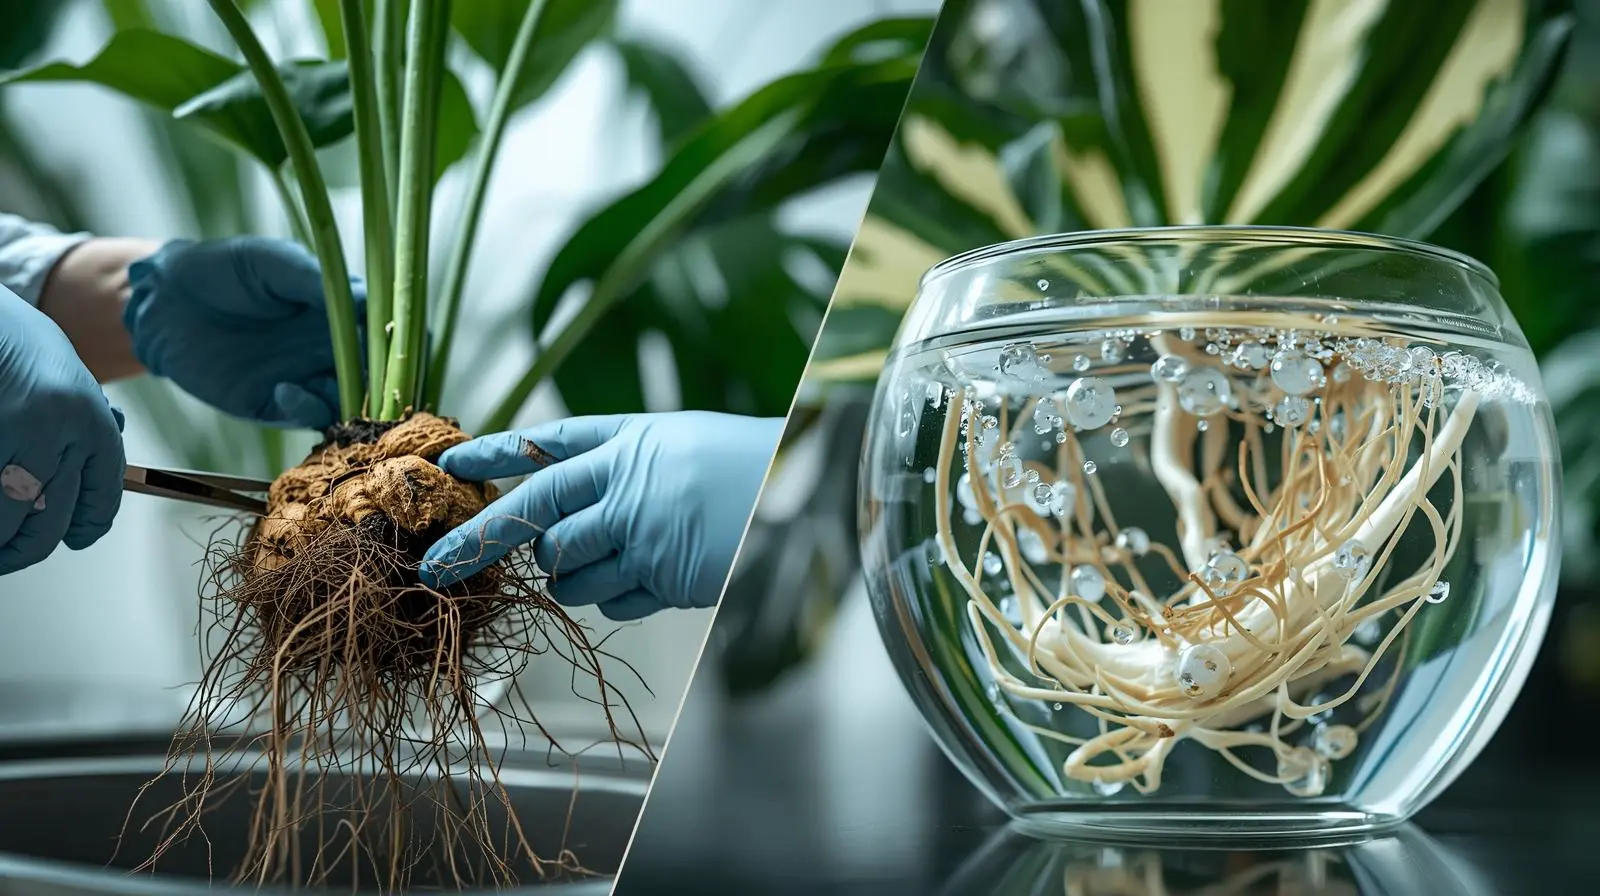
⚠️ Emergency Triage: A High-Value Plant in Critical Condition
Monstera Thai Constellation root rot is treatable if you act within 7 to 10 days of the first symptoms: unpot the plant, cut every mushy brown or black root back to firm white tissue, soak the survivors in dilute 3 percent hydrogen peroxide, and re-root in a sterile, oxygen-rich medium until new white roots form.
These variegated cultivars cost 150 to 400 dollars or more, so watching the cream-splashed leaves yellow and collapse is a real loss. Root rot also moves fast, progressing from first symptoms to collapse in roughly 7 to 14 days once anaerobic pathogens take hold.
This is a clinical, step-by-step rescue procedure, not a “sprinkle cinnamon and hope” guide. Work through it in order and skip nothing.
| Parameter | Ideal | Avoid |
|---|---|---|
| Action window | Treat within 7 to 10 days of first symptoms | Waiting until multiple leaves collapse |
| Root removal | Cut back to firm white or tan tissue | Leaving any soft, brown, or streaked root |
| Sterilant | 3 percent hydrogen peroxide, diluted 1:2 with water | Undiluted or 6 to 12 percent peroxide, rubbing alcohol on roots |
| Soak time | 10 minutes (15 minutes maximum) | Open-ended soaking that burns root tips |
| Re-rooting medium | Sterile perlite, long-fiber sphagnum, or aerated water | Returning straight to dense potting soil |
| Recovery environment | 70 to 85 percent humidity, 70 to 78 F, bright indirect light | Direct sun, cold drafts, early fertilizer |
📋 Emergency Protocol Timeline
- How Do You Know If Your Thai Constellation Has Root Rot?
- How Do You Surgically Remove Root Rot?
- How Do You Sterilize Roots With Hydrogen Peroxide?
- How Do You Re-Root a Thai Constellation After Surgery?
- How Do You Prevent Thai Constellation Root Rot?
- Is Monstera Thai Constellation Toxic to Cats and Dogs?
- Frequently Asked Questions
How Do You Know If Your Thai Constellation Has Root Rot?
Before you cut anything, confirm the Monstera Thai Constellation root rot diagnosis. Not every yellow leaf means rot. Thai Constellation naturally sheds older leaves, and the cream variegated sections brown at the edges in low humidity. True root rot is systemic, fast, and has unmistakable physical signs.
According to University of Maryland Extension, Pythium root rot turns roots brown to black and soft, and the outer layer slips off the core leaving a fine hair-like thread, while Phytophthora rots root tips to a dark, mushy brown. The University of Wisconsin Plant Disease Diagnostics Clinic adds that affected roots are soft, brown, and often carry a bad odor.
Definitive Root Rot Symptoms (three or more confirms it)
- Mushy black or brown roots: healthy Monstera roots are firm and white to tan. Rotted roots are soft, discolored, and fall apart when touched.
- Foul, sulfurous odor: anaerobic decay produces a rotten-egg or sewage smell from the root zone.
- Softness at the stem base: press gently where stem meets soil. A squishy base means the infection is advancing upward.
- Rapid lower-leaf yellowing: several leaves yellowing within 3 to 7 days, not the slow fade of one old leaf.
- Wilting despite wet soil: the plant looks thirsty while the soil is saturated, a hallmark of failed roots.
- Leaf edema: raised corky spots on the underside of leaves from pressure imbalance when roots fail.
⚠️ These Are Not Root Rot
- Brown crispy edges on white variegation: low humidity or mineral buildup, not rot.
- One old bottom leaf yellowing slowly: natural senescence.
- Small brown spots on green tissue: usually physical damage, sunburn, or pests. If you suspect an infestation, work through the Infirmary troubleshooting hub.
- Aerial root browning: aerial roots naturally cork over and turn brown.
The 60-Second Unpot Test
Above-soil symptoms are not enough. Tip the pot on its side and tap the base to release the root ball. Do not pull from the stem. Healthy roots are white to light tan, firm, and smell earthy. Infected roots are dark brown to black, mushy, slimy, and foul. If more than 30 percent of the root mass is brown and soft, move straight to surgery.
How Do You Surgically Remove Root Rot From a Thai Constellation?
This is the decisive phase. Leaving even small pockets of infected tissue lets pathogens recolonize within days, so remove all of it. The full surgical breakdown for Pythium rot covers edge cases, but the core protocol below applies to any Thai Constellation.
Surgical Kit
- Sharp, clean scissors or shears (dull blades crush tissue and spread infection)
- 70 percent isopropyl alcohol for sterilizing tools between cuts
- 3 percent hydrogen peroxide (standard drugstore concentration)
- Large bowl or bucket for the peroxide soak
- Lukewarm clean water for rinsing (distilled if available)
- Paper towels for drying and inspecting roots
- Disposable gloves (optional) to prevent cross-contamination between plants
The Six-Step Rescue Protocol
- Unpot and remove all soil. Take the plant to a sink. Shake and brush away every trace of old soil, which harbors pathogens and must be fully cleared so you can see each root.
- Rinse and inspect. Hold the root ball under a gentle stream of lukewarm water (68 to 77 F) and separate the roots with your fingers. What looks salvageable when dry is often mush when wet.
- Sterilize your tools. Spray scissors with 70 percent isopropyl alcohol and let them air dry for 10 seconds. Do not wipe them, as wiping reintroduces contamination.
- Cut away all infected tissue. Remove every brown or black mushy root with clean cuts, back to firm white tissue. When in doubt, cut it out. Re-sterilize the blades every 3 to 5 cuts.
- Soak in dilute hydrogen peroxide. Mix 1 part 3 percent peroxide with 2 parts water and soak the remaining roots for 10 minutes (details in the next section).
- Re-root in sterile medium. Move the plant into sterile perlite, sphagnum moss, or aerated water and hold it at high humidity while new roots form.
Before you finish, check the stem base. If stem tissue is brown or soft more than 1 cm above the root zone, the infection may be systemic. If the base is firm and pale inside, proceed. When you are done, you should be left with only firm, white to tan roots. Three healthy roots beat ten questionable ones.
⚠️ When to Make the Difficult Call
Survival odds fall sharply if you find any of these:
- Less than 10 percent healthy root mass remaining
- Stem rot extending 3 or more inches above the root zone
- All growth nodes brown and mushy
- Total root loss on a plant with 5 or more mature leaves
In these cases, take stem cuttings from any firm, healthy section above the rot and root them separately to save the genetics. A sphagnum moss propagation box gives cuttings the best odds.
How Do You Sterilize Roots With Hydrogen Peroxide?
Surgery removes visible rot, but microscopic pathogens can linger on surviving roots. A short peroxide soak reduces that surface load before re-rooting. Set expectations honestly: hydrogen peroxide is a surface sterilant and oxygen source, not a systemic cure, and extension specialists caution against treating it as a miracle fix. It works best as one step inside good sanitation and drainage, not on its own. For the deeper chemistry and dosing science, see the hydrogen peroxide root rot guide.
💧 Hydrogen Peroxide Dip Protocol
Mix:
- Add 2 cups (475 ml) clean water to a bowl
- Add 1 cup (237 ml) of 3 percent hydrogen peroxide
- Stir gently for a 1:2 dilution (roughly 1 percent final concentration)
Apply:
- Submerge the entire root system
- Agitate gently so all surfaces contact the solution
- Soak for exactly 10 minutes (set a timer)
- Light bubbling is normal as oxygen releases
After:
- Remove the plant and rinse briefly under clean water
- Pat roots dry with a clean paper towel
- Air dry for 15 to 30 minutes before re-rooting
⚠️ Peroxide Safety and Common Mistakes
- Do not use concentrations above 3 percent. Industrial 6 to 12 percent peroxide burns healthy tissue.
- Do not soak longer than 15 minutes. Extended exposure damages root-tip meristems.
- Do not apply undiluted peroxide to roots. Always dilute 1 part to 2 parts water.
- Do not reuse the solution. Contaminated liquid can reinfect the plant.
Storage: keep peroxide in its original brown bottle away from light, which degrades it within weeks.
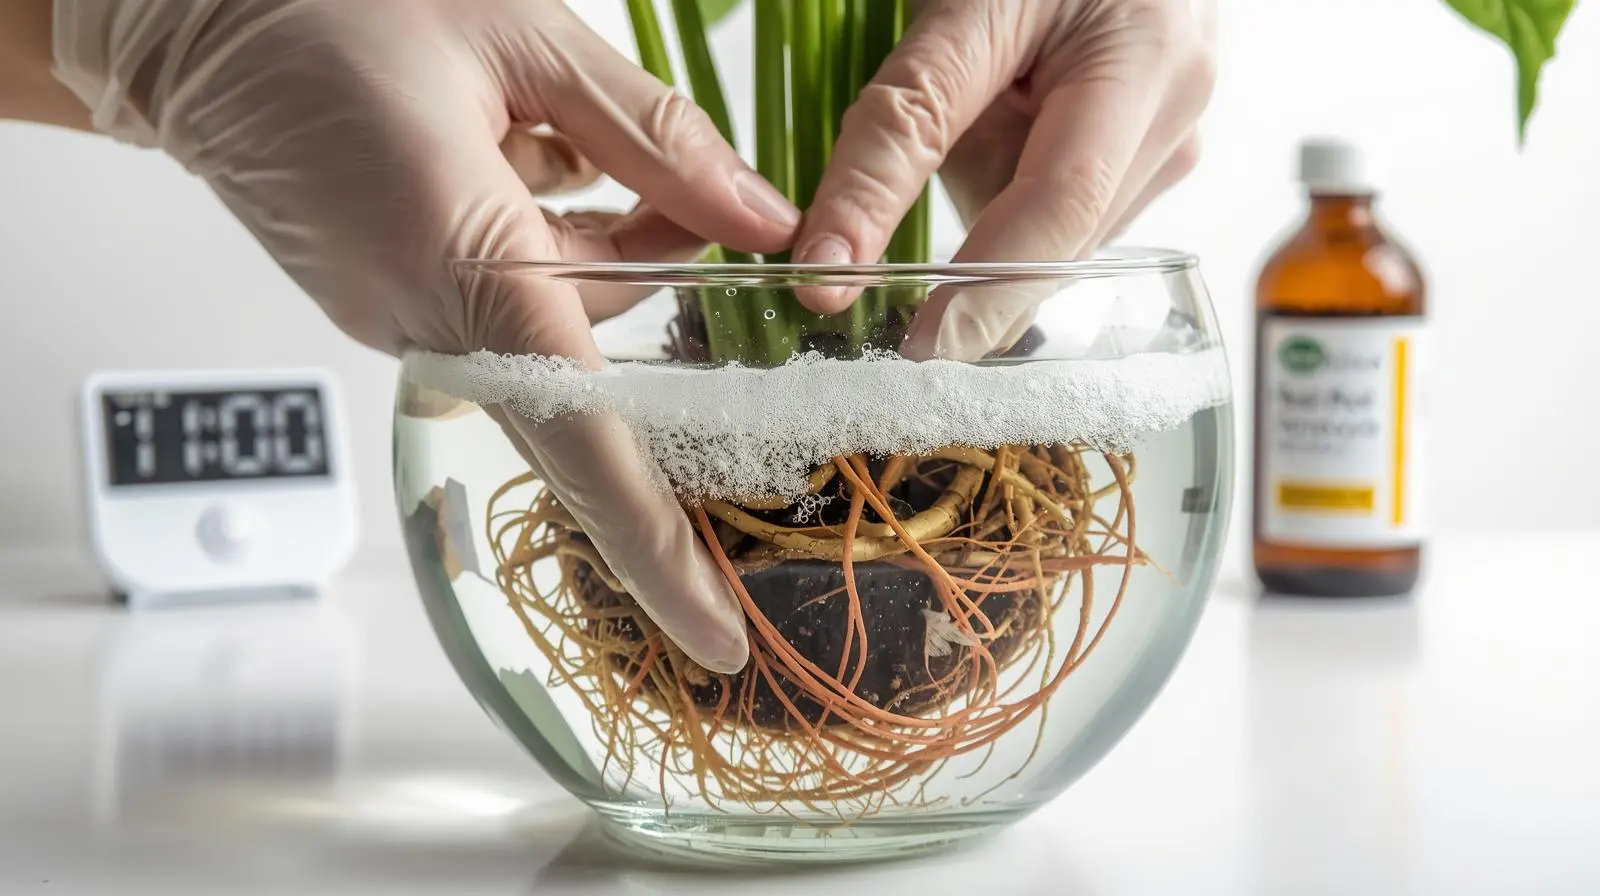
A dilute hydrogen peroxide soak reduces the surface pathogen load on surviving roots.
How Do You Re-Root a Thai Constellation After Surgery?
Most rescues fail here, when growers return a surgically weakened plant straight to soil. Even fresh soil carries microorganisms a compromised root system cannot fight off. Choose one sterile medium below.
✅ Option 1: Sterile Perlite (best for beginners)
Perlite is inert volcanic glass: sterile, highly aerated, and moisture-retentive without waterlogging.
- Fill a clear container with coarse perlite and moisten with distilled water until damp, not soaking
- Insert the plant with 2 to 3 inches of stem for stability
- Water when the top inch dries, roughly every 3 to 5 days
- New roots are visible through the container walls within 2 to 4 weeks
✅ Option 2: Sphagnum Moss (best for fewer than 5 remaining roots)
Long-fiber sphagnum holds steady moisture and supports weak stems.
- Use long-fiber sphagnum, not peat moss
- Soak in distilled water, then squeeze until just damp
- Wrap the roots and lower stem loosely, keeping the moss fluffy for air pockets
- Re-moisten when it feels dry, every 2 to 4 days; new roots emerge in 3 to 6 weeks
For a reusable setup, follow the sphagnum moss propagation box method.
✅ Option 3: Aerated Water Culture (fastest root growth)
Water provides constant hydration while an airstone keeps oxygen high and prevents the anaerobic conditions that cause rot.
- Use a clean glass jar of distilled or filtered water
- Add an aquarium airstone on a 24/7 pump
- Position the plant so only roots, not the stem, touch the water
- Change the water weekly; new roots appear in 7 to 14 days
A passive version of this is the Kratky method for passive hydroponics.
Critical ICU Care (all methods)
- High humidity, 70 to 85 percent: use a humidifier or a loosely vented clear bag, opened 10 minutes daily for air exchange.
- Bright indirect light, no direct sun: an east window or 3 to 5 feet from a south or west window. See the Monstera light requirements guide for exact placement.
- Stable temperature, 70 to 78 F: root growth stalls below 65 F.
- No fertilizer for 4 weeks: wait until new white root tips reach 1 inch, or salts will stress the fragile roots.
- Monitor daily for new roots, leaf stability, and any continued decline.
📊 Recovery Timeline
| Week | Expected Progress | Action |
| 1 to 2 | Stabilization. May drop 1 to 2 more leaves. No visible root growth yet. | Maintain humidity, monitor daily, do not fertilize. |
| 3 to 4 | First white root tips emerge (water fastest, perlite and moss slower). | Begin quarter-strength fertilizer once roots pass 1 inch. |
| 5 to 8 | Rapid root growth. Root mass reaches about half of pre-rot volume. | Move to half-strength feeding every 2 weeks; reduce humidity to 60 to 70 percent. |
| 9 to 12 | New leaf growth resumes; root system firm enough for soil. | Transition to a chunky aroid mix and resume normal care. |
Success signal: consistent new leaves plus a root system that fills the container. Total recovery usually runs 8 to 16 weeks depending on severity.
Placeholder, replace before publishing. Insert Plant Blueprint’s own tracked rescue outcomes here: number of Thai Constellation cases treated, survival rate by re-rooting medium (perlite vs sphagnum vs water), average days to first new root, and any failure patterns you observed. Original numbers you can stand behind are what separate this page from every competitor guide. Do not publish an unsourced survival percentage in the body copy.
Pro tip: label the container with the surgery date. Recovery is measured in weeks, and it is easy to lose track of when the 4-week no-fertilizer window closes or when to expect the first roots.
How Do You Prevent Thai Constellation Root Rot?
Root rot is not bad luck. It is the predictable result of preventable conditions. Fix these three and your Thai Constellation can thrive for years.
Fix 1: The Substrate
Never use standard potting soil. Thai Constellation is an epiphytic climber whose roots grow on tree bark with near-constant air exposure, so it needs a chunky, fast-draining mix.
| Component | Ratio | Function |
| Orchid bark (medium) | 40% | Structure, drainage |
| Perlite or pumice | 30% | Aeration |
| Coco coir | 20% | Moisture retention |
| Worm castings | 10% | Slow-release nutrients |
This mix drains the bulk of applied water within seconds, holding the rest in micro-pores. The large air spaces keep the root zone oxygenated. For the full recipe science, see the best aroid soil mix guide.
Fix 2: The Watering Rule
Overwatering rarely means watering too often. It means keeping the substrate saturated too long. With the chunky mix above, water thoroughly when the top 2 to 3 inches are dry, until 20 to 30 percent drains from the bottom, then empty the saucer within 15 minutes. In practice that is roughly every 7 to 14 days. The University of Minnesota Extension recommends watering Monstera when the top 1 to 2 inches of medium are dry, a useful floor to build on with a faster-draining aroid mix.
Fix 3: Container and Environment
- Drainage holes are non-negotiable. Without them, water pools and creates the anaerobic zone pathogens need.
- Pot size: only 1 to 2 inches wider than the root ball; oversized pots hold stagnant wet substrate.
- Material: terracotta is ideal for oxygen exchange; plastic is fine with strong drainage.
- Air and warmth: keep 50 to 70 percent humidity, 70 to 80 F, and gentle air circulation. As UC IPM explains, the water molds behind root rot are almost always present and only proliferate under wet, poorly drained conditions.
Is Monstera Thai Constellation Toxic to Cats and Dogs?
According to the ASPCA Animal Poison Control Center, the toxic principle is insoluble calcium oxalate. A pet that bites into a leaf usually gets immediate mouth burning, head-shaking, drooling, and sometimes vomiting. It is painful but rarely life-threatening. During rehabilitation your plant is often at floor level in a jar or perlite cup, which is easy for pets to reach, so keep it fully out of range. If you share your home with animals, build the rest of your collection from the vetted cat-safe plants list.
Frequently Asked Questions
Can I save my Monstera Thai Constellation from root rot?
Often yes, if you act within 7 to 10 days of symptom onset and healthy roots remain. Remove all rotted roots, soak in dilute 3 percent hydrogen peroxide, and re-root in sterile perlite, sphagnum moss, or aerated water until firm new white roots form.
How do I know if my Thai Constellation has root rot?
Look for mushy black or brown roots with a foul odor, rapid lower-leaf yellowing, softness at the stem base, and wilting despite wet soil. University of Maryland Extension notes plants wilt even when soil moisture is adequate. Healthy roots are firm and white to tan.
What is the hydrogen peroxide ratio for treating root rot?
Mix 1 part 3 percent hydrogen peroxide with 2 parts water and soak cleaned roots for 10 minutes. This oxidizes surface pathogens on the remaining tissue. Never use concentrations above 3 percent or soak longer than 15 minutes.
Should I put my Thai Constellation back in soil after treatment?
No. After surgery, re-root in sterile perlite, sphagnum moss, or aerated water for 4 to 8 weeks until firm new white roots develop. Returning it to soil too early exposes a weakened root system to reinfection.
Can I use rubbing alcohol instead of hydrogen peroxide on the roots?
No. Isopropyl alcohol is for sterilizing tools, not living tissue. At the 70 percent concentration needed to kill pathogens it destroys plant cells. Use 3 percent hydrogen peroxide diluted 1 part to 2 parts water for root soaking.
Is Monstera Thai Constellation toxic to cats and dogs?
Yes. Per the ASPCA, Monstera deliciosa is toxic to cats and dogs due to insoluble calcium oxalate crystals, which cause oral irritation, drooling, and vomiting if chewed. Keep the plant out of reach during rehabilitation and afterward.
Plant Blueprint | The Infirmary
Monstera Thai Constellation Root Rot Treatment | Published March 2026, updated July 2026