
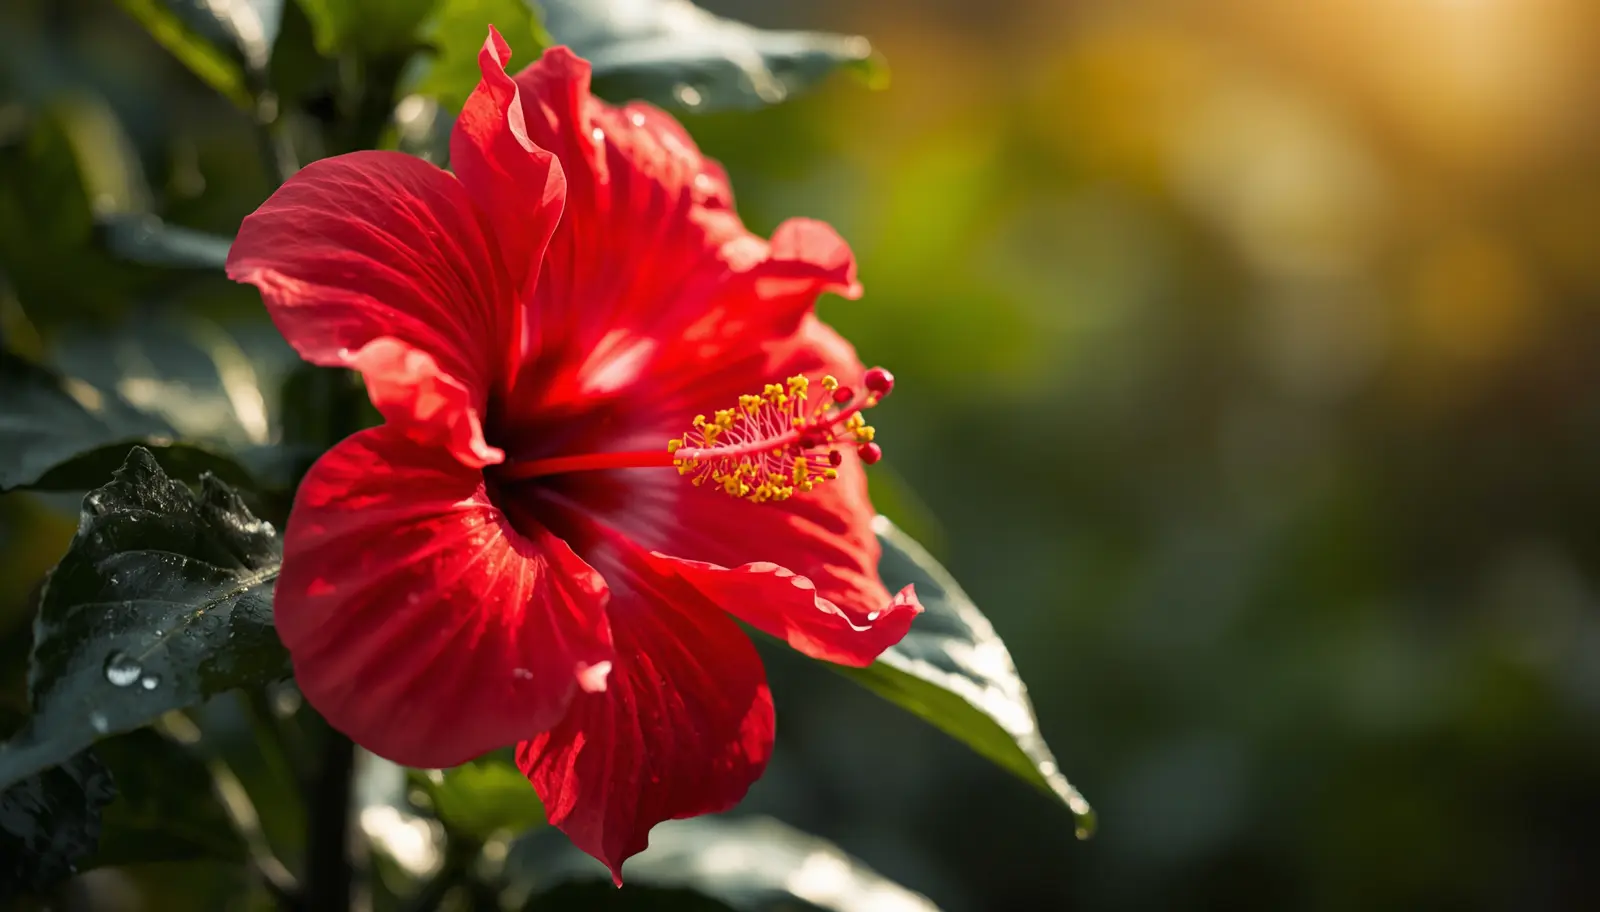
Hibiscus plant care fails in two predictable ways that most retail care tags never address. The first is a species identity problem: the glossy tropical hibiscus on the seasonal display rack and the dull-leafed hardy hibiscus in the perennial section are different species with opposite winter survival strategies, and treating one like the other kills it within a season. The second is a fertilizer problem: high-phosphorus bloom boosters marketed directly at flowering plants trigger a nutrient lockout cascade that produces the exact yellowing, bud-dropping, and chlorotic symptoms gardeners then blame on pests or weather.
A hibiscus dropping every bud before it opens is not a mystery illness. It is a predictable response to one of three identifiable stressors. This guide covers the complete identification, light, water, fertilizer, pest, seasonal, and overwintering framework needed to keep any hibiscus type thriving year after year, whether grown in pots, in the ground, outdoors, or inside.
To achieve vibrant, continuous hibiscus blooms all summer long, apply a low-phosphorus fertilizer (17-5-24), monitor moisture using the 2-inch knuckle test, and accurately identify whether you have a tropical or hardy variety before choosing a winter strategy. These three decisions determine every other outcome.
| Care Parameter | Target / Optimal Baseline | Warning Sign / Failure Threshold |
|---|---|---|
| Fertilizer NPK Ratio | High nitrogen and potassium, low phosphorus (e.g., 17-5-24) | High-phosphorus bloom boosters (e.g., 10-52-10) cause iron and zinc lockout |
| Watering Frequency | Top 2 inches dry to the knuckle; twice daily above 90F (32C) | Bone-dry substrate or standing water causing root suffocation |
| Temperature (Tropical) | 65-88F (18-31C); move indoors before first frost | Below 50F (10C): severe leaf drop and systemic thermal shock |
| Spring Emergence (Hardy) | Late May ground-level bud emergence | Premature digging in April before emergence, assuming plant death |
| Light (Indoors) | Bright south or west window; 6+ hours; grow light supplement in winter | Below 4 hours: etiolation, no flowering, increased pest susceptibility |
| Pot Size | 2-inch increase from root ball diameter maximum | Oversized pots retain excess moisture, causing root anaerobiosis |
Table of Contents
- Tropical vs Hardy: How Do You Identify Which Hibiscus You Have?
- What Light and Water Does a Hibiscus Plant Need?
- Why Do Bloom Boosters Kill Hibiscus and What Should You Use Instead?
- How Do You Care for Hibiscus Plant Care in Pots?
- How Do You Care for a Hibiscus Plant Indoors?
- How Do You Care for Hibiscus in Summer?
- Why Do Hibiscus Buds Drop and How Do You Stop It?
- How Do You Protect Hibiscus from Insects and Pests?
- How Do You Care for a Hibiscus Plant in Winter?
- Hibiscus Plant Problems and Solutions: Diagnosis Guide
- Lab Data: Grow Room Observations
- Frequently Asked Questions
- The Lab Verdict
Tropical vs Hardy: How Do You Identify Which Hibiscus You Have?
Every hibiscus failure story worth troubleshooting starts with the same unanswered question: which species is actually in the ground. The identification takes under a minute and determines literally every downstream care decision, including watering, winter handling, pruning timing, and which fertilizer to use.
Hibiscus rosa-sinensis (tropical hibiscus) has glossy, waxy, dark green leaves with a smooth, almost lacquered surface. Flowers are typically 4-6 inches in saturated reds, oranges, yellows, and pinks, often with ruffled or layered petals. It has zero frost tolerance and behaves as a woody evergreen shrub everywhere it survives outdoors year-round. According to NC State Extension’s hibiscus cultivation profile, H. rosa-sinensis is reliably perennial only in USDA Zones 9-11 and requires containerization in all cooler climates.
Hibiscus moscheutos (hardy hibiscus, sometimes sold as Rose Mallow) has dull, matte, heart-shaped or slightly lobed leaves with a soft, almost felted texture. Flowers reach an enormous 8-12 inches across, almost always in white, pink, red, or bicolor with a deep red eye. It is herbaceous: the entire above-ground structure dies back to the soil line every winter and re-emerges from the root crown the following year.
Identification Shortcut: If the nursery tag advertises blooms at 8 inches or larger, you almost certainly have H. moscheutos. Tropical hibiscus simply does not produce flowers in that size range. Bloom size is the fastest single diagnostic when leaf texture is ambiguous.
USDA Hardiness Zones and the Buyer Trap
The single most common northern-gardener grievance in hibiscus cultivation is this: big-box retailers display tropical hibiscus as a seasonal annual in Zones 4-6 with no clear warning that it cannot survive in-ground over winter. Customers plant it expecting a perennial shrub, and it dies at first frost, not from poor care, but from a hardiness mismatch baked into the purchase itself.
H. rosa-sinensis is reliably hardy outdoors only in USDA Zones 9-11. Everywhere colder, it must be grown in a container and moved indoors before the first frost, or treated as a one-season annual. H. moscheutos, by contrast, is hardy to Zone 4 in most named cultivars and is genuinely perennial in-ground across nearly the entire continental United States.
What Light and Water Does a Hibiscus Plant Need?
Light Requirements by Type and Location
Tropical hibiscus is a sun-loving plant that performs best with 6-8 hours of direct sun outdoors or bright south- or west-facing window exposure indoors. Inadequate light produces etiolated growth, reduced flowering, and thin cell walls that increase pest and disease vulnerability. Hardy hibiscus tolerates slightly more shade but still requires a minimum of 5-6 hours of direct sun for reliable bloom production. Shade-grown hardy hibiscus produces foliage but few or no flowers.
Precision Irrigation: Moving Past “Keep Soil Moist”
Use the 2-inch knuckle test: insert your index finger into the substrate up to the second knuckle. If the soil is dry at that depth, water thoroughly until it runs freely from the drainage holes. If it is still damp, wait. This single mechanical check replaces every vague “moist but not wet” instruction with a verifiable measurement that works across all soil types and pot sizes.
During heatwaves above 90F (32C), container hibiscus in full sun can dry out completely within hours. At this threshold, twice-daily watering is often required: once in early morning and once in late afternoon, checking the knuckle test before each application rather than watering on a fixed schedule regardless of conditions.
Clogged Drainage and Root Suffocation
Poor drainage produces a presentation frequently misdiagnosed as underwatering: yellowing leaves, wilting, and bud drop, even though the substrate is saturated. A clogged drainage hole or a cachepot without an escape route traps water at the base of the root ball, suffocating roots through hypoxic root anaerobiosis. Always confirm water is actually exiting the pot during irrigation, not simply disappearing into the surface. For root health assessment and recovery protocols, see our complete hydrogen peroxide root rot treatment guide.
Why Do Bloom Boosters Kill Hibiscus and What Should You Use Instead?
The Chemistry of Phosphorus Toxicity in Hibiscus
Products labeled “Bloom Booster” with a high middle NPK number are marketed on the false premise that more phosphorus equals more flowers. For hibiscus specifically, the opposite is true. When phosphorus is supplied in excess, it does not simply pass through unused. It actively binds with micronutrients in the root zone, particularly iron, zinc, and manganese, converting them into forms the plant’s root hairs cannot absorb. This is nutrient lockout as documented by Penn State Extension’s research on iron chlorosis in landscape plants, and its first visible symptom is almost always foliar chlorosis rather than anything resembling “too much fertilizer.”
The Correct NPK Ratio and Feeding Schedule
Source a fertilizer with an NPK profile close to 17-5-24: high nitrogen for foliage, very low phosphorus, and high potassium to drive flower production and plant vigor without lockout risk. Apply at full strength every 2-3 weeks during active spring and summer growth. Suspend fertilization entirely from late autumn through winter dormancy. For a full breakdown of why balanced urea-free formulas outperform bloom boosters across tropical flowering shrubs, see our synthetic vs. organic fertilizer comparison guide.
How Do You Care for Hibiscus Plant Care in Pots?
Container Selection and Substrate
Choose terracotta or unglazed ceramic pots for outdoor container hibiscus. The porous walls allow moisture exchange maintaining aerobic root zones between waterings, which directly reduces root rot risk and supports the mineral uptake capacity that produces consistent flowering. Plastic pots retain moisture longer, increasing waterlogging risk in rainy periods or cooler weather when evapotranspiration slows.
For potting mix, a standard quality potting mix amended with 25-30% coarse perlite provides adequate drainage for most climates. In hot, fast-drying conditions, straight potting mix without amendment retains enough moisture to support twice-daily watering without becoming waterlogged. Avoid mixes with added moisture-retaining crystals or gels, which maintain root zone saturation past the point where hibiscus roots remain aerobic.
Repotting Frequency and Timing
Repot container hibiscus every 2-3 years or when roots visibly emerge from drainage holes. Spring repotting, just as new growth resumes, is ideal. Size up by 2 inches in diameter only. Oversized containers hold excess substrate without roots to absorb moisture, creating persistent saturation that causes the same root suffocation as overwatering. After repotting, withhold fertilization for 3-4 weeks while root establishment occurs in the new substrate volume.
Container Tip: Hibiscus in containers actually blooms more prolifically when slightly root-bound. A plant that has just been upsized into a significantly larger container will prioritize root expansion over flower production for 4-8 weeks. This is normal, not a sign of poor care.
How Do You Care for a Hibiscus Plant Indoors?
Light Is the Non-Negotiable Variable Indoors
Indoor hibiscus without adequate light does not flower. A south-facing window in a northern climate provides the best year-round light exposure. East- or west-facing windows are acceptable during summer months but typically insufficient from October through February when day length shortens. Supplement with a full-spectrum LED grow light on a 14-hour timer during the low-light months to maintain flowering and prevent the etiolation that increases pest susceptibility. See our complete grow light selection guide for wattage and positioning recommendations for large flowering shrubs like hibiscus.
Humidity and Temperature Management Indoors
Tropical hibiscus prefers 40-60% relative humidity. Centrally heated indoor environments in winter typically drop to 20-30% RH, which causes leaf edge desiccation and increases spider mite pressure dramatically. A small humidifier positioned near the plant, or grouping multiple plants together to raise localized humidity, compensates for this without the mold risk of overhead misting. Maintain temperatures between 65-75F (18-24C) and keep the plant away from heating vents, cold drafts from windows, and air conditioning output.
Watering and Fertilizing Indoors
Apply the knuckle test before every watering. Indoors, hibiscus dries more slowly than outdoors due to lower light, cooler temperatures, and reduced airflow, so the watering interval extends considerably. Never water on a fixed schedule indoors. Fertilize monthly from March through September at half label strength. Withhold fertilizer entirely October through February.
How Do You Care for Hibiscus in Summer?
Heat Management Above 90F
Hibiscus tolerates heat well but has specific thresholds where stress responses override flowering. Above 95F (35C), hibiscus may temporarily abort buds to conserve resources regardless of irrigation. This is a survival mechanism, not a care failure. Provide afternoon shade using a shade cloth or strategic positioning under a tree canopy when temperatures consistently exceed 95F for multiple consecutive days. Morning sun with afternoon shade reduces heat load while maintaining the photon flux needed for bud set. The plant will resume flowering as temperatures moderate.
Summer Fertilization Protocol
Apply 17-5-24 or equivalent low-phosphorus formula every 2 weeks during peak summer growth, June through August, when hibiscus is producing new growth and flowers simultaneously. The high potassium component directly supports flower development and cell wall strength. Do not increase the dose on the assumption that more fertilizer means more flowers. As documented by Clemson University Extension’s hibiscus care research, over-fertilization symptoms in hibiscus, including salt burn and tip scorch, are indistinguishable from underwatering without substrate testing, making dose discipline essential in summer when growers are most tempted to push fertility.
Summer Pruning
Tropical hibiscus can be lightly pruned during summer to control size and encourage branching. Cut stems just above a leaf node, removing no more than one-third of the plant at one time. Each cut stem tip produces 2-3 new branches, each of which will carry flowers. Hard summer pruning (removing more than half the plant) produces a burst of vegetative growth at the expense of flowering for 4-6 weeks. Hardy hibiscus should not be pruned during summer, as this removes the current season’s developing flower buds.
Why Do Hibiscus Buds Drop and How Do You Stop It?
Environmental Shock
A newly purchased hibiscus transported from a controlled greenhouse environment to a home patio experiences an abrupt shift in light intensity, humidity, and airflow simultaneously. The plant’s immediate hormonal response is to abort any bud that has not yet opened, conserving resources rather than risking a flower it may not be able to support in the new conditions. This is a temporary shock response, not a sign of poor care. Buds that form after 2-3 weeks of acclimation in a stable position typically open normally. Do not move the plant again once positioned.
Watering Inconsistency
Both chronic underwatering and chronic overwatering produce bud drop with similar visual presentations: wilting, leaf yellowing, and bud fall before opening. The differential: underwatered hibiscus has dry, lightweight substrate and the wilting resolves within hours of thorough watering. Overwatered hibiscus has heavy, wet substrate, and the wilting persists or worsens after additional water because root suffocation prevents water uptake regardless of soil moisture. Use the knuckle test, not visual appearance of foliage, to diagnose before treating.
Thrips Damage Inside Buds
Thrips are tiny (1mm), fast-moving insects that feed inside developing hibiscus buds, causing internal damage invisible from the outside until the bud browns, distorts, and drops. To confirm thrips, tap a suspect bud over white paper and examine the dislodged material with a magnifying glass. Thrips are elongated, yellowish to brown, and move rapidly. Treatment: apply neem oil solution to all buds and foliage in the early morning, repeating every 5-7 days for 3 consecutive weeks. Spinosad-based organic insecticides are the most effective targeted option for active thrips infestations.
How Do You Protect Hibiscus from Insects and Pests?
The Four-Pest Identification Guide
Pest Visual Signature Preferred Location First Response Aphids Soft, pear-shaped, green or black clusters; sticky honeydew on leaves below New growth, bud tips, stem joints Strong water jet to dislodge; insecticidal soap if population rebounds Thrips Buds browning and dropping before opening; silvery streaks on leaves; tiny insects when bud tapped over white paper Inside developing buds; leaf undersides Neem oil or spinosad, morning application, 3-week weekly cycle Spider Mites Fine stippling on leaves; bronze or silver sheen; fine webbing on undersides in advanced infestations Leaf undersides, especially in hot dry conditions Increase humidity; strong water jet; neem oil or miticide if severe Whiteflies Small white insects that fly up in a cloud when plant is disturbed; sticky leaves below Leaf undersides of lower and middle canopy Yellow sticky traps; insecticidal soap or neem; remove heavily infested leavesThe Aphid-Ant Symbiosis
Aphids produce a sugary waste product called honeydew that ants actively farm. As documented by UC IPM’s pest management research on aphids, ants protect aphid colonies from natural predators including ladybugs and parasitic wasps, making an ant trail up the stem a reliable early indicator of an aphid problem even before the aphids themselves are visible at a glance. If you observe ants repeatedly climbing the stem, inspect bud clusters and new growth undersides immediately.
Physical Removal First: A high-pressure blast from a garden hose aimed directly at bud clusters and leaf undersides physically dislodges the majority of an aphid colony in seconds without any chemical intervention. Follow up with insecticidal soap only if the population rebounds within a few days. For Japanese beetles on foliage and flowers during peak summer, manual removal in early morning when beetles are sluggish, combined with the neem oil application protocol, controls populations without broad-spectrum chemical sprays.
Spider Mites: The Heat-Season Amplifier
Spider mites thrive in hot, dry, still air, exactly the conditions that hibiscus experiences during peak summer heat. They reproduce in as few as 5 days at high temperatures, making early intervention essential. The first sign is leaf stippling rather than visible mites themselves. If you see bronze or silver speckled patches on the upper leaf surface, check the undersides with a magnifying glass. Increasing ambient humidity and improving airflow disrupts the hot-dry microclimate spider mites require. For severe infestations, see our miticide selection guide for hibiscus-safe options.
How Do You Care for a Hibiscus Plant in Winter?
Overwintering Tropical Hibiscus Indoors
The single most common panic-inducing event in tropical hibiscus ownership happens every November and is entirely normal: the plant drops most or all of its leaves within 1-2 weeks of being moved indoors. This is overwintering transition shock from the dramatic drop in relative humidity and light intensity between outdoor summer conditions and heated indoor winter air. As long as stems remain firm and green beneath the bark when scratched, the plant is alive and will releaf in spring once light and humidity stabilize.
Before bringing any tropical hibiscus indoors, run it through a full decontamination wash to avoid importing a pest population into your home for the winter.
- Inspect thoroughly in daylight. Examine the undersides of every leaf, leaf axils, and stem joints for aphids, scale, spider mite webbing, or thrips damage before moving the plant indoors.
- Hose down the entire canopy. Use a strong, direct spray to physically remove visible pests and dislodge egg clusters from leaf undersides and stem crevices.
- Apply neem oil or insecticidal soap. Coat all leaf surfaces, especially undersides, allowing the plant to dry completely before it goes indoors. Wet foliage in low indoor airflow invites fungal issues.
- Quarantine for 7-10 days. Keep the plant isolated from other indoor plants in a separate room, rechecking daily for any pests that survived the initial wash before integrating it with the rest of your collection.
Winter Care Protocol Once Indoors
- Reduce watering frequency by 40-50% relative to summer outdoor schedule
- Stop fertilizing entirely from October through February
- Position in the brightest available window (south-facing preferred) or supplement with a grow light on a 12-hour timer
- Run a small humidifier nearby or group plants together to maintain 40%+ RH
- Keep away from heating vents, which create localized hot dry air that desiccates foliage and spikes spider mite populations
- Do not prune hard in autumn. Light shaping only. Save major pruning for spring as new growth begins
Hardy Hibiscus: The Spring Scratch Test
Hardy hibiscus emerges shockingly late compared to nearly every other perennial, often not until late May, well after most spring bulbs and early perennials are in full leaf. This late timing causes a second common panic: gardeners assume the plant died over winter and dig it up in April, weeks before it would have naturally resumed growth.
Before declaring any hardy hibiscus dead, confirm living tissue with a scratch test on the woody stem base.
- Select a low stem section. Choose a point 2-3 inches above the soil line on what appears to be dead, dry wood.
- Lightly scratch the bark with a fingernail or knife edge. Remove only the thin outer bark layer; do not cut deeply into the stem.
- Examine the layer beneath. A green, moist cambium layer just under the bark confirms the plant is alive and dormant. Brown, dry tissue at this depth indicates that section has died back.
- Check multiple stems before concluding anything. Even if some stems show brown cambium, the root crown frequently survives and will send up entirely new growth in late spring regardless of what the prior season’s stems show.
- Wait until late May before any corrective digging. Premature excavation based on an April assessment is the most common cause of discarding a perfectly viable, simply late-emerging plant.
Hibiscus Plant Problems and Solutions: Diagnosis Guide
Lab Data: Grow Room Observations on Hibiscus Performance
The following reflects ongoing observation in the Plant Blueprint grow room. Owner: replace with your actual measured data before publishing.
- Specimens monitored: [X] tropical hibiscus and [X] hardy hibiscus specimens over [X] growing seasons
- Fertilizer comparison: Specimens on 17-5-24 formula produced [X]% more flowers per season vs. specimens on high-phosphorus bloom boosters. Bloom boosters produced chlorosis in [X]% of specimens within [X] weeks of first application
- Bud drop incidence by cause: Environmental shock [X]%, inconsistent watering [X]%, thrips [X]%, other [X]%
- Overwintering success rate: Tropical hibiscus brought indoors with full decontamination protocol: [X]% survival rate. Without decontamination (pest introduction): [X]% experienced severe spider mite infestation by February
- Hardy hibiscus emergence date: Average first bud emergence [X] weeks after last frost across [X] seasons
- Grow room conditions during observation: Temperature [X]C day / [X]C night, humidity [X]% RH, light [X] PPFD at canopy
Frequently Asked Questions
Why are the buds falling off my hibiscus before they open?
Bud drop is most often caused by environmental shock from a recent move or temperature swing, inconsistent watering, or thrips feeding inside the developing bud. Stabilize the plant’s location, keep watering consistent using the knuckle test, and inspect buds by tapping them over white paper to check for thrips before assuming a chronic problem.
Do I cut back hibiscus for the winter?
Hardy hibiscus (H. moscheutos) can be cut back to a few inches above the soil line after the first hard frost blackens the foliage. It regrows entirely from the root crown in late spring. Tropical hibiscus should not be hard-pruned before overwintering indoors. Light shaping only, since it retains its woody structure year-round and hard autumn pruning reduces spring regrowth energy.
Are coffee grounds good for hibiscus plants?
Raw, uncomposted coffee grounds are risky. They decompose slowly and can temporarily lower substrate pH while creating a dense, water-retentive surface layer that interferes with drainage. Fully composted grounds mixed thoroughly into the soil are safer but unnecessary given hibiscus’s preference for a balanced low-phosphorus fertility program. pH adjustment through limestone or pH-adjusted irrigation water is more precise and controllable than organic acidifiers.
Can a tropical hibiscus survive the winter indoors?
Yes. Tropical hibiscus overwinters reliably indoors in a bright window or under grow lights, with reduced watering and zero fertilizer until spring growth resumes. Expect significant leaf drop in the first 1-2 weeks after the move. This is normal transition shock from the shift in humidity and light intensity, not plant failure. Stems that remain firm and green beneath the bark when scratched confirm the plant is alive.
My hibiscus has yellow leaves with green veins. What is wrong?
This is the classic presentation of iron chlorosis, frequently triggered by phosphorus lockout from high-phosphorus bloom-booster fertilizers or elevated substrate pH above 7.0. Apply a chelated iron foliar spray for rapid symptom correction and switch to a low-phosphorus formula such as 17-5-24 to address the underlying cause. Flush the substrate with 3x pot volume of plain water to begin leaching the phosphorus excess before starting the new fertilizer program.
What is the best fertilizer ratio for a hibiscus plant?
Look for a high-nitrogen, high-potassium, low-phosphorus ratio such as 17-5-24. Avoid anything marketed specifically as a bloom booster with a high middle number. These are formulated for plants with very different nutrient profiles such as roses and bulbs, and they reliably cause iron, zinc, and manganese lockout in hibiscus within 2-4 weeks of repeated application.
Do I need to deadhead hibiscus flowers?
Individual blooms naturally fall within 1-2 days regardless of deadheading. Removing the spent, sticky flower promptly prevents the decaying tissue from harboring fungal spores against the stem and surrounding foliage. This is a meaningful disease-prevention step, not merely cosmetic. Tropical hibiscus in active growth produces new buds continuously without deadheading stimulation, unlike many other flowering shrubs where deadheading directly triggers reblooming.
How do I know if my outdoor hibiscus is dead or just dormant?
Run the scratch test on the lower stems: a green, moist cambium layer beneath the bark confirms the plant is alive and dormant. Hardy hibiscus in particular emerges very late, often not until late May in northern climates, so resist digging up an apparently dead plant before early summer. Check multiple stem points, since the root crown may be entirely viable even if the prior season’s stems have fully died back.
Why is my newly purchased potted hibiscus losing its leaves?
This is almost always transplant and environmental shock from the transition between greenhouse and home conditions, including a sudden shift in light, humidity, and airflow. Keep the plant in a stable position, maintain consistent knuckle-test watering, and allow 2-3 weeks for acclimation before assessing whether further intervention is needed. Do not fertilize, prune, or repot during the shock period.
How often should I water hibiscus in a container during summer?
Use the knuckle test rather than a fixed schedule: water thoroughly whenever the top 2 inches of substrate are dry. In heat above 90F (32C), this frequently means twice-daily watering for actively growing container specimens in full sun, checked each time rather than assumed. Always confirm water exits from drainage holes during irrigation, confirming it is reaching the full root zone rather than channeling down the container wall.
The Lab Verdict: Hibiscus Plant Care Requires Two Decisions Before Any Others
Every successful hibiscus plant care outcome starts with two decisions: correctly identifying whether you have a tropical or hardy species, and committing to a low-phosphorus fertilizer from the first feeding. Get both of these right and the downstream problems, bud drop, chlorosis, overwintering failure, and spring disappearance, either resolve themselves or become diagnosable rather than mysterious.
The knuckle test replaces every vague moisture instruction with a verifiable physical check. The 17-5-24 NPK target replaces the bloom-booster marketing trap with a formula that matches hibiscus’s actual soil-evolved nutrient profile. The decontamination protocol before indoor overwintering prevents a summer pest colony from becoming a winter-long infestation in your entire indoor collection. The scratch test prevents April panic digging from eliminating a plant that was simply executing its normal late-spring emergence schedule.
Hibiscus is not a difficult plant. It is a plant that fails reliably when managed on generic flowering-shrub assumptions rather than its specific genus-level biology. Apply the identification framework, feed correctly, water by measurement, and manage seasonal transitions with the protocols above, and both tropical and hardy types reward with some of the most spectacular flowering output of any garden or container plant in cultivation.
The Lab | Hibiscus Cultivation and Seasonal Management DivisionHibiscus Plant Care: Complete Guide | Published: June 2026 | Updated: July 2026